> For the complete documentation index, see [llms.txt](https://docs.limio.com/llms.txt). Markdown versions of documentation pages are available by appending `.md` to page URLs; this page is available as [Markdown](https://docs.limio.com/product/checkout/how-to-configure-purchase-links.md).
# Purchase Links
It is possible to send your customers to a checkout or basket that is pre-populated with specific Limio Offers or a Promo Code. At Limio, we call those Purchase Links, but you may call them Payment Links, Buy Links, or Checkout Links.
These links can be used in a variety of ways, for example, to direct a customer from an external pricing page, [Paywall](https://docs.limio.com/integrations/other-integrations/zephr/how-to-integrate-limio-pages-into-the-zephr-paywall), or promotional email into a Limio checkout.
Please note that Purchase Links are generic and not associated with a customer. If you are looking for a way to send customers links to their Abandoned Basket, or for a way for salespeople to send customers links based on quotes, please view this separate documentation:
* [Guide: Inspect and Follow Up on Abandoned Baskets](https://docs.limio.com/guides/feature-implementation-guides/guide-inspect-abandoned-baskets)
* [Checkout links from Limio for Salesforce](https://docs.limio.com/integrations/using-limio-for-salesforce/generate-checkout-link)
There are 4 parts of a purchase link:
1. Shop domain
2. Checkout or cart page
3. Populate basket items with an offer or label
4. (Optional) Apply a promo code
### Part 1: Shop domain
The beginning of your purchase link will always be the domain that your Limio pages are on.
For example, `https://www.yourdomain.com`
### Part 2: Checkout or cart page
Purchase links can direct your customers to either a checkout page or a cart page. Specify the Limio page tag of your desired checkout or cart page after the domain as "/" + tag + "?"
For example, `https://www.yourdomain.com/checkout?`
### Part 3: Populate basket items
There are 3 ways to determine what items the customer should have in their cart when they click your purchase link.
Option 1: Single offer
To populate your customer's cart with a single offer, add "purchase=" and the offer path.
For example, `https://www.yourdomain.com/checkout?purchase=/offers2/offerName`
The offer path can be found in 2 different ways. With either option, you'll need to open the offer you'd like to use in your purchase link.
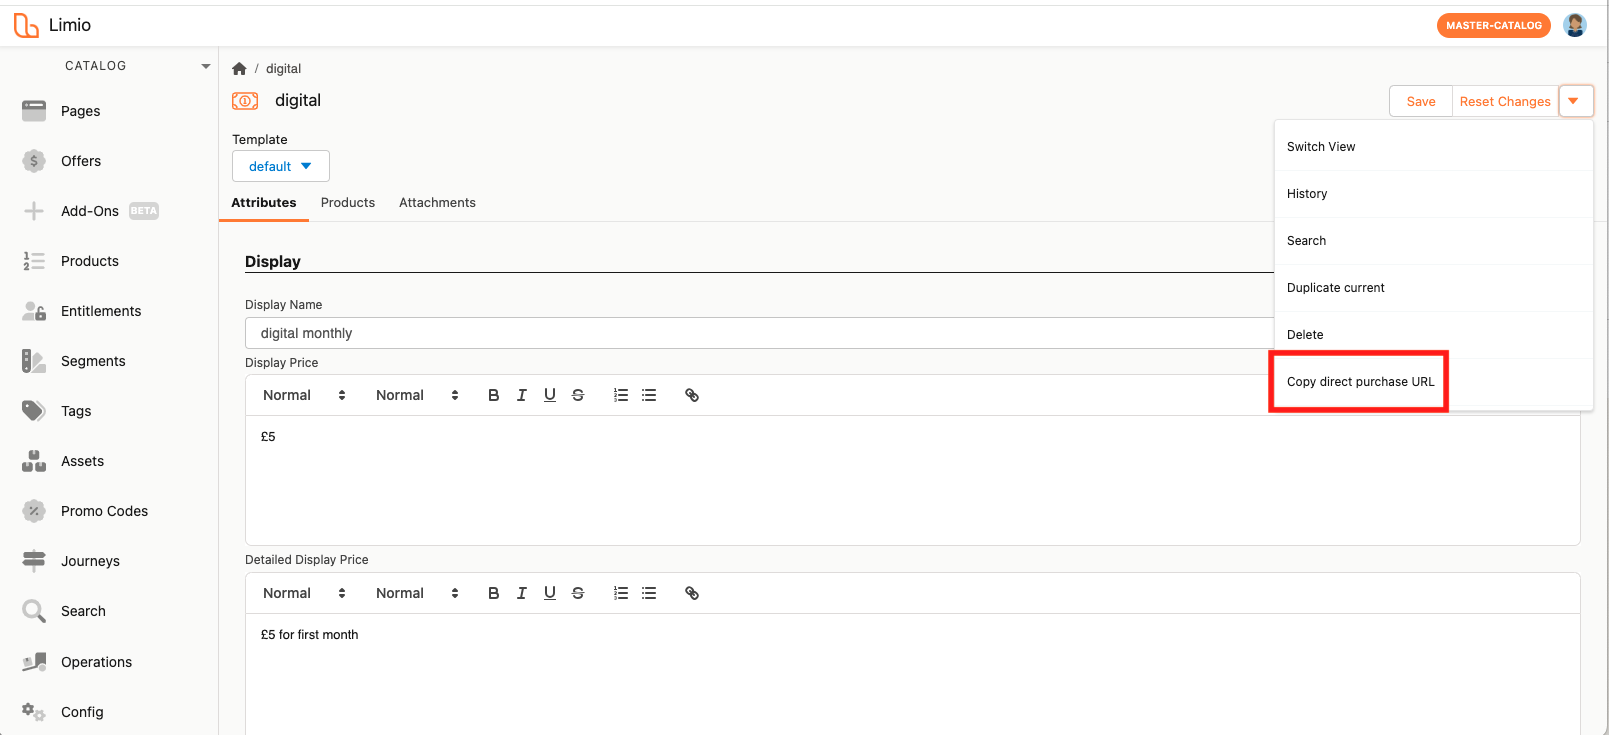
**Copy direct purchase URL**
* Click the down arrow in the top-right corner.
* Select "Copy direct purchase URL".
* The second part of the URL (starting from `/checkout?purchase=/offers2/`) will be copied to your clipboard.
* Note: The `/checkout` portion of the URL will automatically reflect the checkout configuration in the offer. This can be replaced if desired.
* Known issue: If your offer uses an **external** or **external-post checkout**, the External URL specified will remain active in the purchase link even if you switch back to a standard checkout. **Workaround:** Update the External URL to `/checkout` in your offer settings.
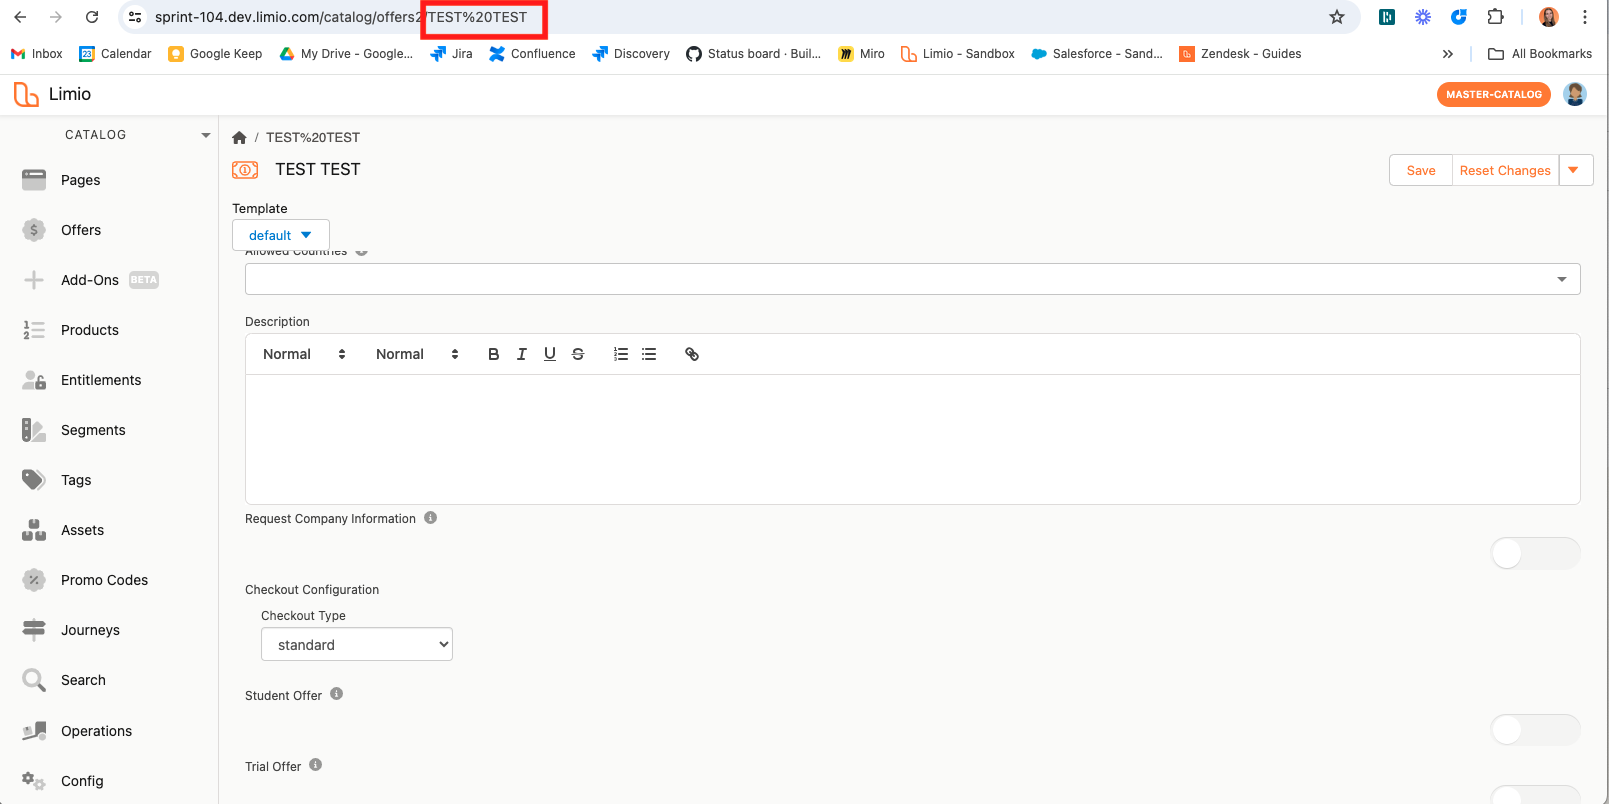
**Use offer page URL**
* Navigate to your offer in the Limio Catalog.
* Look at the URL and copy the text that appears after `offers2/`. This is the name of your offer.
Option 2: Multiple offers
If you want to populate the customer's basket with multiple offers, add "\&purchase=/offers2/secondOffer". This can be done as many times as needed.
For example: [`https://www.yourdomain.com/checkout?purchase=/offers2/firstOffer&purchase=/offers2/secondOffer`](https://www.yourdomain.com/checkout?purchase=/offers2/firstOffer\&purchase=/offers2/secondOffer)
Option 3: Offer label
You can also use labels instead of the offer name to create purchase links. Instead of `purchase=/offers2/offerName`, use `purchase=true&label=labelID`.
For example, [`https://www.yourdomain.com/checkout?purchase=true&label=labelID`](https://www.yourdomain.com/checkout?purchase=true\&label=labelID)
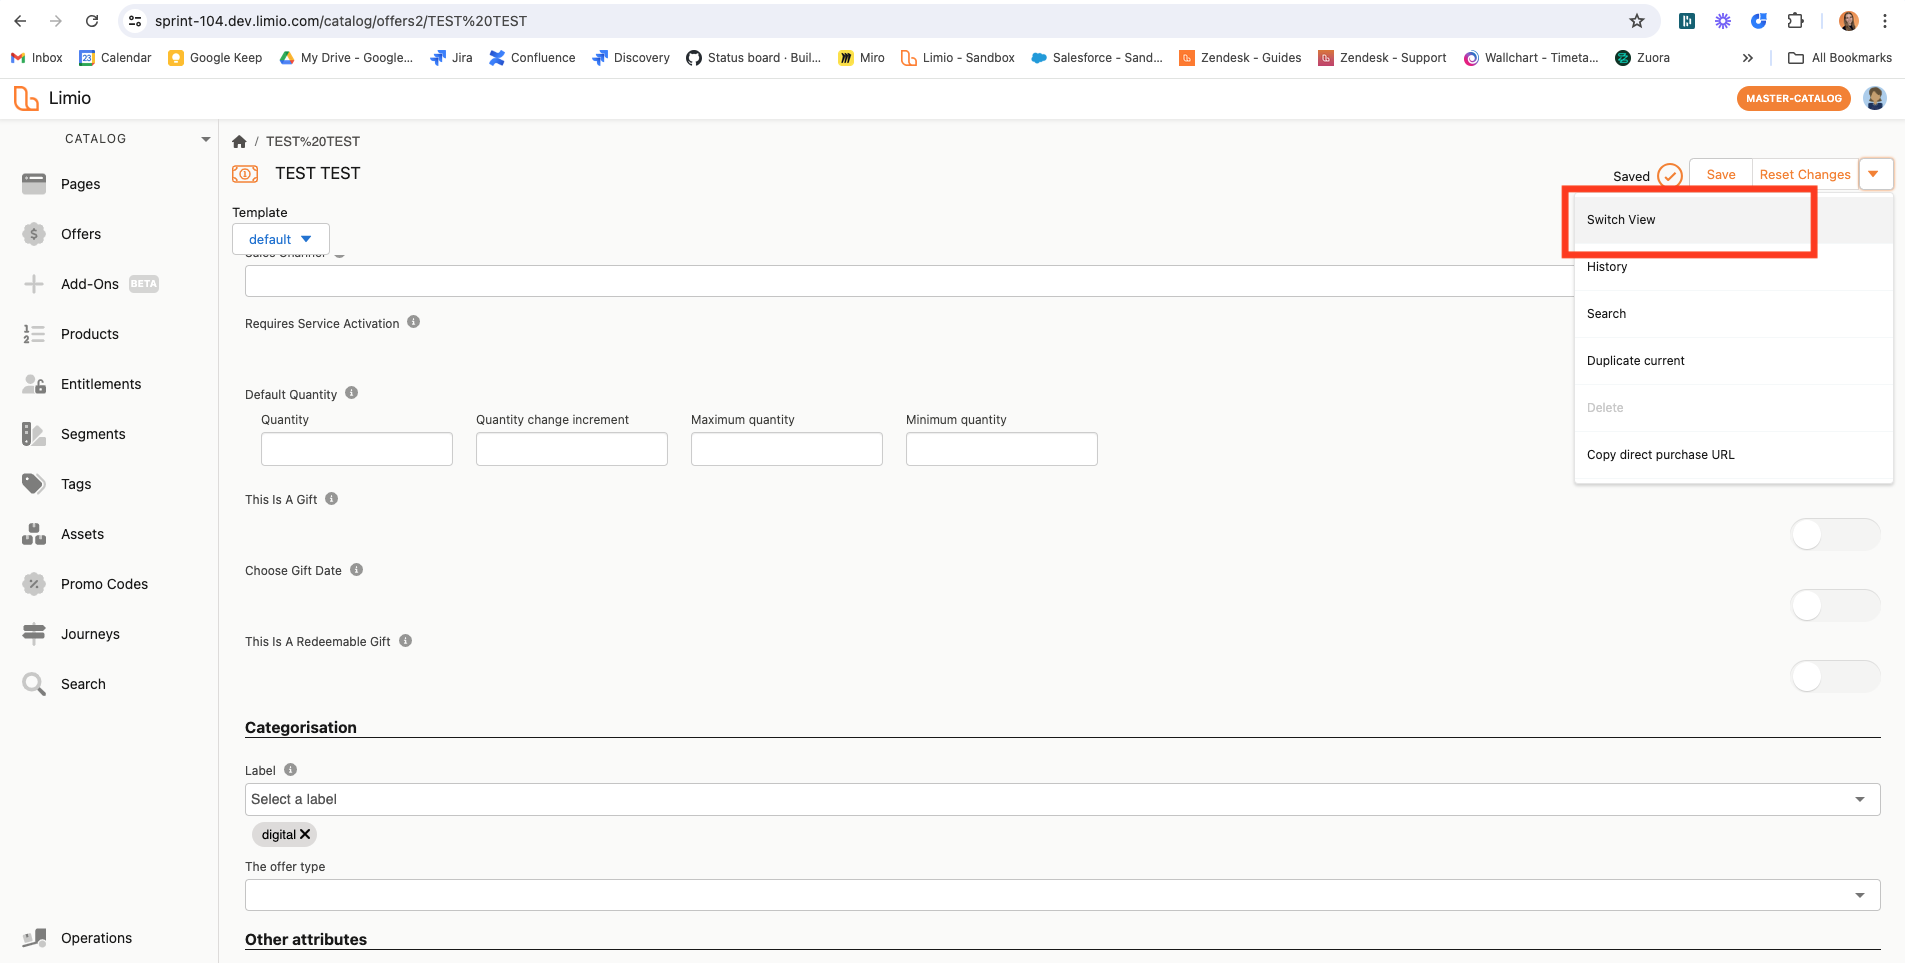
To find the label ID:
* Navigate to an offer that has the offer label you want to use.
* Click the **down arrow** in the top-right corner and select **"Switch View"**.
* In the JSON view of the offer object, locate the label ID under the field `"label__limio"`.
If you have multiple offers with that offer label, the offer that has the same Allowed Country attribute as the customer's limio-country cookie will be populated in the basket.
**Known limitation:** The link will not work if the customer's limio-country cookie matches the Allowed Country attribute for multiple offers with that label.
{% hint style="info" %}
**Resuming abandoned checkouts:** If you want to redirect a customer back to a checkout they abandoned, use the `recoveryLink` returned by the Abandoned Basket API instead of a purchase link. See the [Abandoned Basket Campaigns](https://docs.limio.com/guides/developer-guides/guide-abandoned-basket#use-of-this-api) guide for details.
{% endhint %}
### Part 4: (optional) Apply a promo code
You can automatically apply a promo code to your customer's basket by appending `&pc=promocodename` to the end of your purchase link.
For example, `https://www.domainname.com/checkout?purchase=true&label=digital&pc=PROMO123`
If the promo code is expired, invalid, or not compatible with the items in the basket, the offer will still appear in the basket but the promo code will not be applied.
### Part 5: Analytics
When using Purchase Links in Limio, several key analytics events are triggered to track user interactions:
* **page\_view** – Triggered when a user lands on the checkout or cart page via a Purchase Link.
* **user\_authentication** – Fired when a user hits a cart or checkout page with authentication setup (including anonymous authentication)
* **begin\_checkout** – Initiated when the user starts the checkout process
These events help monitor customer journeys and optimise conversion tracking.
For more details on the Limio data layer, please read here:
---
# Agent Instructions
This documentation is published with GitBook. GitBook is the documentation platform designed so that both humans and AI agents can read, navigate, and reason over technical content effectively. Learn more at gitbook.com.
## Querying This Documentation
If you need additional information that is not directly available in this page, you can query the documentation dynamically by asking a question.
Perform an HTTP GET request on the current page URL with the `ask` query parameter, and the optional `goal` query parameter:
```
GET https://docs.limio.com/product/checkout/how-to-configure-purchase-links.md?ask=&goal=
```
`ask` is the immediate question: it should be specific, self-contained, and written in natural language.
`goal` is optional and describes the broader end goal you are ultimately trying to accomplish on behalf of the user. GitBook uses it to tailor the answer towards what is most useful for that goal.
The response will contain a direct answer to the question and relevant excerpts and sources from the documentation.
Use this mechanism when the answer is not explicitly present in the current page, you need clarification or additional context, or you want to retrieve related documentation sections.