# Welcome to Limio
Limio enables Go-To-Market teams to accelerate revenue by optimising every sales channel. We're excited to have you using Limio to develop new commerce experiences across your channels.
### Platform Overview
**Limio Commerce Platform** is the turnkey solution for subscription businesses needing to unify product-led growth (PLG) and sales-assisted motions across all channels. Built specifically for subscription models, it delivers fast, responsive, mobile-friendly commerce experiences that convert users from free trials to paid subscriptions and drive expansion revenue.
**One Platform, Every Channel:** Limio combines Content Management, Digital Asset Management, Product Catalog Management, Order Management, and eCommerce into a single application that powers your entire customer journey - from initial product discovery to renewals and upsells.
**Unified PLG & Sales-Led Growth:**
* **Product-Led Growth**: Self-service onboarding, in-app upgrade flows, usage-based billing triggers, and frictionless free-to-paid conversions
* **Sales-Assisted Growth**: Quote-to-cash workflows, agent-initiated orders, and seamless handoffs between self-service and sales teams in Salesforce
* **Partner Portal:** Self-service ordering and customer management for partners
**Native Integration Advantage:** With out-of-the-box integration to billing systems like Zuora and CRM like Salesforce, subscription businesses can launch complete commerce experiences rapidly, no custom development, no middleware, no integration headaches.
**The platform includes the following key components:**
* **Limio Catalog:** Product Information Management and Digital Asset Management designed for rapid ecommerce and PLG experimentation. Marketers can manage product offerings, create compelling trial experiences, and package conversion journeys through a WYSIWYG editor ('Limio Page Builder'). Build everything from freemium landing pages to upgrade prompts without developer involvement.
* **Limio Shop:** A subscription eCommerce platform optimised for product-led acquisition. Provides modern, configurable, hosted experiences including pricing pages, frictionless checkout, shopping baskets, and conversion-optimised order completion flows. Supports free trials, usage-based pricing, and seamless free-to-paid conversions - all customisable through Limio Catalog.
* **Limio Self-Service:** Comprehensive subscriber or partner portal that drives product adoption and reduces churn. Includes secure authentication, account management, subscription controls, upgrade/downgrade flows, and intelligent cancellation prevention. Enables customers to self-serve throughout their entire lifecycle while providing expansion opportunities.
* **Limio Subscriptions:** Unified subscription management that tracks customer journeys across all channels. Monitor customers, orders, subscriptions, and behavioral events from initial product trial through renewal. Provides the data foundation for PLG analytics and automated lifecycle campaigns.
* **Limio for Salesforce:** Native Salesforce integration enabling omnichannel PLG and sales-assisted workflows. Sales teams can create subscriptions, apply promotions, and seamlessly hand off to self-service - all within Salesforce CRM.
The Limio Commerce Platform works hands-in-hands with Limio for Salesforce to power omnichannel commerce. See more at [What is Limio for Salesforce](https://docs.limio.com/salesforce/managed-package-overview).
# Get Started with Limio
Welcome to Limio! We're excited to get you started on your journey to better subscription commerce. Limio is an enterprise commerce application and there’s a couple of steps to take before you can start selling.
In this onboarding guide, we’ll cover how to set up key third-party applications for billing, payments, authentication. You'll need to have access to a couple of applications to get yourself started, including:
* Zuora, with admin knowledge of how the product catalog, payments, and tax are configured.
* Salesforce, with admin knowledge of the setup area
We’ll also cover the basics setup of a sandbox and explain some of the more advanced setups options. More specifically, this guide will walk you through:
Each link will reference a more detailed document, so you can always get more details if you're unsure on what to do.
## **Your Limio app**
By default, your application will use the following domains:
* **Primary Domain:**\
`https://{tenant}.prod-us.limio.com/`
* **Online Purchase and Self-Service Domain:**\
`https://{tenant}-shop.prod-us.limio.com/`
You can update the domain of your online experience to a custom domain later. However, keeping these default URLs handy will be helpful during the initial setup.
## **Add users**
Commerce is a team effort, and revenue operations, marketers, product managers, developers and operation staff will often need access to Limio.
Go to [https://docs.limio.com/support/user-permissions-and-administration/how-to-create-and-manage-users-teams-and-permissions](https://docs.limio.com/support/user-permissions-and-administration/how-to-create-and-manage-users-teams-and-permissions "mention")to add more team members. You’ll also be able to configure access and permissions. Tenant Administrator will give you the most flexibility in a sandbox.
## **Configure Integrations**
Limio works with other applications and can be connected with no code. Here are the applications you’ll need to connect to get started:
* **Zuora:** Go to Settings > Zuora and add your client ID and Secret. Read [https://docs.limio.com/integrations/zuora-integration/getting-started/connecting-limio-to-zuora-for-commerce](https://docs.limio.com/integrations/zuora-integration/getting-started/connecting-limio-to-zuora-for-commerce "mention")for more details.
* Configure your payments in Zuora by creating [https://docs.limio.com/integrations/zuora-integration/configuring-payment-gateways/how-to-set-up-zuora-hosted-payment-methods-for-limio](https://docs.limio.com/integrations/zuora-integration/configuring-payment-gateways/how-to-set-up-zuora-hosted-payment-methods-for-limio "mention") or [https://docs.limio.com/integrations/zuora-integration/configuring-payment-gateways/how-to-set-up-zuora-payment-forms-for-limio](https://docs.limio.com/integrations/zuora-integration/configuring-payment-gateways/how-to-set-up-zuora-payment-forms-for-limio "mention")using Limio's shop domain (`https://{tenant}-shop.prod-us.limio.com/`). For sandbox environments, Zuora's Test Gateway is recommended.
* **(Optional) Salesforce:** Go into your Salesforce instance and read [https://docs.limio.com/integrations/salesforce-data-integration/connect-limio-salesforce](https://docs.limio.com/integrations/salesforce-data-integration/connect-limio-salesforce "mention")
* **(Optional) Authentication:** You can select OpenID, SAML, or more to get started. However, we recommend you do this step later and use Limio’s [Configuring Anonymous Authentication](/product/authentication/authentication-provider-per-page/configuring-anonymous-authentication-for-your-checkout-flow) to get started. Go to Settings > Authentication Providers, click Anonymous Authentication, and give it a name (e.g. Anonymous Auth)
## **Create your Limio Catalog**
### Sync from Zuora
In this guide, we’ll assume you’ve created already data in Zuora, but if you haven’t, read [Zuora’s quick start guide on the product catalog](https://docs.zuora.com/en/basics/quick-start-tutorials/zuora-quick-start-tutorials).
The fastest way to load the Limio Catalog is to use the [https://docs.limio.com/integrations/keeping-zuora-and-limio-in-sync/sync-between-limio-catalog-and-zuora-catalog](https://docs.limio.com/integrations/keeping-zuora-and-limio-in-sync/sync-between-limio-catalog-and-zuora-catalog "mention") with Zuora. This will store a local copy of your Zuora catalog in Limio, as well as create Limio Products and Offers automatically for you.
### Limio Products
The sync will automatically populate your Limio data. Now you'll want to review the [https://docs.limio.com/integrations/zuora-integration/manage-your-pricing/how-to-configure-zuora-product-code-sku-in-limio](https://docs.limio.com/integrations/zuora-integration/manage-your-pricing/how-to-configure-zuora-product-code-sku-in-limio "mention")created. If they are physical product, you should toggle on the delivery option.
Optionally, you can also attach [Entitlements](/product/pricing/how-to-create-and-propagate-entitlements-with-limio) that you wish to track.
### Limio Offers
Then, review the [Offers](/product/pricing/what-are-offers-and-how-to-configure-them) to make sure all the configuration is appropriate. Limio Offers is the commercial proposition sold to your customers. So it includes:
* **Display fields**, which is what the end customer see.
* **Billing configuration**, which defines how Limio will integrate with Zuora
* **Product(s)**, which also includes the ability to define a default rate or pricing plan from the billing system
* **Commerce behaviour**, which will drive the experience for the end customer
* **Product tab**, which references the Limio Product (related to a Zuora Product) and the Zuora Rate Plan.
To get started, go to an Offer:
* [ ] Make sure to have a Display Name and a display price.
* [ ] Make sure you have a Limio Product and a corresponding Rate Plan attached in the Offer > Product tab.
* [ ] Check you have a Pricing defined.
* [ ] To get started, we recommend to Use External Pricing? to false.
* [ ] Set the Currency (e.g. USD)
* [ ] Set the price, for example if you'd like an offer that has a price of $100 per month, you can configure it as:
* Price: $100
* Type of charge: Recurring
* Charge Trigger: Order Date
* Repeat Interval: Every 1
* Interval: Month
* Repeat count: For 1 charge
* You can also use the billing system price in Limio. Learn more in [https://docs.limio.com/integrations/zuora-integration/manage-your-pricing/how-to-configure-subscriptions-in-limio-offers-with-initial-price-and-zuora-rate-plans](https://docs.limio.com/integrations/zuora-integration/manage-your-pricing/how-to-configure-subscriptions-in-limio-offers-with-initial-price-and-zuora-rate-plans "mention") vs. [https://docs.limio.com/integrations/zuora-integration/manage-your-pricing/how-to-configure-subscriptions-in-limio-offers-with-external-price-and-zuora-rate-plans](https://docs.limio.com/integrations/zuora-integration/manage-your-pricing/how-to-configure-subscriptions-in-limio-offers-with-external-price-and-zuora-rate-plans "mention").
* [ ] Define the Terms (e.g. 1 Month termed), Auto-Renew (True), and Payment Method (e.g. Zuora Card Payments)
* [ ] Define the Allowable Countries, you can Select All if you don't need to restrict purchases.
* [ ] Set Allow Multi-Buy to true if you sell a quantity-based products (per unit pricing)
* [ ] Last step, define labels, which is the way to attach an offer to a pricing page. A label could be ‘USA Offers’ or ‘Black Friday’. Labels are important in Limio: they allow you to group offers and later can drive logic like the upgrade path.
A full list of what each field does is available [Offer Attributes](/product/pricing/what-are-offers-and-how-to-configure-them/offer-attributes).
## **Create your Acquisition pages**
### Step-by-Step
Now for the exciting part: creating your commerce experience. We’ll cover the basics of acquisition flow:
* [ ] **Pricing page:**
* [ ] Create your first page in Catalog > Pages (Add Page in the top right corner)
* [ ] On the Page, go to Settings in the top right corner and:
* Set a [tag](https://docs.limio.com/product/page-builder/page-builder-overview-of-key-features#modify-page-settings) (URL) such as /pricing for the URL at which the Page will be available
* [Attach the offer label](https://docs.limio.com/product/pricing/how-to-create-offers-and-add-ons-to-attach-to-pages#attaching-offers-to-pages-via-an-offer-label) you created in the step Above.
* [ ] On the [Page Builder Overview](/product/page-builder/page-builder-overview-of-key-features), populate the page with Limio Components. At a minimum, typical components to use will be [https://docs.limio.com/components/component-library/standard-components/component-header-with-navigation](https://docs.limio.com/components/component-library/standard-components/component-header-with-navigation "mention"), [https://docs.limio.com/components/component-library/standard-components/component-offers](https://docs.limio.com/components/component-library/standard-components/component-offers "mention"), and [https://docs.limio.com/components/component-library/standard-components/component-footer](https://docs.limio.com/components/component-library/standard-components/component-footer "mention").
* You should see your offers on the page with the Offer component.
* The CTA of the Offer component (e.g. "Subscribe") will automatically go to the checkout link defined on the attached offers. Standard will go to the URL /checkout.
* [ ] **Checkout:**
* Create a checkout page using the tag /checkout.
* It's a good idea to set the [layout](https://docs.limio.com/components/component-library/cart-components/using-cart-components-for-acquisition#cart-alongside-checkout) for the checkout to 60/40.
* Mark the [Authentication per Page](/product/authentication/authentication-provider-per-page). You can reference the Anonymous Auth created above.
* Drag the checkout [Form Component](https://docs.limio.com/product/checkout/overview-how-to-customise-the-limio-modular-checkout) and enter the sub component manager to create the fields you want to have.
* For a digital product, those will typically be First Name, Last Name, Email, Address (Billing), Payments and a checkbox field for T\&Cs.
* Optionally, you can also:
* Drag [https://docs.limio.com/components/component-library/cart-components/component-cart-items](https://docs.limio.com/components/component-library/cart-components/component-cart-items "mention"), [https://docs.limio.com/components/component-library/cart-components/component-cart-summary](https://docs.limio.com/components/component-library/cart-components/component-cart-summary "mention")and [https://docs.limio.com/components/component-library/self-service-components/component-billing-schedule](https://docs.limio.com/components/component-library/self-service-components/component-billing-schedule "mention") to display the cart back to the user.
* Change the layout of the page to a 60/40 (checkout form with cart on the side). Learn more on [Configure Layout](/product/page-builder/page-builder-overview-of-key-features/configure-layout).
* Set an order complete link such as /order-complete.
* [ ] **Order complete:** Similar to the previous page, set a tag such as /order-complete. Then drag the [order confirmation](https://docs.limio.com/components/component-library/standard-components/component-order-confirmation) component.
That’s it, those are the core pages for a purchase funnel! Click on the Builds button at the top of the page and [Publish/Unpublish Pages](/product/page-builder/how-to-publishunpublish-your-pages-online)the page to make it available online.
From here, you will typically start customising the [design via CSS](https://docs.limio.com/product/page-builder/page-builder-overview-of-key-features/updating-page-styling-using-the-style-editor) or [deploy custom components](https://docs.limio.com/developers/custom-components/custom-components) for more control. You may want to also route traffic intelligently, for example customers from certain countries can see a specific page. And you’ll probably want to create multiple pricing pages, or route customers to purchase via promo codes and purchase links.
### Time to test a purchase
Publish, hit your /pricing page, then go through the funnel.
In a sandbox, use a test email address (e.g. ) and a test card (4242 4242 4242 4242 usually works across gateways) to authenticate and process your first order.
This should automatically populate Limio and Zuora. If there’s is an issue, head to [https://docs.limio.com/support/troubleshooting/how-to-see-order-failures-with-process-events](https://docs.limio.com/support/troubleshooting/how-to-see-order-failures-with-process-events "mention") to see what has gone wrong and modify the relevant configuration.
## **Create your Self-Service pages**
### Step-by-Step
Ok acquisition done, now what about self-service? Here are some pages to create:
* **My Account:**
* Create a page where subscribers can view their subscriptions, their payment methods and invoices.
* Set up a URL such as /myaccount and drag the [https://docs.limio.com/components/component-library/standard-components/component-orders-table](https://docs.limio.com/components/component-library/standard-components/component-orders-table "mention"), [https://docs.limio.com/components/component-library/legacy-configuration-components/component-payments-table](https://docs.limio.com/components/component-library/legacy-configuration-components/component-payments-table "mention"), and [https://docs.limio.com/components/component-library/self-service-components/component-invoices-table](https://docs.limio.com/components/component-library/self-service-components/component-invoices-table "mention").
* On the order table, you can set links to the switch (upgrade/downgrade), cancel and cancel/save, add-ons, win back experiences.
* **Upgrade/downgrade:** This page will allow subscribers to change their current offer.
* Create a URL such as /upgrade and [Create Update Subscription Experience](/product/self-service/what-are-the-standard-functionality-of-limio-self-service-manage-my-account/how-to-configure-an-update-subscription-flow)
* You can configure the page to redirect to My Account or create a success page with an [Order Change Success](https://docs.limio.com/components/component-library/standard-components/component-order-change-success) component.
* **Cancel:** the [cancel experience](https://docs.limio.com/product/self-service/what-are-the-standard-functionality-of-limio-self-service-manage-my-account/how-to-create-a-personalised-cancelsave-experience) can be as simple as a cancel button or a multi-step flow, for example a [https://docs.limio.com/components/component-library/standard-components/component-cancel-survey](https://docs.limio.com/components/component-library/standard-components/component-cancel-survey "mention"), a page outlining benefits, a [Cancel/Save Discount](/product/pricing/what-are-offers-and-how-to-configure-them/cancel-save-discount) and a confirmation of changes or cancellation.
* Learn more at: [Create Personalised Cancel/Save Experience](/product/self-service/what-are-the-standard-functionality-of-limio-self-service-manage-my-account/how-to-create-a-personalised-cancelsave-experience)
All pages should be authenticated, as they won’t load without identifying the customers. You can use set it to Anonymous Auth to get started.
### Time to test self-service
Once your pages are live, you will have the basics of self-service. Publish them and see the changes taking effect in Limio and connected apps such as Zuora. More details on how Limio updates other systems [here](https://docs.limio.com/integrations/keeping-zuora-and-limio-in-sync/how-limio-events-updates-zuora-for-commerce).
You’ll need to process a purchase as described in the previous step, then go to /myaccount page. Try the various flows you have setup.
## **Go further with advanced configuration**
Alright basics done, now let’s cover some of the more advanced setup:
**Marketing capabilities**
* **🎨 Design:** Want more control over the design and the rules to execute during an upgrade or downgrade? Custom components coupled with [Limio User and Subscription SDK](https://docs.limio.com/developers/limio-sdk/user) gives you full creative control.
* **🗂️ Products:** Limio isn’t just for simple subscriptions and you can also sell [Add-ons](/product/pricing/what-are-add-ons-and-how-to-configure-them), [https://docs.limio.com/product/pricing/what-are-offers-and-how-to-configure-them/how-to-configure-a-one-time-offer](https://docs.limio.com/product/pricing/what-are-offers-and-how-to-configure-them/how-to-configure-a-one-time-offer "mention"), [https://docs.limio.com/product/pricing/what-are-offers-and-how-to-configure-them/how-to-add-a-bundle-to-an-offer](https://docs.limio.com/product/pricing/what-are-offers-and-how-to-configure-them/how-to-add-a-bundle-to-an-offer "mention"), [https://docs.limio.com/salesforce/support/legacy-features/gift-codes-legacy](https://docs.limio.com/salesforce/support/legacy-features/gift-codes-legacy "mention") and [Group](https://docs.limio.com/release-notes/limio-commerce-release-notes/legacy-releases/patch-release-group-subs-end-april-21) subscriptions. Setup will vary a bit so take a look at what is needed for your use case.
* **🧠 Personalisation:** What if you have multiple products, brands or want to personalise the switch or cancellation experience? You’ll be able to use Limio Journeys, which allows you to redirect subscribers to specific experiences dynamically based on the [initial offer they purchased](https://docs.limio.com/product/journey/what-are-limio-journeys/create-a-journey-based-on-subscription-offer-labels) or their [segment](https://docs.limio.com/product/journey/what-are-limio-journeys/create-a-journey-based-on-limio-segments).
* **📊 Analytics:** Limio can feed user events via a data layer to popular tag manager such as Google Tag Manager and Tealium, to feed into various analytics tool. Learn more [Configure Limio Data Layer](/product/analytics/how-to-configure-the-limio-data-layer-to-collect-user-events-for-analytics)
* **🔎 SEO:** Limio gives you control over what is surfaced to search engines. Learn more [Configure SEO Metadata](/product/seo/how-to-configure-the-seo-metadata-of-your-pages)
**Developer capabilities**
* **📞 Salesforce:** Limio can integrate with vanilla Salesforce via [https://docs.limio.com/integrations/salesforce-data-integration/platform-events-flexible](https://docs.limio.com/integrations/salesforce-data-integration/platform-events-flexible "mention") and also has a dedicated apps for agent commerce in [Salesforce](https://docs.limio.com/salesforce/managed-package-overview).
* **🔄 Third-party initiated changes:** You can update Limio Subscriptions via a simple endpoint, and we’ll take care of the rest. Learn more [https://docs.limio.com/integrations/keeping-zuora-and-limio-in-sync/sync-between-limio-subscriptions-and-zuora-subscriptions](https://docs.limio.com/integrations/keeping-zuora-and-limio-in-sync/sync-between-limio-subscriptions-and-zuora-subscriptions "mention").
* **⤵️ Existing subscriptions**: You may already be live on Zuora and wish to migrate your existing subscriptions in Limio. Learn more [https://docs.limio.com/guides/administration-guides/migrating-existing-subscriptions-and-customers-into-limio](https://docs.limio.com/guides/administration-guides/migrating-existing-subscriptions-and-customers-into-limio "mention").
* **🚨 Security:** Ecommerce attracts fraudsters and Limio has a series of security features to deter them. Learn more how what to set up [reCAPTCHA Bot Protection](/product/settings/security/recaptcha-bot-protection).
* **🛃 Tax:** Limio will automatically show tax when available, but finer control are available. Learn more
* **↪️ Webhooks:** have custom applications you want to act on an order or change, for example for fulfilment or provisioning? Our [webhooks](https://docs.limio.com/developers/webhooks/using-webhooks) are there to help.
* **🌐 Custom domain:** your shop and self-service can be hosted on your own custom domain. Learn more how to do that [here](https://docs.limio.com/product/settings/how-to-add-your-custom-domain-to-limio).
* **🛒 Abandon basket:** Limio can provide a list of unfinished basket that can then be retargeted via notifications, email or ads. Learn more [here](https://docs.limio.com/guides).
You may also have industry-specific needs, such as selling add-ons alongside core tiered subscription in SaaS or wanting to display the Limio Shop in a paywall. You can talk to your Account Executive to explore your commerce scenarios.
## **Operationalise your ecommerce**
Once you’ve got the shop and self-service setup, Limio will automatically populate the following core objects:
* Customers
* Orders
* Subscriptions
* Events and process events
All customer-initiated action will have an event, and each event has a [process events](https://docs.limio.com/support/troubleshooting/how-to-see-order-failures-with-process-events) which includes detailed callout to third-party systems, error messages and detailed logs. Head there to troubleshoot any issues.
## **Find your current Limio Commerce app version**
### Logged Out
1. Go to the homepage on your Limio Commerce environment
2. Below the **Sign In** button, the Limio version number is displayed in brackets. e.g. (v115.0.37).
### Logged In
1. Go to any page in your Limio Commerce environment.
2. Click the **user icon** in the top-right corner of the page.
3. In the modal that appears, scroll to the bottom. The Limio version is displayed there. e.g. (v115.0.37).
## **We’re here to help**
We’ve written this guide so you could get started and understand how to produce your shop and self-service independently.
But we’re here to help! Reach out to us at if you are new to the platform or if you are a current customer.
# Home Dashboard
The data-driven dashboard on the Limio catalog home page — orders, conversion, abandoned carts and failed process events at a glance.
From Release 116, the Limio catalog home page can be upgraded from the static navigation grid to a data-driven dashboard that gives you an overview of your store the moment you log in.
{% hint style="info" %}
The dashboard is **off by default** — without it, you see the existing home page unchanged. To enable it, go to **Settings > General Settings > Beta settings** and turn on **"Use new data-driven Home Page?"**.
{% endhint %}
## What the dashboard shows
**At-a-glance KPIs**
* **New Orders** — the number of new orders in the last 30 days
* **Top Checkout Conversion** — your highest-traffic checkout page, with its conversion rate and how many checkouts were initiated and completed
* **Cancellations** — the number of cancellations in the last 30 days (hidden when there are none)
**Recent Orders** — your 5 most recent orders across all commercial order types (new, renewal, cancel, switch, save, update), showing the order type, a link to the order reference, the offer, the total and the date. Failed orders appear here too, so nothing slips past unnoticed.
**Abandoned Carts** — the 3 most recent abandoned carts, with the customer email, offer, creation date and the recovery link you can send to bring the customer back. Read more about recovering abandoned baskets in the [abandoned baskets guide](https://docs.limio.com/guides/feature-implementation-guides/guide-inspect-abandoned-baskets).
**Failed Process Events** — the 5 most recent order-processing failures, each linked to its process event so you can investigate straight away. Read more about diagnosing failures in [See Order Failures with Process Events](https://docs.limio.com/support/troubleshooting/how-to-see-order-failures-with-process-events).
Each section links through to the relevant detail page, so you can act on what you see. When a section has no data, it shows an empty-state message instead.
## Resilient loading
Each dashboard section loads independently. If one data source is slow or temporarily unavailable, the rest of the dashboard still loads normally.
# Offers
### What are Limio Offers?
Limio Offers are a core concept in Limio and the foundation of commerce in Limio, as they are the entry point in the Catalogue and the starting point for every subscription.
In Limio Commerce, an Offer defines a product or bundle of products with a price that a customer can purchase. It is configured for a given billing period (for example monthly or annually) or as a one-off. Customers will buy an Offer and receive the products associated with it.
Offers can:
* Use recurring pricing, one-time pricing, or usage-based pricing
* Bundle multiple products together
#### Creation & Management
Go-To-Market and Product teams can create, update and publish Offers via Limio’s no-code interface without bespoke engineering work. Teams may define price, billing frequency, term, channel exposure, and trial or introductory configurations.
When purchased, an Offer will create a Limio Subscription and creates other objects in connected systems, such as a Zuora Subscription or a Stripe Subscription, depending on your billing provider.
#### Visibility to Customers
Once an Offer is published, it can be displayed via Limio’s shop, self-service portal, partner-portal or API/SDK components. Customers see the pricing and choose the Offer, triggering billing and provisioning of the associated entitlements.
#### Key behaviour of Offers
* Offers can be purchased on their own (standalone)
* They contain all the information needed to set up a complete subscription, including terms and auto-renewal settings
* There are 3 types of Offers:
* Standard Offers, which is the typical use case
* Discount Offers, used for Cancel/Save scenarios. Learn more at [Cancel/Save Discount](/product/pricing/what-are-offers-and-how-to-configure-them/cancel-save-discount)
* Order Line Item Offers, used for one-off transactions. Learn more at [Order Line Items](/product/pricing/what-are-offers-and-how-to-configure-them/how-to-configure-and-implement-order-line-items)
What about Add-Ons?
If you want to add extra products or discounts to an existing subscription, you should use **Limio Add-Ons**.
* Add-Ons cannot be purchased standalone
* They must either be bought together with an Offer or added to an existing subscription
* They require less information because they attach to an existing subscription
Learn more: [Add-ons](/product/pricing/what-are-add-ons-and-how-to-configure-them)
## Creating Offers
#### Products
On the Product tab, you can attach the Limio Product and select a Rate Plan from your connected billing system. This may drive the price or will be overridden by Limio.
#### Display
Display fields are used to power the commerce experience and what Limio Components or Custom Components display to the customer through the purchase funnel and self-service experience. Key attributes are:
* **Display Name:** A customer-friendly name for your offer (e.g. Pro Monthly)
* **Display Description:** A longer description of the offer (e.g. Monthly Subscription)
* **Display Price:** A customer-friendly price (e.g. $100 per month, billed annually)
* **Detailed Display Price**: Price details, for example renewal price (e.g. renews at $150 per month)
* **Offer Details:** Features of the offer (e.g. Analytics,
* **CTA:** A call to action for landing pages
* **Checkout Description:** A description used in the Limio Cart and Checkout
* **Best Value Offer:** Highlight for landing pages
* **Group:** Used to group offers on landing pages
#### Billing
The Billing attributes of the Offer will determine the Price as well as some core attributes of the subscriptions, such as the Payment Methods available at Checkout, the Initial and Renewal Terms, and the Auto-Renewal status.
There are multiple ways of configuring the Price to take best advantage of the billing system's flexibility and defining other attributes of the subscription, such as whether it auto-renews or what payment methods can be accepted for this offer. To learn more about all the Pricing options, go to:
* [Manage Pricing with Zuora](/integrations/zuora-integration/manage-your-pricing)
* [Manage Pricing with Stripe Billing](/integrations/stripe-billing-integration/stripe-billing)
### Commerce Behaviour
Commerce behaviour allow you to define certain behaviour of the offer, for example which checkout should be used, whether it allows quantity, which countries the offer can be purchased from, etc... In details:
1. **Allow Multibuy**: Enables a quantity field on an offer so end-users can select and purchase multiple units of that offer in one order. See [Multibuy & Quantity](/product/pricing/what-are-offers-and-how-to-configure-them/how-to-activate-the-quantity-field-to-sell-multiple-subscriptionsitems-at-once).
2. **Default Quantity**: Sets the starting, increment, minimum and maximum quantity values when multibuy is enabled. See [Multibuy & Quantity](/product/pricing/what-are-offers-and-how-to-configure-them/how-to-activate-the-quantity-field-to-sell-multiple-subscriptionsitems-at-once).
3. **Allowed Countries**: Defines the country codes from which end-users are permitted to purchase the offer, restricting geographic eligibility. See [Restrict Billing/Delivery Country](/product/settings/how-to-set-up-localisation/how-to-restrict-the-billing-andor-delivery-country-for-limio-offers).
4. **Checkout Configuration**: Determines the checkout path or mode (standard, external, external-post). See [Direct Customers to Different Checkout Based on Offer](/product/checkout/overview-how-to-customise-the-limio-modular-checkout/how-to-direct-customers-to-a-different-checkout-based-on-the-offer-they-are-purchasing).
5. **Sales Channel**: Specifies through which channel(s) (Online, Partner, Salesforce, etc) the offer is available for purchase, enabling partner or direct segmentation.
6. **Requires Service Activation**: Indicates whether a service activation step is required post-purchase before the subscription becomes active. See [Use Service Activation](/product/settings/other-settings/how-to-use-service-activation-on-a-limio-offer).
### Categorization
Categorization holds the Offer Labels to attach to Pages. Learn more at [Find Offer Labels in Pages Table](/product/page-builder/page-builder-overview-of-key-features/how-to-find-offer-labels-attached-to-pages-using-the-pages-table).
### Cross-sell and Upsells
Customers can choose which upsell and cross-sell offers, as well as add-ons, should be available when the selected offer is placed in the cart. Learn more at: [Cross-Selling](/product/checkout/how-to-configure-cross-selling-in-the-cart-and-checkout) and [Upselling](/product/checkout/how-to-configure-upselling-in-the-cart-and-checkout)
### Upgrade and Downgrade
Customers can define the upgrade and downgrade path, when the selected offer is being modified in self-service. Learn more at [Create Update Subscription Experience](/product/self-service/what-are-the-standard-functionality-of-limio-self-service-manage-my-account/how-to-configure-an-update-subscription-flow).
### Custom Attributes
Customer can use custom attributes, for example to track analytics properties or hold specific fields that might be important for custom components. Learn more at [Templates and Custom Attributes](/product/settings/config-settings/templates-and-custom-attributes).
## Integration with Zuora Billing
Limio Offers have specific behaviour when using Zuora:
* **Catalog:** When products are synchronized to Limio, the Zuora products to be used for Limio Offers are synced in and are then available under the 'Products' tabs on the Offers. Only rate plans available for that Product are listed.
* **Order:** In Zuora, a Limio Offer will create a new Subscription with its own term and with the relevant product and rate plan. For B2B scenarios, you can opt in to [multi-offer single subscription](https://docs.limio.com/integrations/zuora-integration/manage-your-pricing/how-to-configure-subscriptions-in-limio-offers-with-initial-price-and-zuora-rate-plans/how-to-acquire-multiple-offers-in-a-single-subscription) to consolidate multiple offers into one subscription.
Learn more about how Limio maps to Zuora objects in [Products, Offers, and Pages Relationship](/product/page-builder/how-do-products-offers-and-pages-relate-in-page-builder).
To fully understand how your Limio Catalog and Zuora Catalog relates, go to:
{% content-ref url="" %}
{% endcontent-ref %}
## Integration with Stripe Billing
Limio Offers have specific behaviour when using Stripe Billing:
* **Catalog:** Limio Products link to Stripe Products via the Stripe Product Code on the Limio Product. There is no catalog sync — you copy the Stripe Product ID from the Stripe Dashboard into the Limio Product.
* **Order:** When an Offer is purchased, Limio dynamically creates the Stripe Price if it doesn't already exist, then creates a Stripe Subscription attached to the linked Stripe Product. Limio owns pricing — Stripe stores only what Limio has used.
To set up Offers for Stripe Billing, go to:
{% content-ref url="" %}
{% endcontent-ref %}
# Multibuy & Quantity
{% hint style="info" %}
**Multibuy is for selling multiple units of the *****same***** offer** (for example, 5 seats of the same plan).
If you want to combine *different* offers into one consolidated subscription — typical for B2B scenarios — see [Acquire Multiple Offers in a Single Subscription](https://docs.limio.com/integrations/zuora-integration/manage-your-pricing/how-to-configure-subscriptions-in-limio-offers-with-initial-price-and-zuora-rate-plans/how-to-acquire-multiple-offers-in-a-single-subscription).
{% endhint %}
#### Enabling Multi-Subscription Sales with Limio
Marketers can leverage Limio to facilitate bulk subscription sales, particularly useful in B2B contexts, such as charging $10 per month per user.
**Steps to Activate Multi-Subscription Sales**
1. **Select the Offer/Add-on**\
Choose the offer or add-on you want to enable for multiple purchases.
2. **Activate Multi-buy Feature**\
Turn on the ***Allow Multibuy*** option. This feature adds a quantity field, visible to users from the pricing page to checkout and self-service stages.
3. **Set Quantity Parameters**\
Define the default, increment, minimum, and maximum quantities allowed for purchase. Note that from release 112 onwards, default quantity are enforced in [https://docs.limio.com/components/component-library/cart-components/component-cart-items](https://docs.limio.com/components/component-library/cart-components/component-cart-items "mention").
### **Components**
The quantity will be activated across Limio Components. Learn more how the [https://docs.limio.com/components/component-library/cart-components](https://docs.limio.com/components/component-library/cart-components "mention") and [https://docs.limio.com/components/component-library/modular-checkout-components](https://docs.limio.com/components/component-library/modular-checkout-components "mention") handle quantity.
Note that quantity will also be handled different if you use [https://docs.limio.com/product/pricing/what-are-offers-and-how-to-configure-them/volume-pricing](https://docs.limio.com/product/pricing/what-are-offers-and-how-to-configure-them/volume-pricing "mention").
### **Zuora Integration**
Go to [https://docs.limio.com/integrations/zuora-integration/manage-your-pricing](https://docs.limio.com/integrations/zuora-integration/manage-your-pricing "mention") to learn more about the impact of quantity on pricing.
# Offer Attributes
Here is a list of all available Limio Offer attributes by type. Custom attributes can be added by navigating to Config -> Offers in the Limio Catalog. Note that attributes may differ for standard offers, discount offers, and order line item offers. **Below is a list of attributes for offer templates configuration**.
| Type | Label | Name (API value) | Type | Description | Components | Further details |
| ------------------------------------------ | ----------------- | ---------------------------------------------------------------------------------------------------------------------------------------------------------------------------------------------------------------------------------------- | -------------------------------------------------------------------------------------------------------------------------------------------------------------------------- | ------------------------------------------------------------------------------------------------------------------------------------- | ---------- | --------------- |
| display\_name\_\_limio | String | Display name displayed to the customer on the Limio Shop for Offer components (Acquisition and Switch) | associated-offers, cancel-save-offer, customer-orders, email-order, grouped-offers, nav-header, offer-cards, offers, order-change-table, switch-offer, switch-subscription | | | |
| display\_price\_\_limio | Rich Text | Display price displayed to the customer on the Limio Shop for Offer components (Acquisition and Switch) | associated-offers, cancel-save-offer, email-order, grouped-offers, offer-cards, offers, switch-offer- switch-subscription | | | |
| detailed\_display\_price\_\_limio | Rich Text | Detailed display price displayed to the customer on the Limio Shop for Offer components (Acquisition and Switch) | associated-offers, cancel-save-offer, grouped-offers | | | |
| offer\_features\_\_limio | Rich Text | Features displayed to the customer on the Limio Shop for Offer components (Acquisition) | associated-offers, cancel-save-offer, grouped-offers, offer-cards, offers, order-change-table, switch-offer, switch-subscription | | | |
| cta\_text\_\_limio | String | CTA displayed to the customer on the Limio Shop for Offer components (Acquisition and Switch) | associated-offers, grouped-offers, offer-cards, offers, switch-offer, switch-subscription | | | |
| group\_\_limio | Picklist | The group to which this offer belongs. Group are used for display on some components for Acquisition and Switch. | associated-offers, cancel-save-offers, customer-orders, offer-cards, switch-offer, switch-subscription | These Group picklist items can be added and removed from your catalog via the **Config** **tab**, under ***Templates > Offers***. See | | |
| display\_description\_\_limio | String | Description displayed to the customer on the Limio Shop for Offer components (Acquisition and Switch) | grouped-offers, offer-cards | | | |
| best\_value\_\_limio | Boolean | If true, this offer is recognised as the offer with the best value in the campaign. The Limio Shop will display special designs on Offer components (Acquisition) | grouped-offers, offer-cards | | | |
| checkout\_description\_\_limio | Rich Text | Description is displayed in the checkout below the zuora iFrame. | single-page-checkout | | | |
| mma\_description\_\_limio | Rich Text | Offer description that will be displayed in the MMA/Self-Service page | | | | |
| payment\_types\_\_limio | Multi Picklist | How can this offer be paid for? | All components interacting with Billing | | | |
| price\_\_limio | Price | Initial price for the subscription | All components interacting with Billing | | | |
| initial\_term\_\_limio | | The initial term of the subscription | All components interacting with Billing | | | |
| term\_\_limio | | The renewal term of the subscription | All components interacting with Billing | | | |
| autoRenew\_\_limio | Boolean | If true, a subscription with this offer will auto renew until cancelled. | All components interacting with Billing | | | |
| zuora\_payment\_term\_\_limio | Picklist | Possible values are: Due Upon Receipt, Net 30, Net 60, Net 90. Leaving this field blank will keep the default of Due Upon Receipt. | All components interacting with Billing | | | |
| discount\_\_limio | Discount | Denotes a percentage discount for cancel/save and for how long this discount will last for. | cancel-save-offer, order-change-success | | | |
| disable\_autoPay\_\_zuora | Boolean | If true, a subscription with this offer will not auto pay upon renewal. | All components interacting with Billing | | | |
| switch\_date\_\_limio | Picklist | If the offer is a switch offer, this controls when that change will take place | order-change-table, switch-subscription | | | |
| supportBillingFrequencyChange\_\_zuora | Boolean | Turning this setting on will enable removal and re-adding products at the end of the initial term for this offer | | | | |
| is\_gift\_\_limio | Boolean | If true, this offer describes a gift offer | | | | |
| choose\_gift\_date\_\_limio | Boolean | If true, the customer can choose the date on which a gift offer is delivered | | | | |
| allow\_multibuy\_\_limio | Boolean | If true, the customer can add multiple of this offer to their basket (i.e. have a quantity) | associated-offers, basket, checkout, customer-orders, nav-header, offers, orders-table, single-page-checkout, switch-offer, switch-subscription | | | |
| is\_redeem\_gift\_\_limio | Boolean | If true, this offer describes a redeemable gift offer. At the end of the transaction the customer will receive a code which can be exchanged for whatever is described in the offer | edit-address, payments-table | | | |
| allowed\_countries\_\_limio | Multi Picklist | Countries allowed to be put down as delivery destinations during checkout. | associated-offers, customer-orders, edit-address, orders-table, payments-table, switch-subscription | | | |
| description\_\_limio | Rich Text | Description displayed to the customer on the Limio Shop for Offer components (Acquisition and Switch) | associated-offers, nexi-billing | | | |
| request\_company\_info\_\_limio | Boolean | If true, the customer will be required to fill out company information on checkout | | | | |
| checkout\_\_limio | | Link to the relevant checkout | associated-offers | | | |
| push\_to\_checkout\_\_limio | Boolean | When toggled on, clicking the CTA of an offer will add the item to the basket and push the user to checkout. | | | | |
| student\_\_limio | Boolean | If true, this offer is recognised as a student offer. | | | | |
| trial\_\_limio | Boolean | If true, this offer is recognised as a trial offer. | add-to-basket, grouped-offers, offers | | | |
| tax\_\_limio | String | A short static message about tax to display in the shop basket. | order-confirmation, single-page-checkout, switch-offers | | | |
| sales\_channel\_\_limio | Multi Picklist | Allows this offer to be sold in Salesforce. | | | | |
| requires\_service\_activation\_\_limio | Boolean | If true, this offer will require activation on a separate Zuora order, accesible from MMA. NOTE: It also requires Zuora config ('Require Service Activation of Orders?' must be set to yes on 'Default Subscription and Order Settings') | | | | |
| default\_quantity\_options\_\_limio | | Defines the starting quantity, the increments the offer amount can be changed by and the maximum quantity. | single-page-checkout, switch-subscription | | | |
| eligible\_partners\_\_limio | Multi Picklist | Partners that are eligible to sell this offer | | | | |
| block\_multiple\_\_limio | Boolean | Prevents purchasing multiple instances of this offer | block-purchase-dialog | | | |
| discount\_note\_\_limio | Rich Text | Additional pricing information displayed in cart-items component | cart-items | | | |
| label\_\_limio | Editable Picklist | Used to identify campaigns under given labels (they are not the same labels at offer) | | | | |
| offer\_type\_\_limio | Picklist | Can be used by Salesforce agents to filter offers and data analytics for reporting | | | | |
| upsell\_display\_name\_\_limio | Rich Text | Name displayed when this offer is being shown during an upsell | | | | |
| upsell\_display\_description\_\_limio | Rich Text | Description displayed when this offer is being shown during an upsell | | | | |
| upsell\_offers\_\_limio | Label Selector | Offers to show during upselling | | | | |
| cross\_sell\_display\_name\_\_limio | Rich Text | Name displayed when this offer is being shown during a cross-sell | | | | |
| cross\_sell\_display\_description\_\_limio | Rich Text | Description displayed when this offer is being shown during a cross-sell | | | | |
| cross\_sell\_offers\_\_limio | Label Selector | Offers to show during cross-selling | | | | |
| cross\_sell\_addons\_\_limio | Label Selector | Add-ons to show during cross-selling | | | | |
| cross\_sell\_cascade\_removal\_\_limio | Boolean | If true, remove this offer from the basket if it was added as a cross-sell and the offer that had this offer as a cross-sell was removed from the basket | | | | |
| upgrade\_offers\_\_limio | Multi Picklist | Offers this offer can upgrade to | | | | |
| downgrade\_offers\_\_limio | Multi Picklist | Offers this offer can downgrade to | | | | |
| downgrade\_cta\_\_limio | String | Call to action text for downgrading the offer | | | | |
| upgrade\_cta\_\_limio | String | Call to action text for upgrading the offer | | | | |
| update\_configuration\_\_limio | String | URL to redirect to when Offer is displayed in an Update Subscription context | | | | |
# Order Line Items
**Note: This is available from R107 and onwards.**
You can now configure and process Order Line Items in Limio!
The concept of Order Line Items already exist in Zuora ([see here](https://docs.zuora.com/en/zuora-billing/manage-accounts-subscriptions-and-non-subscriptions/manage-non-subscription-transactions/order-line-items)), and refer to any non-subscription-based items created by an order, representing transactional charges such as one-time fees, physical goods, or professional service charges that are not sold as subscription services.
This means you can now append any additional one-off charge to a subscription, all through the Limio interface and without any code. Order Line Items can also be purchased standalone (without a subscription).
Firstly, this introductory video gives an overview of the new Order Line Item functionality in Limio, including:
* How to configure them
* How they integrate with Zuora
{% embed url="" %}
## Configuring Order Line Items
In Limio, Order Line Items are created just like any other Offer. When setting up a new Offer, you will now see an option to Add Order Line Item. Selecting this option designates the Offer as an Order Line Item, allowing it to be processed accordingly.
From this point, you can configure the Order Line Item just as you would a standard Offer. If you need to capture specific details, you can create a dedicated Offer Template with relevant Order Line Item fields.
## Order Processing
When an order gets processed with a Subscription and an Order Line Item, the Subscription will process as normal. The Order Line Item will not be tied to the Subscription, and instead will be visible on the Limio and Zuora Order. Let's go through an example to see how things look in Limio and in Zuora.
Let's take this example, with the following items processed in my order:
1 Offer: US digital monthly
1 Order Line Item: Download USB
### Limio Order Processing
#### *Limio Subscription*
Given the Order Line Item is processed separately to the subscription, the Limio Subscription for this example looks the same as any other, and does not make any reference to the Order Line Item.
#### *Limio Order*
In the Order view, you will see both items that we purchased: the Subscription and the Order Line Item. These have been split out into two separate sections, as well as in a summary at the top of the order.
In Limio's [API](https://docs.limio.com/api), order line item are offers but have a different subtype:
```auto
"record_type": "offer"
"record_subtype": "line_item"
```
### Zuora Order Processing
#### *Zuora Subscription*
Similar to the Limio Subscription, there is no reference to the Order Line Item in the Zuora Subscription - only the US digital monthly subscription that we bought.
#### *Zuora Order*
The subscription appears as normal on the Zuora Order, and now we also see a separate Sale Order Line Items section, which contains our Order Line Item.
## Known Limitations
* Order Line Items are intended for one-off purchases and therefore are supported in Acquisition experiences in Limio Shop.
* Purchasing Order Line Items through Limio for Salesforce is not supported.
## In Summary
* Order Line Items offer a way to append non-subscription based charges to a subscription, such as set up fees and standalone charges for additional hardware.
* Order Line Items are configured in Limio as Offers under a new Order Line Item category.
* Order Line Items are processed separately from the subscription itself, and will appear on the Zuora and Limio Orders, but **not** on the Subscription objects.
# One-Time Price
There are two types of ‘One Time’ charge types:
### One Time (EVERGREEN)
* The 'One Time(EVERGREEN)' charge type produces a one off charge that is not bound to any period of time.
### One Time (TERMED)
* The 'One Time(TERMED)' charge type produces a one off charge bound to a specified period of time ie 1 day, 2 days, 3 days etc.
### Steps to configure an Offer with a ‘One Time’ charge type
1. Create your offer.
2. Look out for the, ‘Price' field that is located in the picture below. Click the 'Price Field.
3. A pop up modal will appear.
4. Entire your desired price.
5. Next choose your ‘One Time’ charge type.
**For ‘One Time(EVERGREEN)’ charge type you will just need to set your ‘Charge Trigger.**
**For ‘One Time(TERMED)' charge type you will need to set the following:**
* ‘Type Of Charge' = ‘One Time Termed’
* ‘Charge Trigger’ = Your Choice
* ‘Every’ the length of time, ie ‘Every 4 Days’ would mean a 4 day charge
* ‘Charge Type' keep set to 1
* The drop down list at the top right-hand side of the modal sets the ‘Term’ ie Days, Months etc.
*Screenshot: One Time Termed Price Editors Modal*
Also make sure the ‘Auto Renew' button is off.
## **Integrations**
### **Zuora**
#### **Configure as one-off**
You will also need to configure a corresponding ‘One Time’ rate plan in Zuora with ‘Flat Fee Pricing’. Please see the example below. Note that you can put the price as $0 as the Limio Offer value will override the Zuora value.
#### **Configure as recurring**
While the **One-Time** rate plan in Zuora satisfies many one-off offer use cases, some scenarios require a different configuration. This applies particularly when using the **end date** on the Zuora invoice to manage revenue recognition.
In this instance, the following configuration is necessary.
1\. Configure your Limio Offer
Ensure the following settings in your **Limio Offer** configuration:
* **Type of Charge**: `Recurring`
* **Charge Trigger**: `Start of Subscription`
* The charge duration matches the period for which the one-time offer is active.
Additionally, ensure the **Offer Term** aligns with the settings in the **Price Editor**. Example configuration:
* **Renewal Type**: `TERMED`
* **Renewal Trigger**: `EXTERNAL`
* **Term Length**: `8`
* **Term Type**: `Weeks`
* **Auto Renew**: `FALSE`
2\. Configure your Zuora Rate Plan
Since the **Zuora Rate Plan** will be recurring, configure it as follows:
* **Charge Model**: `Per Unit Pricing`
* **Unit of Measure (UOM)**: `Each`
* **Default Quantity**: `1`
* **Trigger Condition**: `Upon Service Activation`
* **End Date**: `Fixed Period after the Charge is triggered` (**Important**)
* Always set to **1 Billing Period**
* **Billing Period**: Match your one-time offer period (e.g., `8 weeks`)
* **Billing Timing**: `In Advance`
* **Billing Day**: `Charge Trigger Day`
* **Billing Period Alignment**: `Align to Charge`
You will also want to ensure that your **Revenue Recognition Rule** is set to `Recognise upon invoicing`.
This configuration ensures that while the subscription technically contains a **recurring charge**, it will **only have one charge** and have a **fixed end date in the Zuora invoice** for revenue recognition purposes.
\---
Not finding the pricing option you need? Get in touch at and we will be able to help.
# Bundle Pricing
## How to add a Bundle to an Offer
When you create an offer (see for more) you have the ability to add more than one product to the offer. This allows you to sell multiple products to a subscriber via one offer.
### Bundles with Initial Price
Here is how you configure a bundle offer if you are using [Limio Price](https://docs.limio.com/integrations/zuora-integration/manage-your-pricing/how-to-configure-subscriptions-in-limio-offers-with-initial-price-and-zuora-rate-plans) :
1. **Select the offer** and go to Products from the tabs towards the top of the screen. You will be presented with the view shown below.
2. **Add your products.** You will need to add each product to your bundle in turn. It will look like the image below. From release 114 onwards, you are able to add the same Product in a bundle.
1. **If you are using Zuora, you will need to select the rate plan for each product.** This will be the Rate Plan on the Product. If you are using Stripe Billing, this is not necessary to provide.
3. **Define the split on each product.** The split here refers to how the offer Price is attributed to each product. For example, an Limio Price of $20 per month with a split of $15 per month on product A and $5 per month on product B would be 75% and 25%.
### Bundle with External Pricing
**External Pricing:** If you are using [External Price](https://docs.limio.com/integrations/zuora-integration/manage-your-pricing/how-to-configure-subscriptions-in-limio-offers-with-external-price-and-zuora-rate-plans) on the Offer, you will not be able to set the split and the total offer cost will be the sum of the rate plans on each product, as defined in the connected billing system.
## **Known Limitations**
* **Rate plans with different billing frequencies:** You cannot mix different charge periods on rate plans e.g. monthly and annual. This will result in an error.
* **Products with multiple quantities:** If you plan on using the [quantity field](https://docs.limio.com/product/pricing/what-are-offers-and-how-to-configure-them/how-to-activate-the-quantity-field-to-sell-multiple-subscriptionsitems-at-once), bundles will not currently work.
* **Blocking purchase:** The does not currently work with bundles.
# Volume Pricing (Beta)
{% hint style="info" %}
*Please note that this functionality is in beta so we recommend you thoroughly test in your test environment before enabling this feature in production. This functionality is available in Release 112 and onwards.*
{% endhint %}
### Volume Pricing in Limio
Volume pricing allows you to charge based on the number of units purchased, making it suitable for scenarios like seat counts, gigabyte usage, or API calls for SaaS. Previously, Limio supported Volume Pricing charge models only with [External Pricing](https://docs.limio.com/integrations/zuora-integration/manage-your-pricing/how-to-configure-subscriptions-in-limio-offers-with-external-price-and-zuora-rate-plans). However, recognizing the demand for flexibility and control in managing more pricing in Limio, Volume Pricing can now be handled in [Offers](/product/pricing/what-are-offers-and-how-to-configure-them).
This guide will walk you through using Volume Pricing charge models in Limio. Note that this feature is still in Beta and may change over time.
If you're looking to charge per unit *actually consumed* (rather than per unit *purchased upfront*), see [Usage Pricing](/product/pricing/what-are-offers-and-how-to-configure-them/usage-pricing) instead.
#### Enable the feature
In order to use this feature, you will need to navigate to the Beta settings section of the Limio Commerce app. From the User profile dropdown in the top-right hand corner of the app, navigate to Settings. You will then need to select the Beta option at the bottom.
Selecting the Beta menu option in the Limio Commerce app General Settings paneOnce you have successfully navigated here, toggle the slider for the option marked "**Use Pricing Editor v2 instead of Pricing Editor v1?**". Remember to click Save at the top of the page. This will enable our new Pricing Configuration Editor which includes the ability to configure Recurring Volume Pricing.
### Configuring Volume Pricing for a Limio Offer
Volume Pricing can be configured for both Limio Offers and Limio Add-Ons. This guide will demonstrate how to set it up for a Limio Offer. The same steps apply when configuring an Add-On.
#### Steps to Configure Volume Pricing
1. **Navigate to Offers:**
* Go to the Offers tab and select your desired offer.
2. **Edit Price Attribute:**
* Locate the Price attribute within the selected offer.
* Click on it to begin editing.
3. **Select Pricing Type:**
* Choose "Recurring Volume" from the top options.
4. **Configure Pricing Tiers:**
* Define unit range and amount per tier
* Select between "Flat Fee" or "Per Unit" pricing for each tier.
* Flat fee: Customer is charged the list price if their quantity is within that tier.
* Per unit: Customer is charged the list price multiplied by the quantity selected, depending on what tier they are in.
5. **Set billing period**
* Specify the billing period of the charge, and whether the customer will be charged multiple times before renewal.
6. **Save Changes:**
* Fill in all necessary details and click "Save" to apply the configurations.
Once you have completed editing your offer, remember to Save and Republish the offer for the changes to take effect ([https://docs.limio.com/product/pricing/how-to-manage-offers-and-add-ons-versions-with-publish](https://docs.limio.com/product/pricing/how-to-manage-offers-and-add-ons-versions-with-publish "mention")) .
{% hint style="info" %}
When setting up volume pricing with Flat Fee tiers, it's advisable to specify a default minimum quantity for the Offer/Add-on. This value should match the ending unit of your first tier. Consequently, when using the Limio [Cross Sell component](https://docs.limio.com/components/component-library/cart-components/component-cross-sell), the offer/add-on will initially appear in the user's basket with this pre-defined quantity, ensuring the provision of the correct number of units.\

{% endhint %}
#### Configure a purchase experience using Volume-priced Offers and Add-Ons
[Limio Cart Items](https://docs.limio.com/components/component-library/cart-components/component-cart-items) component has full support for Volume-Priced Offers and Add-Ons, and will allow your customers to select a quantity easily when using either Flat Fee or Per Unit pricing.
**Flat Fee Pricing:**
* Tiers are displayed as single selectable dropdown options.
* Selecting a tier sets the order quantity to the tier's highest eligible quantity.
* Open-ended tiers are shown as: "51+", for example.
**Per Unit Pricing:**
* Features a standard number input for custom quantities.
* Input validation ensures quantities do not exceed the maximum configured limit, unless dealing with an open-ended final tier.
#### Note
Limio supports volume pricing tiers that differ from those set in a Zuora Rate Plan.
# Usage Pricing(Beta)
*Available from Release 114 onwards.*
### Usage Pricing in Limio
Usage Pricing allows you to charge based on how much a customer actually consumes, instead of a flat amount per period. It's suited to products where consumption varies between customers or over time. Previously, Limio supported usage-based offers only with [External Pricing](https://docs.limio.com/integrations/zuora-integration/manage-your-pricing/how-to-configure-subscriptions-in-limio-offers-with-external-price-and-zuora-rate-plans). From Release 114, the per-unit rate can be configured directly in Limio so admins manage it from the Price Editor like any other price.
This guide will walk you through using Usage Pricing in Limio.
#### Enable the feature
In order to use this feature, you will need to navigate to the Beta settings section of the Limio Commerce app. From the User profile dropdown in the top-right hand corner of the app, navigate to Settings. You will then need to select the Beta option at the bottom.
Toggle the slider for the option marked "**Use Pricing Editor v2 instead of Pricing Editor v1?**". Remember to click Save at the top of the page. This will enable our new Pricing Configuration Editor which includes the ability to configure Usage Pricing.
### Configuring Usage Pricing for a Limio Offer
Usage Pricing can be configured for both Limio Offers and Limio Add-Ons. This guide will demonstrate how to set it up for a Limio Offer. The same steps apply when configuring an Add-On.
#### Steps to Configure Usage Pricing
1. **Navigate to Offers:**
* Go to the Offers tab and select your desired offer.
2. **Edit Price Attribute:**
* Locate the Price attribute within the selected offer.
* Click on it to begin editing.
3. **Select Pricing Type:**
* Choose "Per Unit Usage" from the top options.
4. **Configure the charge:**
* **Currency**: the currency of the per-unit price (e.g. USD).
* **Price per unit**: the amount the customer is charged for each unit consumed.
5. **Set billing period**
* Specify the billing frequency (every X days, weeks, months, or years), and whether the charge runs for a fixed number of billing periods or open-ended. If fixed-term, specify how many periods.
6. **Save Changes:**
* Fill in all necessary details and click "Save" to apply the configurations.
Once you have completed editing your offer, remember to Save and Republish the offer for the changes to take effect ([Manage Offer Versions with Publish](https://docs.limio.com/product/pricing/how-to-manage-offers-and-add-ons-versions-with-publish)).
### Billing behaviour and checkout display
Usage charges bill **in arrears**: the customer is invoiced at the end of each billing period for the consumption that occurred during it. As a result, usage charges do not contribute to the upfront cart total at checkout.
The customer sees the per-unit rate and billing frequency, but no quantity selector and no charge applied to the order total. The first invoice with usage charges arrives after the first billing period closes.
# Cancel/Save Discount
Limio allows you to create Discounted offer, which are specific to the cancellation scenario. You can learn more on the cancel/save experience in the guide: [Create Personalised Cancel/Save Experience](/product/self-service/what-are-the-standard-functionality-of-limio-self-service-manage-my-account/how-to-create-a-personalised-cancelsave-experience)
This document will walk you through how to create a %-percentage discount offer for a cancel/save scenario.
{% hint style="warning" %}
**Note:** A Discount Offer is a separate concept than Promo Codes. It is specific to Cancel/Save scenario and cannot be used for acquisition and update orders.
Learn more about:[Promo Codes v2](/product/pricing/how-to-configure-and-implement-promo-codes)
{% endhint %}
## **Creating a Discount offer**
To create a new discount offer, follow these steps:
1. Select **Offers** from the navigation pane on the left.
2. Click the **Create** button in the top-right corner.
3. Choose **Add Discount** and configure the details.
After setting up the discount, you'll need to link it to a campaign. For guidance, see the section titled **Attaching Offers to Campaigns via a Label**.
#### **Configuring a Discount offer**
First set the **Discount** in %, the discount term (e.g. monthly), and the offer term.
Then attach the product and rate plan:
You will also need to configure the rate plan field on the offer. See [Zuora integration](https://docs.limio.com/integrations/zuora-integration) below for more details.
Finally, on the Page Builder, add the [Cancel Save Component](https://docs.limio.com/components/component-library/standard-components/component-cancel-save-offer).
## Zuora integration
If you are using Zuora, you will need to create a 0% Zuora Discount-Percentage (see [here](https://knowledgecenter.zuora.com/Billing/Subscriptions/Product_Catalog/B_Charge_Models/B_Discount_Charge_Models)). You may:
1. Create a generic Zuora Product to use across all Discounts
2. Create discount rate plans on different Zuora Products.
1\. is quicker to setup but 2. can allow for more granular reporting in Zuora.
Regardless of approach, the setup for a Zuora Discount-Percentage should use a 0% discount percentage. The Billing Period should define the length of the discount (e.g. 1 Month for an annual, 1 Year for an annual subscription).
## What about creating discounts that go beyond the term of an offer?
To create a discount which is longer than the term of an offer (for example, a 6 month 50% discount to be applied a monthly subscription), do the following:
* In Zuora, set the Billing Period to match the recurring period (e.g. month)
* In Limio, set the Offer Term matching the original Offer Term (e.g. 1 month):
* Finally, set the discount term to match the full discounted period (e.g. 50% for 6 months):
The Zuora config for this would look like the following:
To use multi-currency with discount plans, ensure the discount matches the offer's currency. For example, to apply a 50% discount on a USD rate plan, activate the 50% discount plan for USD. Navigate to the Product, select "Edit Price in Multi-Currency," and click "Activate" in the modal. (Learn more about Multi-Currency in Zuora [here](https://knowledgecenter.zuora.com/Quick_References/How_Do_I_._._./How_do_I_handle_multi-currency_in_Zuora%3F)).
# Add-ons
**Add-ons** in Limio allow you to sell a product alongside a core product, for example a Premium Support add-on alongside a Pro plan. They are either bought alongside a core [Offers](/product/pricing/what-are-offers-and-how-to-configure-them) or can be added to a Subscription that already has a core product.
Add-ons will generally **inherit the Term and Auto-Renew settings** from the parent Offer or Subscription. Therefore adding or removing an add-on will be co-termed with the parent offer or subscription.
### When to use add-ons
Add-ons can be used in various commercial scenarios, such as:
* For a **SaaS company**, to sell additional products alongside a core package.\
**Examples: analytics package, AI feature bundle, training services, or premium support.**
* For a **media company**, to extend a digital package.\
**Examples: adding a game subscription to a digital plan, or including event access.**
### Key behaviours of add-ons
* For **new orders**, the Add-Ons will inherit the term of the Offer.
* For **self-service**, the Add-Ons will be co-termed with the parent Subscription.
* If added mid-term, prorated charges apply for the remainder of the billing period.
* How **order processing** works for add-ons:
* For new Subscriptions, add-ons are included as part of the **Create Subscription** order in Limio.
* For self-service updates, customers can add or remove add-ons via the **Update Subscription** action in Limio.
* This triggers a corresponding **Add Product Order, Remove Product Order**, or a combination of both in Zuora.
* Learn more at [https://docs.limio.com/integrations/keeping-zuora-and-limio-in-sync/how-limio-events-updates-zuora-for-commerce](https://docs.limio.com/integrations/keeping-zuora-and-limio-in-sync/how-limio-events-updates-zuora-for-commerce "mention").
* Add-ons cannot be **cancelled** independently.
* Cancellation is applied at the Subscription level. Cancelling a Subscription removes all associated Offers, including the base Offer and any add-ons.
* However, as mentioned above, you can **remove an Add-On** from a Subscription.
Depending on your use case, consider the following alternatives:
* **Separate Subscriptions:** Useful if the additional product requires its own Term, billing cycle, or auto-renewal settings.
* **Offer Switch:** For cases where the customer is upgrading or changing their core Offer, rather than adding something alongside it. More details on [Switch](https://docs.limio.com/product/self-service/what-are-the-standard-functionality-of-limio-self-service-manage-my-account/how-to-create-a-personalised-switch-upgrade-or-downgrade-experience) here.
* **Bundle Offers:** When multiple products are always sold together as a package, consider grouping them in a single Offer
## Creating Add-Ons in Limio
The process of creating a subscription add-on is similar to the core Limio Offer concept. Go to 'Add-ons' from the left hand navigation and fill in the necessary information.
Out of the box, these are the fields available for configuration:
| Name | The add-on name. This is only visible in the Limio app | Yes |
| ------------------- | ----------------------------------------------------------------------------------------------------------------------- | --- |
| Add-on display name | The add-on name that will be visible to the end user | Yes |
| Label | The label used to include add-ons to a page | |
| Description | The description the end user will see | |
| Price | The price for this add-on. This can be defined in Limio or it can be pulled externally. | |
| Add-on type | You can define types for add-ons for easy categorisation | |
| Rate plan | The corresponding Zuora rate plan for this add-on | Yes |
| Allow Multibuy | If true, the customer can add multiple of this add-on to their basket. | |
| Default Quantity | Defines the starting quantity, the increments the add-on amount can be changed by and the minimum and maximum quantity. | |
Managing pricing is similar to Offers and will depend on what the billing system supports. Learn more at:
{% content-ref url="" %}
{% endcontent-ref %}
## Publishing Add-Ons
Add-Ons, just like Offers, are versioned and need to be published to be available to the sales channels, including Limio for Salesforce. This gives you greater control over your catalog and ensures updates are only visible once the corresponding page is republished. It also helps manage version control when selling through Limio Shop or Limio for Salesforce. Learn more at [Manage Versions with Publish](/product/pricing/how-to-manage-offers-and-add-ons-versions-with-publish).
## Add-Ons in New Order Components
If add-ons are selected during the new order journey, they will be incorporated during order processing and will appear in the Zuora subscription. Limio's Cart Items and Cart Summary support Add-Ons. Learn more at [https://docs.limio.com/components/component-library/cart-components](https://docs.limio.com/components/component-library/cart-components "mention").
## Add-Ons in Self-Service Components
To use the add-ons concept within Self-Service, please use and the [Create Update Subscription Experience](/product/self-service/what-are-the-standard-functionality-of-limio-self-service-manage-my-account/how-to-configure-an-update-subscription-flow).
# Discounts & Promo Codes (Beta)
Run promotions with reusable Discounts and the promo codes that redeem them. Beta — currently for Stripe Billing.
Discounts & Promo Codes are a new way to run promotions in Limio, built on two catalog objects that separate the deal from how customers claim it:
* A **Discount** is the deal: "20% off for 3 months", or "£10 off the basket", applied to everything or just specific items.
* A **Promo Code** is how customers claim it: the code they type at checkout, like SUMMER20, with its own redemption limit, start date and expiry date.
One Discount can power any number of Promo Codes, so changing the deal is one edit — not one edit per code. Both objects work like the rest of your catalog: templates, filtering, bulk actions and API access.
{% hint style="info" %}
**Beta**: Discounts & Promo Codes are in beta and currently work with **Stripe Billing only**. Support for Zuora, and for redeeming these promo codes through Limio for Salesforce, is planned for a future release.
{% endhint %}
**Which promo codes should I use?**
| Your setup | Use |
| -------------- | ------------------------------------------------------------------------------------------------------------- |
| Stripe Billing | This page — Discounts & Promo Codes |
| Zuora Billing | [Promo Codes v2](/product/pricing/how-to-configure-and-implement-promo-codes) (unchanged and fully supported) |
{% hint style="info" %}
**Note**: A Discount is a separate concept from the [Cancel/Save Discount](/product/pricing/what-are-offers-and-how-to-configure-them/cancel-save-discount) offer type, which remains specific to cancel/save journeys.
{% endhint %}
***
## Enable the beta
Go to **Settings > Beta** and turn on **"Use Limio Discounts"**. Two new entries appear in the Limio Catalog side panel: **Discounts** and **Promo Codes**.
Enabling the beta does not change how your existing Promo Codes v2 behave — codes of both versions can be redeemed side by side (see [Redemption at checkout](#redemption-at-checkout)).
## Create a Discount
In the catalog, go to **Discounts** and click **Create**. The following attributes define the deal:
| Attribute | Details |
| ----------------------- | ---------------------------------------------------------------------------------------------------------------------------------------------------------------------------------------- |
| **Display name** | The discount name shown to the customer when it is applied |
| **Display description** | Rich text description shown when the discount is applied |
| **Applies to** | **Basket** applies the discount to every item in the basket. **Line items** applies it only to offers carrying the label you select in the **Attached offers label** field that appears. |
| **Discount** | **Percentage discount** with a percentage value, or **Amount discount** with a currency and amount |
| **Duration** | How long the discount is applied for: a length and a type (months or years) |
| **Label** | Optional label for organising your discounts |
| **Stripe coupon** | The linked Stripe coupon — created for you with the **Create Coupon** button (see below) |
Discounts behave like other catalog items: you can manage attribute sets with templates (**Config > Templates**), filter and export the table view, edit in-line, and bulk update, copy or delete.
## Create the Stripe coupon and publish
Stripe applies discounts through **coupons**, and a Stripe coupon cannot be changed once created. Limio manages this for you:
1. Configure your Discount and click **Create Coupon**. Limio creates a matching coupon in Stripe and links it to the Discount.
2. Click **Publish**. Publishing requires a linked, in-sync Stripe coupon — if the Discount has no coupon, or you changed the Discount after creating the coupon, the publish fails and tells you to click **Create Coupon** first.
If you click **Create Coupon** when the linked coupon already matches the Discount, nothing is created and Limio confirms the coupon is in sync. If the Discount has changed, Limio creates a **new** Stripe coupon and re-links it — the old coupon is left behind in Stripe but no longer used.
{% hint style="warning" %}
Orders always use the coupon that was linked **at the time of the last publish**. If you change a Discount, remember to **Create Coupon** and **Publish** again for the change to take effect in your shop.
{% endhint %}
## Create Promo Codes
In the catalog, go to **Promo Codes** and click **Create**:
| Attribute | Details |
| ---------------------- | ----------------------------------------------------------------------- |
| **Promo code** | The code customers type at checkout. Matching is case-insensitive. |
| **Status** | Active or inactive. Inactive codes cannot be redeemed. |
| **Available quantity** | How many times the code can be redeemed. Leave empty for unlimited. |
| **Description** | Internal description |
| **Start date** | The date the code becomes redeemable. Leave empty to start immediately. |
| **Expiry date** | The date the code stops working. Leave empty for no expiry. |
| **Limio discount** | The Discount this code redeems |
The Promo Codes table also shows the **redeemed quantity** for each code, so you can track uptake of a campaign at a glance.
## Redemption at checkout
Customers redeem codes through the same **Promo Code Redeem** component you may already use today — no page changes are required.
When a customer applies a code and the beta is enabled, Limio first looks for a matching new-style Promo Code; if none exists it falls back to Promo Codes v2, so existing campaigns keep working during the transition.
A new-style code is applied when all of these checks pass — otherwise the customer sees the component's invalid-code message:
* The code is **active**
* The current date is within the **start and expiry dates**
* There is **available quantity** remaining
* The linked Discount exists and is **published**
* For **amount discounts**: the basket currency matches the discount currency
* For **line items** discounts: the basket contains at least one offer with the attached offers label
When the discount is applied, the basket totals update to show the saving — for line-item discounts on the matching items only, for basket discounts across the whole order. Line item totals never go below zero. Customers can remove an applied code and enter a different one.
## What happens on the order
When the customer places the order, the subscription created in Stripe carries the Stripe coupon linked to the Discount, so Stripe bills the discounted amount for the configured duration. The Limio subscription records the Discount that was applied.
Redemption counting is only committed on success: the code's redeemed quantity increases by one when the order completes, and is restored if order processing fails — abandoned or failed orders never consume codes.
## API access
Both objects are available through the Limio API:
* [Promo Codes API](https://docs.limio.com/api/catalog-api/promo-codes) — create and manage promo codes, including the linked discount reference
* [Catalog API](https://docs.limio.com/api/catalog-api/catalog) — query discounts with `record_type=discount` (published only, or all versions via the catalog items endpoint)
## Current limitations and roadmap
* Discounts work with **Stripe Billing only** in this release. Zuora support is planned as a later phase of the same initiative.
* Redeeming these promo codes through **Limio for Salesforce** is not yet supported and is planned for a future release.
* Existing discount offers, discount add-ons and Promo Codes v2 are unchanged — nothing is removed or migrated by enabling the beta.
# Promo Codes v2
{% hint style="info" %}
This page documents **Promo Codes v2**, which work with **Zuora Billing** and remain fully supported. For the new billing-agnostic model — a reusable **Discount** powering one or more promo codes, currently available for **Stripe Billing** — see [Discounts & Promo Codes (Beta)](/product/pricing/discounts-and-promo-codes).
{% endhint %}
*Note: This is available from R106 and onwards.*
Limio has replaced our legacy promo codes with Promo Codes v2. We have built Promo Codes v2 with the intention of streamlining the configuration process, allowing more powerful controls on the promo code application, and enabling new promo codes' types such as setting an amounts (-£10).
Promo Codes v2 offers a more intuitive user experience, and more control over how you leverage Zuora and Limio to create Promo Codes that suit your specific marketing campaigns.
The video below gives an overview of the new Promo Codes functionality, including:
* How to configure them
* How they integrate with Zuora
* How to deploy them on a Limio page
{% embed url="" %}
## Enable Promo Codes v2
To use Promo Codes, you will need the Promo Codes permission in Users > Permissions.
Before you can start configuring promo codes v2, you will need to enable them on so that the Limio App knows which version of promo codes to use. To do this, go to:
Settings > General Settings > Beta > Use Promo Codes v2 instead of Promo Codes v1?
Then, if you head to Promo Codes from the Catalogue, you will see the v2 interface. You can check this by looking at the site url, you should see:
```auto
/objects/promo_codes_v2/limio
```
## Configuring Promo Codes
In the Promo Codes interface you will see all the promo codes that you have configured. You can create a new one by clicking the button in the top right, at which point a modal will appear in which you can configure your promo code.
The following fields are available:
| **Promo Code** | The code you want to use for this promo code. This must be letters and numbers only. We will automatically save all promo codes as all capital letters. You will not be able to create multiple promo codes with the same name, for example PROMO and promo. |
| -------------------- | ---------------------------------------------------------------------------------------------------------------------------------------------------------------------------------------------------------------------------------------------------------------------------------------------------------------------------------------------------------------------------------------------------------------------------------------------------------------------------------------------------------------------------------------------------------------------------------------------------------------------------------------------------------------------------------------------------------------------------------------------------------------------------------------------------------------------------------------------------------------------------------------------------------------------------------------------------------------------------------------------------------------------------------------------------------------------------------------------------------------------------------------------------------------------------------------------------------------------------------------------------------------------------------------------------------------------------------------------------------------------------------------------- |
| **Status** | The status of the promo code, active or inactive. If the promo code is inactive, it will not be usable by customers. |
| **Quantity** | How many of these promo codes you want to be available. Especially useful for campaigns when you want to configure a finite amount, or if you want single-use promo codes for individuals. Leaving Quantity empty means unlimited codes. |
| **Description** | The internal description of the code. |
| **Start / End Date** | The period the code will be active for. Especially useful for seasonal or temporary marketing campaigns (e.g. Black Friday, Christmas). If no dates are set, then the promo code will be active unless the status changes to inactive or the quantity is reached. |
| **Applies To** |
This allows you to control which basket items the code will apply to.
- Whole Basket will apply the discount to every item in the basket.
- Selected offers and add-ons allows you to define specific items to apply this code to. If this option is selected, an additional field will appear allowing you to define the offer label which will identify which offer or add-on to apply the discount to. If the offer or add-on that is associated with this code does not appear in the cart when the code is applied, the code will not be applied to the basket.
|
| **Product** | The **Zuora** **product** that this promo code will associate with. This could be a standalone Discounts product or any product such as Digital or SaaS Premium. |
| **Discount Type** | Choose the type of the discount, between Amount Discount and Percentage Discount. |
| **Rate Plan** |
Choose the relevant Zuora Rate Plan that the redeemed Limio Promo Code will subscribe to. The corresponding Rate Plan in the Zuora Billing Catalog must be configured with a Discount charge model:
For Amount Discount: The Zuora rate plan charge must use Charge Model: Discount - Fixed Amount (this sets the charge's model to DiscountFixedAmount)
For Percentage Discount: The Zuora rate plan charge must use Charge Model: Discount - Percentage (this sets the charge's model to DiscountPercentage)
Important: Regular charge models like Flat Fee, Per Unit, etc. will NOT appear in the Rate Plan dropdown. Limio filters rate plans by the charge model to match your selected Discount Type.
Additional requirements:
Set Apply Discount To: to All Charges in the Subscription
Ensure the Discount Rate Plan in the Zuora Billing Catalog is activated for all currencies the Promo Code might be redeemed with. Redemption will fail if the currency is not activated.
Other Rate Plan settings (e.g. Billing Period) can be configured in Zuora, or controlled from Limio via Rate Plan Overrides.
|
{% hint style="warning" %}
**Start and End Dates are interpreted in UTC**, taking effect at midnight (00:00) UTC on the listed dates.
**Start Date:** a code with Start Date `7 September` becomes active at 00:00 UTC on 7 September.
**End Date:** a code with End Date `8 September` becomes invalid at 00:00 UTC on 8 September — at the very start of 8 September, not the end of any day. To keep a code valid throughout its intended final day, set End Date to the **following day** (e.g. set `9 September` for a code intended to be valid throughout 8 September).
{% endhint %}
To search and filter promo codes, use the search bar at the top of the Promo Codes page. Type the attribute (e.g., Amount discount, Created, Status) and the value you want. The list will update automatically to show relevant promo codes.
## Rate Plan Overrides
Limio also offers the ability to overwrite the Zuora Rate Plan. This means that if you would prefer to just have an arbitrary rate plan for amount ($0) and percentage off discounts (0%) in Zuora, and handle all the specific configuration through Limio, that is also possible! Generally we recommend this approach.
To do this, you will first need to select a Rate Plan in the Promo Code Configuration. At that point, some more fields will appear prompting the user to overwrite the discount if they wish.
### Amount Discount
When Amount Discount is selected, the following fields will be visible:
| **Currency** | The currency of the discount value (e.g. USD) |
| ----------------------------------- | ------------------------------------------------------------------------------------------------------------------------- |
| **Amount Discount** | The numeric amount to be discounted (e.g. 15) |
| **Duration Length & Duration Type** |
The amount of time to apply the discount for. E.g. 1 Month
Duration Length = 1
Duration Type = Month
|
### Percentage Discount
When Percentage Discount is selected, the following fields will be visible:
| **Percentage Discount** | The % amount to discount (e.g. 25) |
| ----------------------------------- | ------------------------------------------------------------------------------------------------------------------------ |
| **Duration Length & Duration Type** |
The amount of time to apply the discount to. E.g. 1 Month
Duration Length = 1
Duration Type = Month
|
## Known Limitations
#### Override Fields
Please note that if the rate plan override fields are not used, there are a few limitations:
* The order total in Limio Commerce > Subscriptions won't be inclusive of the discounted price.
* The [Order Confirmation](https://docs.limio.com/components/component-library/legacy-configuration-components/component-order-confirmation) component will display the wrong price paid to the customer if they purchased a gift with a promo code that did not use the rate plan override fields.
#### Billing Frequency
We recommend aligning the billing period of the rate plan or duration type in the override field of your promo code to the billing frequency of your offer. If the billing frequency of your offer is longer than the billing period or duration type of your promo code, the discount will be prorated.
For example, let's say the customer has an offer which costs £120 and has a billing frequency and term of 1 year, and they have applied a 50% off promo code that has a duration of 1 month. The promo code will give a discount on the prorated monthly cost of the annual subscription. In this case, the £120 offer will now cost £115, which could be confusing to customers expecting to see the offer costing £60 with the discount.
## Redeeming a promo code on a Limio Page
To add the ability to redeem your promo codes, you will need to make use of one of the new [Cart Components](https://docs.limio.com/components/component-library/cart-components), specifically, the [Promo Code Redeem](https://docs.limio.com/components/component-library/cart-components/component-promo-code-redeem) component.
First, you'll need to navigate to the page on which you want the end user to redeem their code. This tends to be a [cart or checkout page](/product/checkout/overview-how-to-customise-the-limio-modular-checkout).
From here, simply locate where you want the promo code redeem text to appear, and you can add the component to there!
\
Once you have saved and rebuilt the page, you can test out the purchase flow and you should see your promo code being applied:
The Limio Cart Components will extend to include any Promo Code logic. For example, the BILLING-DETAILS will adjust the amount due, and the CART-SUMMARY will recognise the updated price with the discount applied. You can also update the copy of these components from their respective props.
For Promo Codes on specific cart items, you can combine these with the new Upsell and Cross Sell functionality that will soon be available in Limio to make an even more customisable shop experience.
## Apply a promo code to a purchase link
You can automatically apply a promo code to your customer's basket by appending "\&pc=promocodename" to the end of your purchase link.
For example, `https://www.domainname.com/checkout?purchase=true&label=digital&pc=PROMO123`
If the promo code is expired, invalid, or not compatible with the items in the basket, the offer will still appear in the basket but the promo code will not be applied. For more information on creating and configuring purchase links, see:
{% content-ref url="/pages/c0KGxYCq0VzmaKg66nhq" %}
[Purchase Links](/product/checkout/how-to-configure-purchase-links)
{% endcontent-ref %}
# Entitlements
Subscribers expect immediate access to their purchases upon confirmation. This can be complex with multiple systems involved in order provisioning or fulfillment. Introducing Limio Entitlement! Limio, as a commerce platform, is the first to recognize successful purchases and can provide real-time webhooks to Access and Identity platforms for granting specific features. Entitlements refer to the features or access a customer receives when subscribing to a product. For instance, a basic subscriber might receive an online product, while a gold subscriber gains an online product plus a physical product and online support.
## **Creating and mapping Entitlements**
To create an Entitlement within Limio, click Entitlements on the Catalog side menu. Click on the "+" button, then "Add Entitlements". Make sure to give the Entitlement a name and a label. A code can also be provided to identify the Entitlement within a system external to Limio.
To associate an Entitlement to a product, click Products on the Catalog side menu. Click on your desired Product, then click on the Entitlements tab. Select your desired Entitlement from the list, and press the Save button in the top right corner.
From there, the Entitlement will map to Offers through the Product. Ultimately, Subscriptions will have the Offer. See a full diagram:
## **Propagating** **an Entitlement to other systems**
Once the webhook endpoint is setup, Limio will automatically fire entitlements for New Orders, Switch and Cancel/Save. Here is an example of entitlement webhooks sent to Salesforce.
The payload is described in:
{% content-ref url="" %}
{% endcontent-ref %}
Note that it is possible to send synchronous webhooks (i.e. the order will fail if the webhook is not successfully received by your entitlement system). Learn more at:
{% content-ref url="" %}
{% endcontent-ref %}
# Catalog Management
Limio Offers are a fundamental concept of Limio. Customers will purchase an Offer or upgrade/downgrade to different Offers. Offers can represent a recurring pricing, a one-time pricing, and can bundle various products. If you want to better understand what individual Offers do, go [here](https://docs.limio.com/product/pricing/what-are-offers-and-how-to-configure-them#what-are-limio-offers).
It's important to note that Limio Offers can be purchased standalone and will create a Limio Subscription (as well as a Zuora Subscription). If a subscriber purchases 2 Limio Offers, they will then have 2 Limio Subscriptions (and 2 Zuora Subscriptions).
If you wish to add products and pricing to an existing Subscription, you should consider using Limio Add-Ons. [Add-ons](/product/pricing/what-are-add-ons-and-how-to-configure-them)
This document explains the workflow around Offers. Add-Ons are attached in the same way as Offers, so the steps described here will also work for Add-Ons.
Content:
## Offers Overview
You will find Offers within the core navigation of the application.
*Screenshot: New Offers section available on the left navigation menu*
Read more about searching and filtering here: [Search, Filter, and Edit](/product/pricing/how-to-create-offers-and-add-ons-to-attach-to-pages/how-to-search-filter-and-edit-your-pages-offers-add-ons-and-products)
All the created offers will visible in able via in the new Offers section. Details of these offers can be seen in table view and the columns to view can be added or removed from the settings icon on the right side of this view.
*Screenshot: Table View for offers and settings icon for filtering columns*
*Screenshot: Adding/removing the columns in table view*
### Viewing an offer
Just click on offer name and the offer will open.
*Screenshot: Click on an offer to open or edit the offer*
### Searching for an offer
Search is currently case sensitive and works the same as the current search function with exception of the save search functionality. ***Read:***
*Screenshot: Searching an offer using search feature*
### Edit In-Line Offers
It is possible to edit in-line Offers. Click on the pencil, edit the required fields, and confirm via the tick icon.
### Bulk Updating Offers
You can edit multiple offers simultaneously in the offer table by selecting the checkboxes next to the offer names. This feature enables you to modify the attributes of the selected offers all at once, and also provides the option for bulk deletion of these offers.
*Screenshot:Bulk Edit for offers*
Select all option for bulk editing is also available which reduces the manual task of selecting the offers. You can use it along with the search criteria on offer table to edit selected set of offers.
*Screenshot:Bulk Edit using select all*
When you click on bulk update and follow through the steps the last message will show you the offers you successfully updated.
*Screenshot:Offers updated using Bulk Update Option.*
## Creating offers
To create a new offer, click on the create button in the top right corner
*Screenshot: Creating an offer*
### Duplicating an Offer
This is done on an offer level. In drop down menu, click Duplicate current.
*Screenshot: Duplicating an offer*
## Adding Offer Labels
### Label Setup - Config > Templates
To use labels on offers, just make sure that it's selected on the offer template you are using.
*Screenshot: Label*
Labels can be added to the offers from the labels dropdown. You can also create new labels.
Multiple labels can be added to single offer. To remove a label, just remove the label pill by clicking on the close button (x). Note: In the future every offer will need to have at least have one label.
*Screenshot: Using new label to create new labels*
*Screenshot: Adding new labels*
*Screenshot: Adding multiple labels to offers*
### *NB. Saving Offer*
Once the new label is created, Click on save option on the right top corner to save the changes to the offer
*Screenshot: Click save after making any changes to the offer*
## **Attaching Offers to Pages via an Offer Label**
Offers can be added to the page by navigating to the Pages, clicking on Settings and going to the **Attached Offers.**
By selecting a label from the label dropdown list, you will be able to add the offers associated to that label. You can only add one label to a Page, however you can add the same Offer Label to multiple Pages.
*Screenshot: Adding offers to page using label from the dropdown*
*Screenshot: Attaching the offers to the page*
### Changing Offers on Pages
Change the offers on a page by just clicking on the Pages and changing the label.
### Navigating to offer
Just click on Offer name and the offer will open.
## Set or Update an Offer Version
Limio can version offers in order to avoid offer updates to be immediately distributed to third-parties (via API), to agents (via Limio for Salesforce), or purchasable directly by customers (via Limio Commerce Purchase Links).
If you are using Offer Version (learn more at [Manage Versions with Publish](/product/pricing/how-to-manage-offers-and-add-ons-versions-with-publish)), you will need to build and publish a Page to set or update the version of the Offer. This may require you to create an empty Page for the sole purpose of managing the Offer Versions.
If you do not set an Offer version, the **Offer will not be visible in Limio for Salesforce, Limio Catalog API and Limio Commerce Purchase Links.** If you do not re-publish the Page after editing the Offer, your latest changes will not be visible in those features and only the last version will be visible.
# Search, Filter, and Edit
In the Limio Pages, Offers, Add-ons, or Products tabs, you can quickly find and edit your catalog items.
## Filter
Apply filters by using the search bar at the top of the page.
You can add the attribute you want to search for (eg: Name, offer type, etc) and enter the value you want to filter the entries by. You can add multiple attributes.
To scan information more quickly, navigate to the cog on the top right of the table. From there you can select which columns to view on the page.
## Bulk actions
You are also able to bulk update, copy, or delete your catalog items.
### Bulk Update
Once all the target offers have been selected (we recommend no more than 300 items), click on the "Bulk update" option at the bottom of the page.
For the bulk update UI, it provides different features of the page or offer to target. In the screenshot below, it's the offers attributes. Once the option is selected, click on "Next Step".
From there, you can update any fields for the available templates associated with the pages or offers.
## In-line editing
Edit information directly in the table view with in-line editing, which allows you to quickly modify information without opening each item. To trigger in-line editing, click the pencil icon in the top right corner.
## Export
Export your table by clicking the cloud icon in the top right corner. You can then decide whether to export all columns or just the visible columns, and all results or just the current filtered results. Historical jobs are also stored for later reference.
# Export
On the Pages, Offers, Add-Ons and Products pages, from *v100*, you can now export to CSV your filtered items view. To export your results, navigate to the download icon on the top right of the table. From there you can select your export preferences.
Within this view you can choose to export only the columns currently visible on the page or all possible columns for the item type. You can also decide to export the currently filtered results as set in the table or an unfiltered list of items.
Click the "Export" button to initiate the export job. Once the export is complete, a download icon will appear in the related row of the table. By clicking this icon the CSV will be downloaded to your computer.
You can now view your export history by accessing the "Historical Jobs" tab. Here, you can see which columns and filters had been applied to previous exports. You also have the option to download that exported file or generate a new export based on the most current data.
# Manage Versions with Publish
For offers and add-ons to appear in **purchase links** or in **Limio for Salesforce**, they must first be **published**.
Publishing creates a **version** of each offer and add-on. This versioning is important because it gives you control over when updates go live. For example, you might make a change in the **Limio Catalog** that you don’t want customers to see immediately. By managing versions, you can decide exactly when those changes become available online or in Limio for Salesforce.
Versioning also ensures consistency across Limio features that depend on offers and add-ons, such as **cross-sell** and **upsell** functionality, which require published and up-to-date versions of the relevant offers.
There are two ways to publish: directly from the catalog (below), or via a page (Steps 1–2).
## Publish directly from the catalog (Release 116 and later)
Offer and add-on pages in the catalog have their own **Publish** and **Unpublish** buttons next to Save. Publishing an item directly creates a new published version immediately — no page rebuild required.
The new version is immediately live everywhere that reads published offers and add-ons: **Limio for Salesforce**, **upgrade and downgrade options**, **cross-sells and upsells**, and **purchase links**.
{% hint style="warning" %}
Shop pages are unchanged: they render the versions bundled at page build time, so a rebuild and republish is still required for changes to appear on shop pages.
{% endhint %}
## Step 1: Attach the offer or add-on to a page
1. Open the **Page Builder** in Limio.
2. Add the **offer label** or **add-on label** to a page.
3. Click **Save** to confirm your changes.
💡 If you are only using [Purchase Links](/product/checkout/how-to-configure-purchase-links)or want to update offers for Limio for Salesforce, you can create a **dedicated publishing page** (sometimes called a **dummy publishing page**) that contains all offers and add-ons you want to make available. Make sure that this page [is not indexed](https://docs.limio.com/product/seo/how-to-configure-the-seo-metadata-of-your-pages) and behind an [authentication](https://docs.limio.com/product/authentication/authentication-provider-per-page) gate to restrict access.
## Step 2: Publish the page
Once the offer or add-on is attached to a page:
1. Click **Build** > **Rebuild** to generate the latest version of the page.
2. Click **Publish** to make it live.
The most recent published version of the page will automatically update all offers and add-ons it references, ensuring the latest published versions are available online and in Limio for Salesforce.
## Important: Changes are only live after republishing
Edits to a published offer or add-on are not automatically live. For changes to appear on your **shop pages**, you must still **rebuild and republish** a page that contains those offers or add-ons. For Limio for Salesforce, purchase links, cross-sells/upsells and upgrade/downgrade options, you can instead publish the offer or add-on directly from the catalog (Release 116 and later).
For example, if you change the price of an add-on and save it in the Catalog but don’t republish the page that includes it, your customers will still see the previous version online and in Limio for Salesforce.
## Summary
| Action | Description |
| ------------------------------------ | ----------------------------------------------------------------------------------------------------------------------------------------------------------------------- |
| **Publish from the catalog (R116+)** | Publishes the offer or add-on directly — live immediately in purchase links, Limio for Salesforce, cross-sells and upgrades. Shop pages still require a page republish. |
| **Attach to a page** | Add the offer or add-on label to a Limio Page. |
| **Build and publish** | Makes the offer or add-on live in purchase links and Limio for Salesforce. |
| **Republish after edits** | Ensures the latest version is visible to customers. |
Our Limio [Get Offers v2 API](https://docs.limio.com/api/catalog-api/catalog#get-offers-v2) and [Get Add-ons API](https://docs.limio.com/api/catalog-api/catalog#get-add-ons) both allow you to distinguish whether you want to retrieve published offers/add-ons or all offers/add-ons in your catalog. Within the API, a version will be a unique identifier, such as:
```auto
version": "4dd34671f26fdbbf240560b78f7f2f54654cde72"
```
## Related articles:
[Publish/Unpublish Pages](/product/page-builder/how-to-publishunpublish-your-pages-online)
[https://docs.limio.com/support/troubleshooting/i-cant-publish-my-pages](https://docs.limio.com/support/troubleshooting/i-cant-publish-my-pages "mention")
# Page Builder Overview
With Limio, marketers can change the visuals of their Limio Shop & Self-Service pages through the Page Builder .
The Page Builder works with 'components' which are pre-built sections which provide a set of functionality, like a hero banner, an offer display, or a Youtube video.
To see a list of available Limio components, check our user guide: [What are the Limio Components available on the Page Builder](https://docs.limio.com/components/what-are-the-limio-components-available-on-the-page-builder). Page Builder also supports custom components built by external developers in a modern Developer Experience. Learn more about custom components [here](https://docs.limio.com/developers/custom-components/custom-components).

## **Creating a page**
You can create a page from scratch or based on another existing page. To create a page from scratch:
1. Click Pages in the left menu panel.
2. Click Create in the top right corner.
3. Click Create from scratch, click next.
4. Add a Page Name and select a page template. The attributes displayed are based on the page template that can be found in the Config tab in the bottom right corner.
5. Click save. You will be redirected to your new page.
To create a page based on an existing page:
1. Click Pages in the left menu panel.
2. Click Create in the top right corner.
3. Click Create from existing page, click Next.
4. Click the grey + icon.
5. Search for the page you want to create your new page based off of. Please note that you can only create a new Page in Page Builder v2 based off of other Pages specifically in the Page Builder v2. You cannot select a page in Page Builder v1.
6. Select the page, click next.
7. Add a Page Name and select a page template. The attributes displayed are based on the page template that can be found in the Config tab in the bottom right corner.
8. Click save. You will be redirected to your new page.
## **Modify page settings**
Click the Settings button in the top right corner. This will allow you to further customise your page.
**Page Configuration:**
* **Template:** Select an existing page template. Page templates can be created or updated by navigating to Config > Templates > Pages.
* **Tag:** Displays the URLs to reach a page. A tag can only be used on one page, and a page can have multiple tags if needed.
* ***Important note:*** \_When adding another tag to a published page, the page must be unpublished first before adding the extra tag. Once added, confirm the settings > save the page > then rebuild and publish.\
\_
* **Require Authentication:** If the require authentication toggle is turned on, then the user will need to be authenticated to access the page. This is useful in self-service or checkout pages.
* You can also select the exact authentication mechanism to use. This can be useful to remove authentication for guest checkout or to use a specific identity provider on a given domain. Learn more about authentication per page [here](https://docs.limio.com/product/authentication/authentication-provider-per-page).
**Attached Offers & Add-ons:**
Once you've [created an offer or an add-on](https://docs.limio.com/product/pricing/how-to-create-offers-and-add-ons-to-attach-to-pages#offers-overview), you can add them to your page.
* **Label:** Select an offer label if you want to display offers on the page. Once a label is selected, the relevant offers will be displayed.
* **Sort:** The order in which the offers are listed are the order that they will appear in the offer component used. To rearrange the order of the offers, click on the arrows on the left of the columns.
* **Verify:** You can modify the offer table columns by clicking the grey gear in the right corner.
**Attributes**
Page attributes are displayed based on which page template is set above. The attributes of a page are determined by closing the Settings view, and then navigating to Config > Templates > pages.
## **Adding a new component**
Click on any "+ Add Component" button. This will display the Components selector.
Components are organised by type (eg Acquisition or Checkout), and specific components can be searched for using the search bar in the top right corner. At the bottom, you can find custom components.
## **Moving a Component**
Reorder components by hovering over the component you want to move, and using the purple icon with 6 dots to drag and reorder.
## **Editing a Component**
To edit a component, click on the purple pencil icon and then on the right hand side you will be able to change the visuals, wording, URL links and other properties associated with the component.
Make sure to click Confirm after making changes.
## **Deleting a Component**
To delete a component, simply hover over the component and click on the "x" option at the top right.
**Style and Fonts**
Apply custom CSS styling by clicking on the Style button in the top right corner.
Read more about styling here: [Configure Styling](/product/page-builder/page-builder-overview-of-key-features/updating-page-styling-using-the-style-editor)
**Preview page as customer**
You can input a user ID to preview your page from a specific customer perspective.
Read the guide here: [View Page from Customer Perspective](/product/page-builder/page-builder-overview-of-key-features/how-to-view-a-page-from-a-customer-perspective)
If you have any questions, please email us at .
# Configure Layout
### Selecting a Page Builder Layout
The Page Builder allows you to customise your page layout, with the layout automatically adjusting based on the selected template. Here are the available layout options:
1. **Default Layout**
* Includes: Header, Body, and Footer.
* Suitable for basic pages without additional navigation or columns.
2. **Left Navigation Layout**
* Includes: Header, Body, Footer, and a Left Navigation panel.
* Ideal for pages requiring a navigation menu on the left.
3. **Right Navigation Layout**
* Includes: Header, Body, Footer, and a Right Navigation panel.
4. **Two Column Layout**
* Includes: Left Column and Right Column of equal width.
* Use this layout to display content side-by-side with equal emphasis.
5. **Two Column Layout – 60/40**
* Includes: Header, Footer, Left Column and Right Column, with the left side occupying 60% of the width and the right side 40%.
* Best suited for pages requiring a larger primary content area alongside secondary content, like a checkout and a cart.
#### Template-Specific Layouts
When you change the template of a page in the **Config** section, the relevant layout for that template will automatically be applied in the Page Builder. This ensures consistency between the chosen template and its intended layout design.
#### Where to Configure Layouts
To configure the default layout for a specific template:
1. Navigate to **Config > Page Templates > select a Page template > go to Layout tab.**
2. Select the appropriate layout for the template.
# Configure Styling
You can update your page's look and feel using CSS from the style editor in the Page Builder.
Open the style editor by clicking on Style in the top navigation. Once the Style editor is open, you can add the relevant CSS.
You can preview what your page will look like on Mobile or Tablet by selecting the device.
Don't forget to save any edits you make.
### Using Global Styles in Limio
You can create a global stylesheet and reuse it across multiple pages by importing it into each page’s style editor. This helps keep styling consistent and easier to maintain.
Follow the steps below to set this up.
#### 1. Create your global CSS file
Start by creating a CSS file that contains styles to be shared across pages, such as base typography, design tokens, and common components.
Example:
```
body {
margin: 0;
font-family: Inter, Arial, sans-serif;
color: #1a1a1a;
}
/* ===== Design tokens ===== */
:root {
--color-primary: #0055ff;
--color-secondary: #00a3a3;
--spacing-sm: 8px;
--spacing-md: 16px;
--spacing-lg: 32px;
}
/* ===== Shared components ===== */
.button {
padding: var(--spacing-sm) var(--spacing-md);
border-radius: 4px;
background: var(--color-primary);
color: white;
border: none;
}
/* ===== more global styles ===== */
...
```
#### 2. Upload the stylesheet as an asset
1. In the Limio sidebar, navigate to **Assets**.
2. Create a new asset (for example, **Global Styles**).
3. Drag and drop your global CSS file into the asset upload area.
4. Save the asset.
5. Copy the asset URL from the clipboard icon on the right-hand side.
#### 3. Import the global stylesheet into a page
1. Navigate to the page where you want to apply the global styles.
2. Open the page’s **Style Editor**.
3. Import the global stylesheet using the asset URL you copied, for example:
#### 4. Verify the styles
Once imported, the global styles should be applied to the page. You can still add page-specific styles below the import to override or extend the global styles as needed.
# Find Offer Labels in Pages Table
When publishing an offer or add-ons, it’s important that the correct offer label is attached to a page. If you're having trouble publishing an offer or an add-on, you can use the **Pages Table** to help debug the issue.
You can do this by using the **Attached Offer Label** filter in the Pages Table. This lets you check which pages are connected to specific offer labels.
See [How to configure Offer Labels in Limio](https://docs.limio.com/integrations/zuora-integration/manage-your-pricing/how-to-configure-subscriptions-in-limio-offers-with-initial-price-and-zuora-rate-plans) to learn more about offer labels.
### How to use the "Attached Offer Label" filter
1. Go to the **Pages Table** in Limio.
2. Select the filter option for **Attached Offer Label**.
3. Enter the label(s) you want to check.
This will return a list of all pages that are currently linked to those labels. It’s a quick way to confirm whether your offer is connected to a page.
> *ℹ️* **Tip**: When entering multiple labels, be mindful of the filter logic. You can choose between:
>
> * **Any**: Returns pages with **any** of the entered labels.
> * **All**: Returns pages that contain **all** of the entered labels.
>
> This selection will impact your search results, so use it depending on what you're troubleshooting.
### When should I use this?
This filter is useful when:
* Your offer is not appearing on a page.
* You want to confirm that a page is correctly linked to multiple offers.
* You’re debugging publishing issues related to offer visibility.
* You want to safely clean up offer labels in your catalog.
For more guidance on using offers, pages, and products tables in Limio, find our article [Search, Filter, and Edit](/product/pricing/how-to-create-offers-and-add-ons-to-attach-to-pages/how-to-search-filter-and-edit-your-pages-offers-add-ons-and-products).
# View Page from Customer Perspective
| 🌟 This feature is coming soon. Check out our [https://docs.limio.com/release-notes/](https://docs.limio.com/release-notes/ "mention"). |
| --------------------------------------------------------------------------------------------------------------------------------------- |
# Products, Offers, and Pages Relationship
This article describes the relationship between Limio pages, offers and products.
Understanding how these entities are interconnected will help you effectively create and manage successful marketing campaigns.
In Limio, each **Product** is associated with a Zuora product, which, in turn, is linked to a rate plan. Products can have a set of entitlements which define the permissions granted to customers who subscribe to that product.
**Offers** in Limio represent bundles or packages of products. An offer can consist of one or multiple products, allowing for versatile product combinations. Additionally, each product can belong to multiple offers, enabling targeted marketing efforts.
Finally, you can create **Pages** aimed at promoting specific products or offers. A page can include multiple offers, providing the flexibility. Similarly, each offer can be associated with multiple pages, ensuring cross-promotion and broad marketing reach. Pages can also be used without offers or products attached, for example in a checkout or static content view.
# Publish/Unpublish Pages
## How to publish/unpublish your pages online
You can control whether a page is visible to customers by publishing or unpublishing it from the Limio Page Builder.
### What is publishing?
Publishing makes your page live and accessible via the browser. Any updates made in the Page Builder only become visible to customers after the page is republished.
### What is unpublishing?
Unpublishing removes the page from public access. Visitors who try to access the URL will receive an error. You can still view and edit the page in the Page Builder; it just won’t be available online.
### What is preview?
**Preview** allows you to see how your page will look to customers before making it public. This is useful for seeing how layout and design will look in the browser for desktop, mobile or other devices
Preview does **not** make the page accessible to customers and does **not** require publishing. Note that Preview does not currently support mocking up data (for example a cart or a subscription).
### How to publish a page
1. In the **Limio Page Builder**, open the page you'd like to publish.
2. Make sure your changes are saved via the **Save** button.
3. Click on **Builds** and then hit **Rebuild** to start building your page.
4. After a few minutes, the **Page** can be published by clicking on Publish.
5. The page will now be live at the page’s configured URL.
✅ Tip: After publishing, open the page in a private browser window to confirm it appears as expected.
{% embed url="" %}
#### When should I republish?
You should republish your page whenever:
* You make layout, content, or component changes.
* You switch page templates or layouts (e.g. switching to the **60/40 layout**).
* You change the authentication settings or Page SEO.
* You update offers or pricing and want them reflected on the live page, or you need to update their [version](https://docs.limio.com/product/pricing/how-to-manage-offers-and-add-ons-versions-with-publish).
Changes are only visible once published.
### How to unpublish a page
1. Go to the **Limio Page Builder** and open the page you want to remove from public view.
2. Click the **Build** button in the top right.
3. Select **Unpublish**
4. The page is now offline and cannot be accessed by customers.
🛑 Important: If the page was previously indexed by search engines, it may still appear in results temporarily. Consider using SEO settings or redirects for better control.
### How to preview a page
1. Open your page in the **Limio Page Builder**.
2. Make any required changes and click **Save**.
3. In the top-right corner, click **Preview**.
4. A new tab will open showing a preview version of your page.
🔒 The preview URL is only accessible to users logged into Limio. It cannot be shared externally.
## **Questions**
**Once published, can I make further edits?**
Yes, edit your page, save, and rebuild. The preview and publish will be available once successful.
**I made a global change in Settings impacting my whole Shop. Do I need to rebuild and republish all my changes?**
Yes, you can trigger a mass Rebuild by going to Operations > Mass Build and Publish. Learn more at: [Mass Build and Publish Pages](/product/page-builder/how-to-publishunpublish-your-pages-online/mass-build-and-publish-pages)
**My build isn't showing the Publish button.**
Sometimes Build can fail, for example if an asset stored in Limio and used in the page has been corrupted. Learn more at [https://docs.limio.com/support/troubleshooting/how-to-check-if-a-build-has-failed-and-why](https://docs.limio.com/support/troubleshooting/how-to-check-if-a-build-has-failed-and-why "mention") .
**Can I publish old version of the page?**
Yes, just click on Publish on the Build version you'd like to publish.
# Preview Page on Different Devices
With Limio, if you'd like to see your page instantly without making it live to customers, for example to check the look and feel across devices. Within the build tab, just click on the **'Style'** tab, the select a Device from the **'Viewport'** dropdown. You will see your page in the mobile, tablet and desktop viewport options.
This preview does not allow to place a test order or test link structure. Please check our guide on [How to Publish your page](https://docs.limio.com/product/page-builder/how-to-publishunpublish-your-pages-online) to be able to place a test order.
# Default Tag
The `/default` tag in Limio is a versatile tool that serves multiple purposes. It is effectively synonymous with the root URL (`/`) of your website and plays a key role for Pages, [Limio Journeys](https://docs.limio.com/product/journey/what-are-limio-journeys), and as a fallback page.
## `/default` as the Homepage
When you set `/default` as the tag for a Page in the Limio app, it becomes your website's homepage. For example:
1. Imagine your shop is hosted at **[www.limio-shop.com](http://www.limio-shop.com)**.
2. In Limio, you create a new Page and assign `/default` as its tag.
3. After publishing, the Page will be accessible at both:
* **[www.limio-shop.com/default](http://www.limio-shop.com/default)**
* **[www.limio-shop.com](http://www.limio-shop.com)** (the root URL).
This means `/default` is functionally equivalent to `/` on your domain.
## `/default` in Limio Journeys
The `/default` tag can also be used as a **starting point** for a Limio Journey. When configured as the starting point:
* All visitors to your root URL (**[www.limio-shop.com](http://www.limio-shop.com)**) will be directed through the conditions defined in the journey.
* Ensure the following before setting `/default` as the starting point:
1. **Review the Journey Conditions**: Confirm all conditions are configured correctly.
2. **Verify Linked Pages**: Make sure the Pages in the conditions are live by clicking **'Show page details'**.
Once verified, update the starting point to `/default` and **save**. This makes the journey active for your homepage. You can test this by navigating to your domain (e.g. **[www.limio-shop.com](http://www.limio-shop.com)**) and verifying the behaviour.
## `/default` in Limio Journeys
If a user attempts to access a URL that Limio cannot resolve, they will be redirected to `/default`. Essentially, `/default` also serves as the **404 page** for your site.
***
### Key Considerations
* **Double-Check Before Publishing**: Because `/default` is critical for routing all users visiting your homepage. Ensure journeys and pages tied to `/default` are fully configured and functioning as expected.
* **Testing**: Always test the behaviour of `/default` by accessing your domain and confirming the routing and page content.
# Mass Build and Publish Pages
The **Mass Build and Publish** feature enables you to efficiently build and publish multiple Pages in just a few steps. This tool simplifies the process by allowing you to select and manage multiple Pages simultaneously.
**Recommendation**: We strongly advise setting up **Page Labels** to control which Pages are published. Without Page Labels, all Pages will be built and published, potentially leading to unintended changes in your production environment.
## To Mass Build and Publish Pages
Navigate to operations in the catalog, click on mass build and publish.
1. **Navigate to Mass Build and Publish**
1. Go to **Operations** in the **Catalogue**.
2. Click on the **Mass Build and Publish** button.\
Screenshot: Mass Build and Publish in Operations
2. **Select Pages for Mass Build**
* A list of all Pages will appear with options to mass build them.
* You can either:
* Build **all Pages**, or
* Use the **Page Label dropdown** to filter and select specific groups of Pages.\
\
\&#xNAN;*Screenshot: Using Page Labels for Mass Build*
3. **Add Labels to Pages** (Optional)\
Adding labels helps create groups of Pages for more precise control. To add labels:
1. Navigate to **Page Settings** for the desired Page(s).
2. Select a label from the **Page Label** dropdown menu.
3. Save your changes.\
\
Screenshot: Adding Labels to Pages
4. **Build pages**
1. Click the **Mass Build** button to start the process.
2. A **build progress message** will appear at the top of the screen, showing the status of the operation.
* The build time varies depending on the number of Pages selected (approximately 3-4 minutes per Page).\
\
Screenshot: Build Progress Message
5. **Publish pages**
1. Once the build is complete, a success message will appear.\
\
\&#xNAN;*Screenshot: Mass Build Successful Status*
2. Click **Publish** to deploy the selected Pages to the **Limio Shop** and **Self-Service** platforms.\
\
Screenshot: Mass Publish of Selected Page Status
## Troubleshooting: Cannot See Page Labels?
If Page Labels are not visible in the Page Builder:
1. Go to **Config > *****Expand***** Templates > Pages**.
2. **Locate the Label Attribute**:\
Scroll down to the `label__limio` attribute under the **'Name'** column. This attribute defines how labels are configured for Pages.\
\
\&#xNAN;*Screenshot: Finding the page Label attribute in the Pages Template Config*
\
**Note**: The attribute name may differ depending on your customisation. For example, it might appear as "Label" in one instance, but a different name in another.
3. **Check the currently available list of Page Labels**
1. Expand the Editable Picklist by clicking on the downward chevron.
2. Scroll through the list of available labels in the Limio App Environment.
4. **Enable the Label Attribute**:
1. Select a desired templates.
2. Find the checkbox next to your label attribute and tick it to enable the feature.
3. **Save** the changes.
***
### Additional Notes
* This could take several minutes, navigating to another screen will cause the mass build to fail
* Always verify the Pages selected for mass build and publish, especially in production environments
# Modular Checkout
**The Limio Modular Checkout is the next iteration of the Limio Commerce platform checkout ✨.**
Instead of the single, inflexible component, Modular Checkout uses a series of flexible subcomponents to give full flexibility on your checkout with no-code.
Modular Checkout is delivered via a component leveraging the native React functionalities of [Form](/components/component-library/modular-checkout-components/component-checkout-form). It has the following benefits:
* **Structured data collection:** Forms ensure all required purchase information is collected in a structured manner.
* **Validation and error handling:** Use regex and min/max rules in forms to validate user input, minimising errors and ensuring data accuracy.
* **Improved user experience:** Use tooltips and labels to simplify checkout form input.
* **Flexibility and customisation:** Customise checkout forms to tailor the layout and field order to your business needs.
* **Integrated:** Forms integrate with address, tax, payment and authentication systems to streamline the experience and make sure all data is accurate in connected systems such as [Zuora](https://docs.limio.com/integrations/zuora-integration), [Stripe](https://docs.limio.com/integrations/stripe-billing-integration) and [Salesforce](https://docs.limio.com/salesforce).
* **Omnichannel:** Modular Checkout can be used to shift sales-assisted quotes or customer service-initiated orders to online quotes/checkout. Learn more at [https://docs.limio.com/salesforce/agent-assisted-ordering/generate-checkout-link](https://docs.limio.com/salesforce/agent-assisted-ordering/generate-checkout-link "mention") and [https://docs.limio.com/salesforce/cpq/limio-cpq](https://docs.limio.com/salesforce/cpq/limio-cpq "mention").
This document will give you an overview of the customisation available for the Modular Checkout. If you are looking for a detailed document on the Limio Component, go here: [Form](/components/component-library/modular-checkout-components/component-checkout-form). If you are interested in the legacy checkout, go to [Component: Single Page Checkout](/components/component-library/legacy-configuration-components/component-single-page-checkout).
## **Made for subscription and recurring products companies (and beyond)**
Limio Modular Checkout allows our customers to:
* [Offer quantity-based products](/product/pricing/what-are-offers-and-how-to-configure-them/how-to-activate-the-quantity-field-to-sell-multiple-subscriptionsitems-at-once)
* [Sell bundles in one transaction](https://docs.limio.com/product/pricing/what-are-offers-and-how-to-configure-them/how-to-add-a-bundle-to-an-offer)
* [Sell one-off products](https://docs.limio.com/product/pricing/what-are-offers-and-how-to-configure-them/how-to-configure-a-one-time-offer)
* Sell with complex prices such as [volume pricing](https://docs.limio.com/product/pricing/what-are-offers-and-how-to-configure-them/volume-pricing)
* [Run tax calculation](https://docs.limio.com/integrations/zuora-integration/manage-your-pricing/how-to-configure-subscriptions-in-limio-offers-with-external-price-and-zuora-rate-plans)
* Embed different payment gateways and payment methods. If you use Zuora, see [Zuora payment gateways](https://docs.limio.com/integrations/zuora-integration/configuring-payment-gateways). If you use Stripe Billing, see [Stripe payment methods](https://docs.limio.com/integrations/stripe-billing-integration/manage-payments)
* Support [physical delivery](https://docs.limio.com/components/component-library/modular-checkout-components/modular-checkout-subcomponents-in-form/form-subcomponent-address-fields) and [gift checkouts](https://docs.limio.com/components/component-library/modular-checkout-components/modular-checkout-how-to-configure-a-gift-checkout)
* Have [renewal checkout](/product/self-service/what-are-the-standard-functionality-of-limio-self-service-manage-my-account/how-to-create-a-personalised-renewal-experience) for existing termed subscription
* Run B2C checkouts, B2B self-serve checkouts and [partner / reseller checkouts](/product/partner-portal/partner-portal-overview) (including flows where the bill-to and sold-to parties differ) from the same platform
Additionally within the checkout, [Layouts](https://docs.limio.com/product/page-builder/page-builder-overview-of-key-features/configure-layout) can be used to display [Cart Components](/components/component-library/cart-components) side by side with your Form, including [Promo Codes v2](/product/pricing/how-to-configure-and-implement-promo-codes), [Upselling](/product/checkout/how-to-configure-upselling-in-the-cart-and-checkout) and [Cross-Selling](/product/checkout/how-to-configure-cross-selling-in-the-cart-and-checkout) components.
## **Best-in-class features for checkouts**
**Analytics in mind:** The Limio Form also works well with analytics and reporting solutions, for example to [capture user events from the checkout](https://docs.limio.com/product/analytics/how-to-configure-the-limio-data-layer-to-collect-user-events-for-analytics) and making sure [orders pass through parameters such as UTM tags](https://docs.limio.com/product/analytics/how-to-configure-limio-for-tracking-and-attribution-in-salesforce-and-zuora).
**Abandoned cart:** In the background, a basket or [cart](https://docs.limio.com/components/component-library/cart-components/using-cart-components-for-acquisition) is created and persist. The cart can be displayed and can also be used for [abandon basket campaign](https://docs.limio.com/developers).
**A/B test and experiments:** You can create multiple checkouts and [A/B tests](https://docs.limio.com/product/journey/what-are-limio-journeys/create-a-journey-based-on-a-ab-test) them. You can also deliver specific checkout for specific Limio Offer, in different languages, or to support brand-specific or product-specific UX.
**Multi-brand, multi-language and multi-currency:** Run different checkouts for different brands, regions or currencies from a single Limio instance. Field labels, copy, validation messages and Terms & Conditions can all be localised, and the layout or UX can be tailored per brand, product or geography.
**Compliance:** There is also a range of off-the-shelf enforcement components for the checkout, such as [Block Related Purchase Component](https://docs.limio.com/components/component-library/standard-components/component-block-related-purchase-modal) or [Block Purchase Dialog](https://docs.limio.com/components/component-library/standard-components/component-block-purchase-dialog) to prevent undesired orders. You can also configure T\&Cs and marketing preferences via [Form Subcomponent: Field](/components/component-library/modular-checkout-components/modular-checkout-subcomponents-in-form/form-subcomponent-field).
**Auto-renewal compliance:** Limio Modular Checkout complies with existing auto-renewal regulations across major jurisdictions, including:
* **UK** — Digital Markets, Competition and Consumers Act 2024 (DMCC) subscription-contract rules
* **EU / EEA** — Consumer Rights Directive and Omnibus / Modernisation Directive requirements on automatically renewed contracts
* **US (federal)** — FTC "Click-to-Cancel" rule (Negative Option Rule) and Restore Online Shoppers' Confidence Act (ROSCA)
* **US (state)** — California Automatic Renewal Law (ARL), and equivalent statutes in New York, Illinois, Oregon, Colorado, Virginia, Vermont, Washington D.C. and other states
The checkout can be configured to capture the relevant auto-renewal consent at the point of purchase (separate, affirmative opt-in where required) and to share the contract information — renewal cadence and price, cancellation rights, and post-purchase confirmation — with the customer before and after the order is placed.
**Security:** Limio supports a range of security features for the checkout, including:
* IP / browser fingerprinting to detect suspicious sessions
* [Google reCAPTCHA bot protection](/product/settings/security/recaptcha-bot-protection)
* [Rate limiting](/product/settings/security/rate-limiting) on submission endpoints
* 3D Secure (3DS) strong customer authentication, delivered via the underlying payment gateway
* [Content Security Policy (CSP)](/product/settings/security/content-security-policy-csp) and [CORS configuration](/product/settings/security/cors-configuration)
* [SSO / OpenID Connect login options](/product/settings/security/login-options-sso) and [audit logging of configuration changes](/product/settings/security/track-changes)
Learn more at [Security Settings](/product/settings/security).
**Conversion-optimised:** It is also optimised to accelerate input, for example:
* [Prefill fields from identity solutions such as name and email](/product/authentication/sso-your-authentication)
* [Add express checkout options such as Apple Pay, PayPal and Google Pay as soon as possible](https://docs.limio.com/integrations/zuora-integration/configuring-payment-gateways/configuring-payment-type/how-to-configure-apple-pay-for-zuora-in-limio)
* [Provide integrations to prefill addresses such as Loqate](https://docs.limio.com/integrations/other-integrations/loqate)
## **Configurable via no code**
Modular Checkout is fully configurable within the Limio app, via subcomponents or the Style editor. Subcomponents allow to add:
* As many fields as you want, including non-Limio standard fields, to collect additional information in the Checkout. Field types include:
* First Name (First Name Field)
* Last Name (Last Name Field)
* Email (Email Field)
* Address Fields (Address Fields)
* Payment (Payment Field)
* Display Text (for headings, additional information, copy) (Display Text)
* Generic Field that can collect [standard HTML types](https://www.w3schools.com/html/html_form_input_types.asp) (Field, which allow Input, Date, Number, Email Address, Text Area, Phone Number, Dropdown, Radio Buttons, Checkbox)
* Rearrange the order of fields with a drag-and-drop interface
* Change copy, validation rules, required fields and size of the fields
* Write custom field values back to your billing provider (for example into the subscription, order or account custom fields) — useful for capturing B2B sales attribution, partner names, internal IDs or KYC data without writing any code
Fields can be based on conditions, to allow for more dynamic experiences, for example surfacing fields when specific products are in the basket or when certain payment methods are selected. See [https://docs.limio.com/components/component-library/modular-checkout-components/managing-conditionality-in-subcomponents](https://docs.limio.com/components/component-library/modular-checkout-components/managing-conditionality-in-subcomponents "mention") for more details.
## **Extensible with low code**
#### Extending Limio's Modular Checkout
Developers have the flexibility to enhance Limio's Modular Checkout by integrating features like identity verification services or API checks using Limio Custom Subcomponents. These subcomponents can utilize the [Limio SDK](https://docs.limio.com/developers/limio-sdk) to:
* Display custom fields that require external validation, ensuring the checkout process is paused until validation is complete.
* Present the shopping basket differently from the default Limio basket.
* Apply specific rules depending on customer identity and their selected items.
For more information, please visit [Custom Subcomponents](/developers/custom-components/custom-subcomponents).
## **Payment gateway and payment method flexibility**
Limio's Modular Checkout is designed to work with the payment gateways and payment methods your business already uses — even if your billing provider doesn't natively support them.
### How payments work in Limio
At checkout, Limio securely collects your customer's payment details and passes the resulting payment token to your billing provider (such as Zuora or Stripe) to manage the subscription. How that token is collected depends on your setup:
**Billing-native payment methods** — For payment gateways that your billing provider supports out of the box, Limio embeds the billing provider's own payment form directly in the checkout:
* **Zuora:** Limio renders [Zuora Hosted Payment Methods (HPM)](https://docs.limio.com/integrations/zuora-integration/configuring-payment-gateways/how-to-set-up-zuora-hosted-payment-methods-for-limio) or [Zuora Payment Forms](https://docs.limio.com/integrations/zuora-integration/configuring-payment-gateways/how-to-set-up-zuora-payment-forms-for-limio) as a secure iFrame within the checkout. The token is created directly in Zuora.
* **Stripe:** Limio renders [Stripe Payment Elements](https://docs.limio.com/integrations/stripe-billing/getting-started/configure-stripe-payment-settings) for a seamless card entry experience. When using Stripe with Zuora billing, Limio tokenises the card in Stripe and [passes the token to Zuora](https://docs.limio.com/integrations/zuora-integration/configuring-payment-gateways/limio-stripe-payments-integration) via Credit Card Referenced Transactions.
**Third-party payment providers** — For gateways not natively supported by your billing provider, Limio connects directly with the payment provider to collect the payment token, then passes it back to the billing system using a supported framework:
* **Zuora Universal Payment Connector (UPC):** Limio integrates with providers like [Nexi](https://docs.limio.com/integrations/zuora-integration/configuring-payment-gateways/how-configure-a-nexi-upc-integration-in-limio) and Datatrans, handles the payment form or redirect, and creates a UPC payment method in Zuora with the token received. This means Zuora manages the subscription and recurring billing, even though the payment was collected by a different provider.
* **Direct integrations:** For providers like Twikey, Limio manages the payment agreement directly and links it to the billing provider for ongoing subscription management.
This approach means you are not limited to the payment gateways your billing provider supports. If your preferred payment provider can produce a token, Limio can route it to your billing system.
### Supported payment methods
Limio supports a wide range of payment methods across billing providers. What is available to your customers depends on your billing provider and payment gateway configuration:
| Payment Method | Zuora | Stripe |
| ------------------------ | ----- | ------ |
| Credit / Debit Cards | ✅ | ✅ |
| Apple Pay | ✅ | ✅ |
| Google Pay | ✅ | ✅ |
| PayPal | ✅ | ✅ |
| ACH / Direct Debit | ✅ | ✅ |
| SEPA Direct Debit | ✅ | ✅ |
| Invoice / Purchase Order | ✅ | — |
| Bank Transfer | ✅ | ✅ |
| Nexi (via UPC) | ✅ | — |
| Datatrans (via UPC) | ✅ | — |
| Twikey | ✅ | — |
Beyond this list, any payment method supported by your billing provider or connectable via frameworks like Zuora UPC can be integrated. If you have a specific payment gateway requirement, [get in touch](https://www.limio.com/contact) — chances are, we can support it.
### Configuring payment methods
Payment methods are configured per offer, giving you full control over which options appear in the checkout for each product. You can also offer [multiple payment gateways](https://docs.limio.com/integrations/zuora-integration/configuring-payment-gateways/how-to-setup-a-second-payment-gateway) and let customers choose their preferred method using the [Payment Method Selector](https://docs.limio.com/components/component-library/modular-checkout-components/modular-checkout-subcomponents-in-form/form-subcomponents-payment-method-selector-field).
For detailed setup guides, see [Configuring Payment Gateways](https://docs.limio.com/integrations/zuora-integration/configuring-payment-gateways) or [Stripe Payment Settings](https://docs.limio.com/integrations/stripe-billing/getting-started/configure-stripe-payment-settings).
# Direct Customers to Different Checkout Based on Offer
## Checkout Types on offers
You can configure on the offer which checkout to use for this specific offer. Checkout on the offers can be configured in three different ways as mentioned below.
* Standard
* External
* External-Post
* Purchase Links
*Screenshot: Checkout configuration types*
## Standard Checkout
Standard checkout is the default Limio checkout. This checkout configuration makes use of the default Limio checkout page and authentication, and goes to /checkout.
## External Checkout
External checkout allows you to define explicitly the checkout link which is external to Limio.
This type of checkout configuration will be required where authentication is done outside Limio and then redirected to the checkout page for Limio. This can also be used when you have multiple checkout links (for example for segmentation).
In the case the user is unauthenticated and the checkout is authenticated, when Limio constructs the redirect url to be passed to the authentication flow it will fill the basket Id if the external url has the value present in the format /checkout-trial?basket={{basketId}}.
## External-Post Checkout
Using the external post checkout data can be pre-filled using the post request which is typically a HTML form.
External URL uses post request method which collects the data required for checkout in the body of the request message and this information is then used for checkout.
This type of checkout configuration is external to Limio.
# Purchase Links
It is possible to send your customers to a checkout or basket that is pre-populated with specific Limio Offers or a Promo Code. At Limio, we call those Purchase Links, but you may call them Payment Links, Buy Links, or Checkout Links.
These links can be used in a variety of ways, for example, to direct a customer from an external pricing page, [Paywall](https://docs.limio.com/integrations/other-integrations/zephr/how-to-integrate-limio-pages-into-the-zephr-paywall), or promotional email into a Limio checkout.
Please note that Purchase Links are generic and not associated with a customer. If you are looking for a way to send customers links to their Abandoned Basket, or for a way for salespeople to send customers links based on quotes, please view this separate documentation:
* [Guide: Inspect and Follow Up on Abandoned Baskets](https://docs.limio.com/guides/feature-implementation-guides/guide-inspect-abandoned-baskets)
* [Checkout links from Limio for Salesforce](https://docs.limio.com/salesforce/agent-assisted-ordering/generate-checkout-link)
There are 4 parts of a purchase link:
1. Shop domain
2. Checkout or cart page
3. Populate basket items with an offer or label
4. (Optional) Apply a promo code
### Part 1: Shop domain
The beginning of your purchase link will always be the domain that your Limio pages are on.
For example, `https://www.yourdomain.com`
### Part 2: Checkout or cart page
Purchase links can direct your customers to either a checkout page or a cart page. Specify the Limio page tag of your desired checkout or cart page after the domain as "/" + tag + "?"
For example, `https://www.yourdomain.com/checkout?`
### Part 3: Populate basket items
There are 4 ways to determine what items the customer should have in their cart when they click your purchase link.
Option 1: Single offer
To populate your customer's cart with a single offer, add "purchase=" and the offer path.
For example, `https://www.yourdomain.com/checkout?purchase=/offers2/offerName`
The offer path can be found in 2 different ways. With either option, you'll need to open the offer you'd like to use in your purchase link.
**Copy direct purchase URL**
* Click the down arrow in the top-right corner.
* Select "Copy direct purchase URL".
* The second part of the URL (starting from `/checkout?purchase=/offers2/`) will be copied to your clipboard.
* Note: The `/checkout` portion of the URL will automatically reflect the checkout configuration in the offer. This can be replaced if desired.
* Known issue: If your offer uses an **external** or **external-post checkout**, the External URL specified will remain active in the purchase link even if you switch back to a standard checkout. **Workaround:** Update the External URL to `/checkout` in your offer settings.
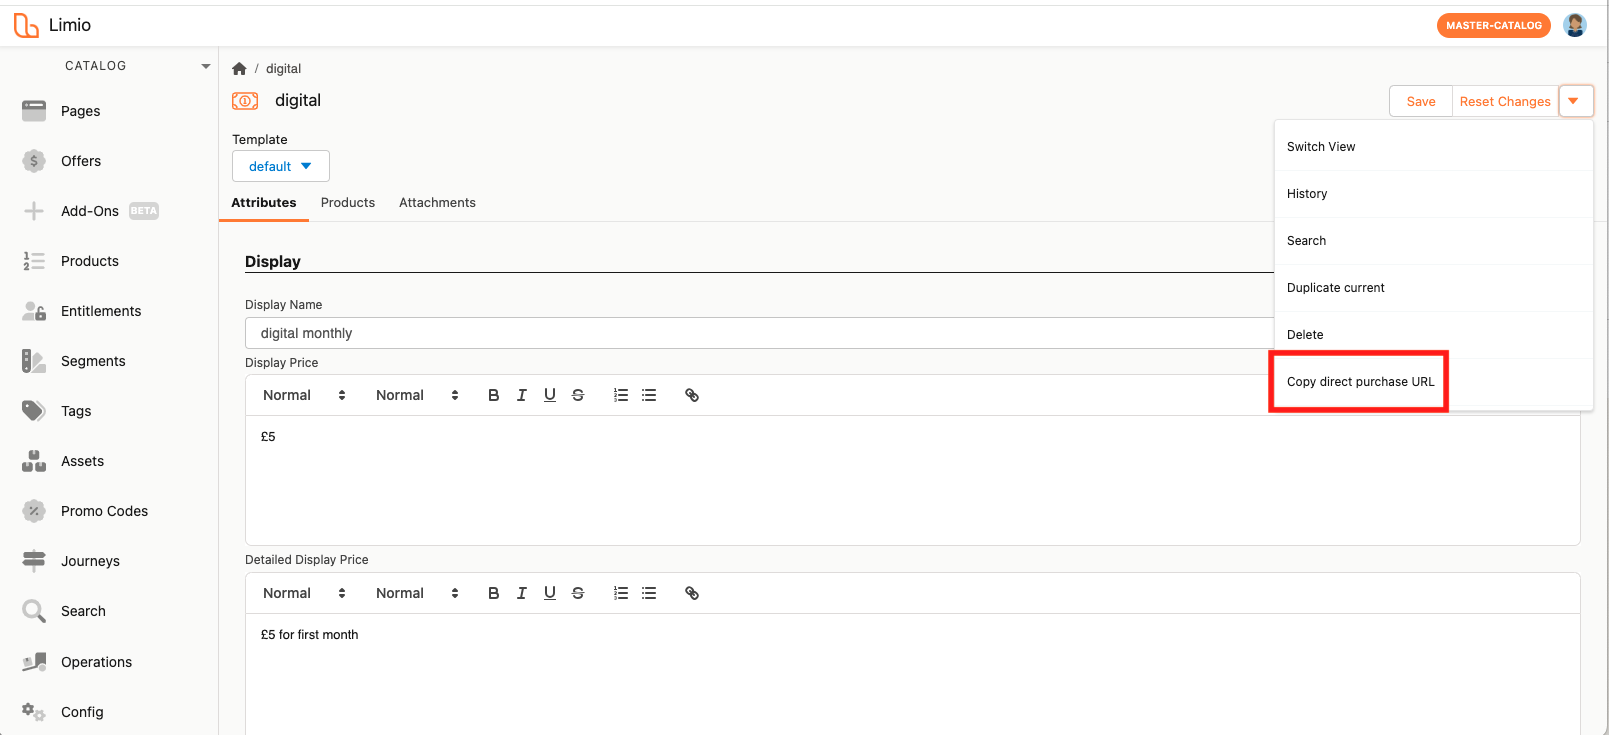
**Use offer page URL**
* Navigate to your offer in the Limio Catalog.
* Look at the URL and copy the text that appears after `offers2/`. This is the name of your offer.
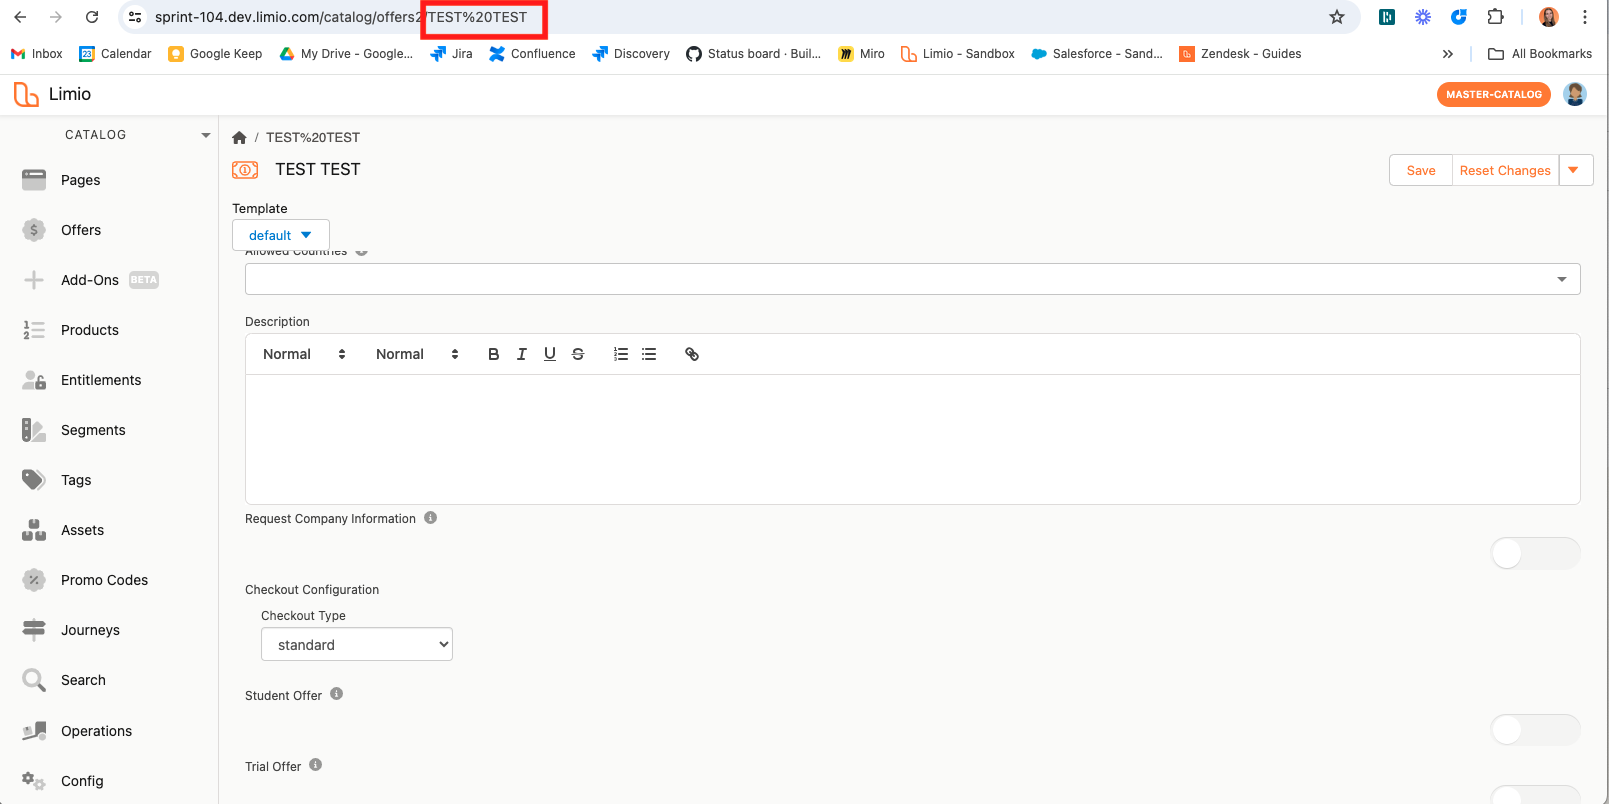
Option 2: Multiple offers
If you want to populate the customer's basket with multiple offers, add "\&purchase=/offers2/secondOffer". This can be done as many times as needed.
For example: [`https://www.yourdomain.com/checkout?purchase=/offers2/firstOffer&purchase=/offers2/secondOffer`](https://www.yourdomain.com/checkout?purchase=/offers2/firstOffer\&purchase=/offers2/secondOffer)
Option 3: Offer label
You can also use labels instead of the offer name to create purchase links. Instead of `purchase=/offers2/offerName`, use `purchase=true&label=labelID`.
For example, [`https://www.yourdomain.com/checkout?purchase=true&label=labelID`](https://www.yourdomain.com/checkout?purchase=true\&label=labelID)
To find the label ID:
* Navigate to an offer that has the offer label you want to use.
* Click the **down arrow** in the top-right corner and select **"Switch View"**.
* In the JSON view of the offer object, locate the label ID under the field `"label__limio"`.
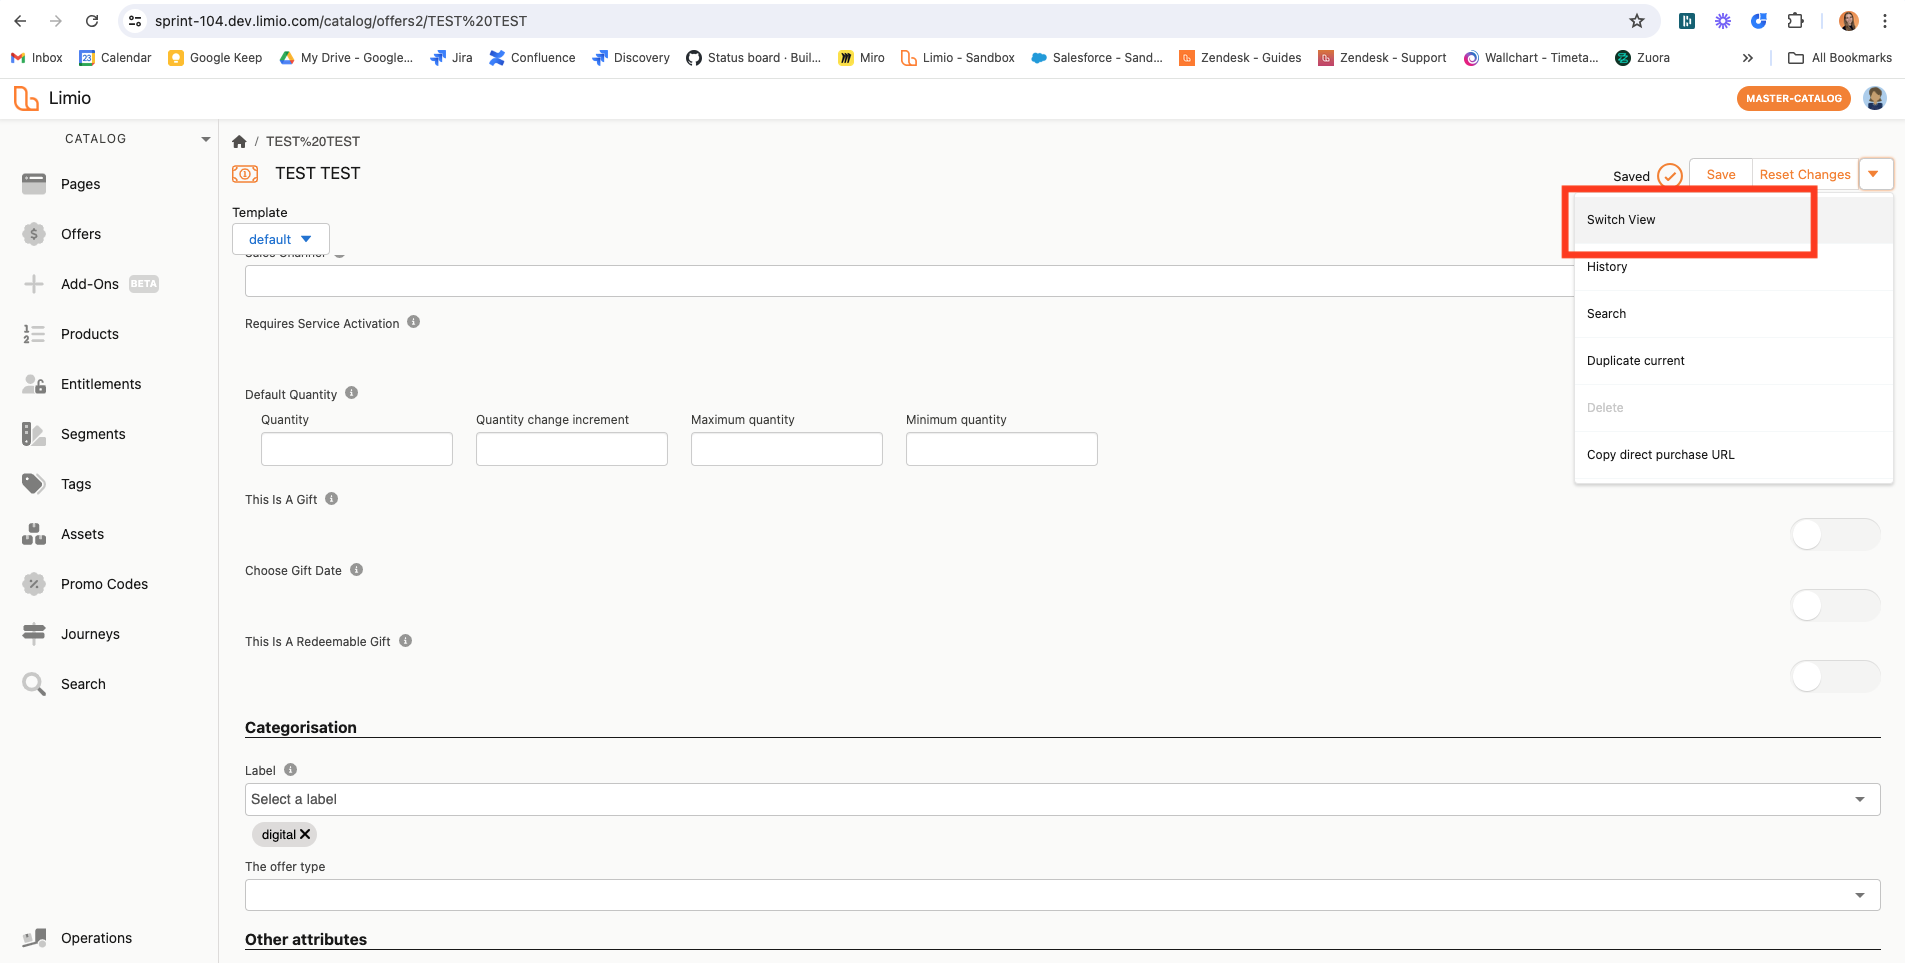
If you have multiple offers with that offer label, the offer that has the same Allowed Country attribute as the customer's limio-country cookie will be populated in the basket.
**Known limitation:** The link will not work if the customer's limio-country cookie matches the Allowed Country attribute for multiple offers with that label.
Option 4: Structured purchase links (add-ons and quantities)
Available from Release 116, structured purchase links let you compose a more complex basket than the standard `purchase=` parameter supports:
* Add-ons attached to specific offers
* Quantities for both offers and add-ons
* Parent/child relationships between offers and add-ons, so an offer and its add-ons are grouped together on the same subscription in your billing system
Each offer in the basket is defined as an `order_item` object:
```
order_item[unique-key][path]=offer-path
```
Where:
* `unique-key` can be any unique value (for example `0`, `1`, or `bookkeeping`)
* `path` is the full path of the offer, found in the same way as in Option 1
You can include as many order items as required:
```
https://www.yourdomain.com/checkout?
order_item[0][path]=/offers2/Tax%20Individual
&order_item[1][path]=/offers2/Payroll
```
**Add add-ons to an offer**
Add-ons are attached to a specific order item using the following structure:
```
order_item[offer-key][add_on][index][path]=add-on-path
```
Where:
* `offer-key` matches the parent offer's key
* `index` is a numeric index beginning at `0`
* `path` is the add-on path, which appears after `/add_ons/` in the Limio Catalog URL
The add-ons defined under an order item automatically become children of that parent offer. This parent/child relationship ensures that the offer and its add-ons are grouped together on the same subscription.
**Set quantities**
To specify the quantity for an offer, use:
```
order_item[offer-key][quantity]=value
```
To specify the quantity for an add-on, use:
```
order_item[offer-key][add_on][index][quantity]=value
```
**Complete example**
The following link creates one Tax offer with two add-ons (the first with quantity 2), and one Bookkeeping offer with quantity 3 and one add-on:
```
https://www.yourdomain.com/checkout?
order_item[0][path]=/offers2/Tax
&order_item[0][add_on][0][path]=/add_ons/Additional%20Entity
&order_item[0][add_on][0][quantity]=2
&order_item[0][add_on][1][path]=/add_ons/Quickbooks%20Online
&order_item[1][path]=/offers2/Bookkeeping
&order_item[1][quantity]=3
&order_item[1][add_on][0][path]=/add_ons/Payroll
```
Promo codes can be applied to structured purchase links in the same way as standard ones (see Part 4).
{% hint style="info" %}
**Resuming abandoned checkouts:** If you want to redirect a customer back to a checkout they abandoned, use the `recoveryLink` returned by the Abandoned Basket API instead of a purchase link. See the [Abandoned Basket Campaigns](https://docs.limio.com/guides/developer-guides/guide-abandoned-basket#use-of-this-api) guide for details.
{% endhint %}
### Part 4: (optional) Apply a promo code
You can automatically apply a promo code to your customer's basket by appending `&pc=promocodename` to the end of your purchase link.
For example, `https://www.domainname.com/checkout?purchase=true&label=digital&pc=PROMO123`
If the promo code is expired, invalid, or not compatible with the items in the basket, the offer will still appear in the basket but the promo code will not be applied.
### Part 5: Analytics
When using Purchase Links in Limio, several key analytics events are triggered to track user interactions:
* **page\_view** – Triggered when a user lands on the checkout or cart page via a Purchase Link.
* **user-authentication** – Fired when a user hits a cart or checkout page with authentication setup (including anonymous authentication)
* **begin\_checkout** – Initiated when the user starts the checkout process
These events help monitor customer journeys and optimise conversion tracking.
For more details on the Limio data layer, please read here:
# Cross-Selling
## How to configure cross-selling in the cart and checkout
Limio offers out-of-the-box cross-selling features to help you maximize customer lifetime value. Cross-selling is a strategy that encourages customers to add related or complementary offers to their existing basket. With subscriptions, cross-selling usually means offering an add-on or a related product that enhances the current subscription plan.
## Configuration
Cross-selling in Limio is simple - configure your cross-sell offer or add-on text, attach your cross-sell offers or add-ons to core offers via offer or add-on labels, and configure the [https://docs.limio.com/components/component-library/cart-components/component-cross-sell](https://docs.limio.com/components/component-library/cart-components/component-cross-sell "mention").
Note that an offer can have cross-sells that are offers and add-ons, however add-ons cannot have any cross-sells themselves.
### 1 - Configure offers and add-ons for cross-selling
#### Cross-sell display text
The Cross-sell Display Name and Cross-sell Display Description attributes on offers and add-ons are used to control the text displayed to the customer in a cross-sell scenario. This provides flexibility to use different text when presenting cross-sell offers in the Cross Sell component versus an offer card component.
To configure cross-sell offer display text:
1. Open the relevant offer by navigating to the Offers tab in the right navigation panel.
2. Select the offer you want to edit, or create a new one.
3. Locate the Cross-sell Display Name and Cross-sell Display Description attributes.
4. Populate the attributes with the desired text.
5. Save and [publish](https://docs.limio.com/product/pricing/how-to-manage-offers-and-add-ons-versions-with-publish#step-1-attach-the-offer-or-add-on-to-a-page) the offer.
To configure cross-sell add-on display text:
1. Open the relevant add-on by navigating to the Add-ons tab in the right navigation panel.
2. Select the add-on you want to edit, or create a new one.
3. Locate the Cross-sell Display Name and Cross-sell Display Description attributes.
4. Populate the attributes with the desired text.
5. Save and [publish](https://docs.limio.com/product/pricing/how-to-manage-offers-and-add-ons-versions-with-publish#step-1-attach-the-offer-or-add-on-to-a-page) the add-on.
#### Configure removal behaviour
In some cases, you may only want to allow a customer to purchase a cross-sell if the core offer is still in the basket. For example, if you are selling a full priced offer with a heavily discounted offer as a cross-sell.
In these scenarios, set the offer attribute labeled "Remove this item from the basket if it was added as a cross-sell and the base offer was removed?" to true.
#### Attach cross-sell offers and add-ons to offers
Limio uses the Cross-sell Offers and Cross-sell Add-ons attributes to determine which set of offers and/or add-ons should be displayed as cross-sell options in the shop. Once a label is added to the Cross-sell Offers or Cross-sell Add-ons attributes, you can see which offers and/or add-ons will be involved in the cross-sell scenario in a table below, and change the order of the offers or add-ons.
A note on ordering: Cross-sell ordering in the shop is determined first by the order of items in the basket, and then by the configured order of the offers and cross-sells.
To attach cross-sell offers to a core offer:
1. Add the same offer label to all the offers you want to cross-sell from a core offer. You do not need to add that offer label to the core offer. Ensure that each of these cross-sell offers are published.
2. On the core offer, locate the Cross-sell Offers and set that attribute to the offer label you added in step 1.
3. After adding an offer label, you can order the offers by clicking the up and down arrows on the left side of the table. The order in the table will be how the offers are displayed in the Cross Sell component.
4. Save and [publish](https://docs.limio.com/product/pricing/how-to-manage-offers-and-add-ons-versions-with-publish#step-1-attach-the-offer-or-add-on-to-a-page) the offer. Both the core offer and cross-sell offers will need to be published in order for the cross-selling experience to work properly. You can check whether your cross-sells are published by looking at the Status column in the Cross-sell Offers table.
To attach cross-sell add-ons to a core offer:
1. Add the same add-on label to all the add-ons you want to cross-sell from a core offer. Ensure that each of these cross-sell add-ons are published.
2. On the core offer, locate the Cross-sell Add-ons and set that attribute to the add-on label you added in step 1.
3. After adding an add-on label, you can order the add-ons by clicking the up and down arrows on the left side of the table. The order in the table will be how the add-ons are displayed in the Cross Sell component.
4. Save and [publish ](https://docs.limio.com/product/pricing/how-to-manage-offers-and-add-ons-versions-with-publish#step-1-attach-the-offer-or-add-on-to-a-page)the offer. Both the core offer and cross-sell add-ons will need to be published in order for the cross-selling experience to work properly. You can check whether your cross-sells are published by looking at the Status column in the Cross-sell Add-ons table.
### 2 - Configure cross-selling in the Limio shop
The [https://docs.limio.com/components/component-library/cart-components/component-cross-sell](https://docs.limio.com/components/component-library/cart-components/component-cross-sell "mention") is where the cross-sell offers are displayed. Follow these steps to ensure your cross-selling experience is configured correctly:
1. Add the Cross Sell component to your desired page.
2. Set price visibility: If you are using initial pricing on your offers and add-ons and want to show the price in the Cross Sell component, then set the Show Price prop to True. Otherwise, set this prop to False. If you are using externally priced offers or add-ons, set this prop to False.
### 3 - Edit cross-sell offers and add-ons
After publishing your initial cross-sell experience, you may want to change the cross-sell offers or add-ons in the future.
If you update the display text attributes of an offer or add-on, remember to save and republish that offer. You do not need to re-publish the core offer.
If you change which offers are associated with a cross-sell offer label, you will need to click the "Update attached items" button on your core offer. Remember to save and publish the core offer again.
**Important:** If you do not click the "Update attached items" button, the new offers or add-ons will not appear in any live cross-selling pages.
## Customer Behaviour
Here’s how the [https://docs.limio.com/components/component-library/cart-components/component-cross-sell](https://docs.limio.com/components/component-library/cart-components/component-cross-sell "mention") will work for customers in a cross-sell scenario:
1. **Display cross-sells**
* When a customer adds an offer to the cart that has cross-sells, the cross-sells will be displayed in the Cross Sell component.
* If the offer has no cross-sells configured, no cross-sell options will be shown.
* If there are cross-sells that have the same product as any of the offers or add-ons in the cart, then that cross-sell will not be displayed.
* If multiple offers in the basket have cross-sells that point to the same product, that cross-sell will only appear once in the Cross Sell component.
* Cross-sells are ordered by basket order first (cross-sells from the first item added appear before cross-sells from the second item), then by the configured order in the Cross-sell Offers or Cross-sell Add-ons table on each offer.
2. **Selecting a Cross-sell Offer**
* If a customer adds a cross-sell to the basket, then the cross sell will be added to the cart as a new line item and will no longer appear in the Cross Sell component.
* The Cross Sell component will update based on whether the added cross-sell has any other cross-sells configured.
3. **Removing an Offer**
* If a customer removes an offer from their basket, the cross-sells related to that offer will be removed from the Cross Sell component.
* If any remaining offers in the basket were cross-sells of the removed offer and the cascade attribute on that offer is true, that offer will also be removed.
## Tracking in the data layer
Cross-selling can be tracked with the Limio data layer. If a customer clicks on a cross-sell to add to the basket, then the add\_to\_cart event will be triggered.
These events help track the success of cross-sell promotions and provide valuable data for analysis.
Read more about the Limio data layer here: [Configure Limio Data Layer](/product/analytics/how-to-configure-the-limio-data-layer-to-collect-user-events-for-analytics)
## Publishing offers and add-ons
To avoid your offers and add-ons being immediately available online while being configured, Limio versions offers and add-ons and require to publish them to make them available for sales. Learn more at [Manage Versions with Publish](/product/pricing/how-to-manage-offers-and-add-ons-versions-with-publish)
# Upselling
## How to configure upselling in the cart and checkout
Limio offers out-of-the-box upselling features to help you maximise customer lifetime value. Upselling is a strategy that encourages customers to upgrade their existing basket to one that has a higher value. With subscriptions, a higher value subscription usually means a subscription with a longer initial term (eg monthly to annual) or a more premium offering (eg basic to pro).
*Screenshot: In this example, the SaaS Subscription offer has 2 upsells - 2 years and 3 years. The Cart Items component has been configured to display the upsell price.*
## Configuration
Upselling in Limio is easy - simply configure your upsell offer text, link your upsell offers via offer labels, and enable upselling in the .
### 1 - Configure offers for upselling
#### Upsell display text
The Upsell Display Name and Upsell Display Description attributes on offers are used to control the text displayed to the customer in an upsell scenario. This grants you more flexibility to use different text in upselling scenarios and non-upselling scenarios.
In the screenshot above, the SaaS Subscription offer is currently in the basket and has 2 upsells. The SaaS Subscription offer would have the following configuration:
* Display Name: SaaS Subscription
* Upsell Display Name: 1 year of protection
* Upsell Display Description: ~~$95.99~~ $71.99
To configure upsell display text:
1. Open the relevant offer by navigating to the Offers tab in the right navigation panel.
2. Select the offer you want to edit, or create a new one.
3. Locate the Upsell Display Name and Upsell Display Description attributes.
4. Populate the attributes with the desired text.
5. Save and publish the offer.
Do this for each offer you plan to be involved in the upsell scenario.
#### Link upsell offers
Limio uses the Upsell Offers attribute to determine which set of offers should be displayed as upsell options. Once an offer label is added to the Upsell Offers attribute, you can see which offers will be involved in the upsell scenario in a table below, and change the ordering of the offers.
In a basic upsell scenario where the customer can select an upsell and then reselect the original offer, follow these steps:
1. Add the same offer label to all the offers you want involved in an upsell scenario.
2. On each of the offers, locate the Upsell Offer attribute and set that attribute to the offer label you added in step 1.
3. After adding an offer label to the Upsell Offer attribute, you can order the offers by clicking the up and down arrows on the left side of the table. The ordering in the table will be how the offers are displayed in the Cart Items component in the shop.
4. Save and publish the offer.
If you do not want to allow your customers to downgrade back to their original offer after accepting an upsell offer, do not add the upsell offer label to the original offer.
### 2 - Configure upselling in the Limio shop
The is where the upsell offers are displayed. Follow these steps to ensure your upselling experience is configured correctly:
1. Enable the upsell feature: Ensure the Display Upsell Offers prop in the Cart Items component is set to true.
2. Set price visibility: If you are using initial pricing on your offers and want to show the price in the upsell section, then set the Show Price in Upsell Offers prop to true. Otherwise, set this prop to false. Note that if you are using externally priced offers, you must set this prop to false.
**Note:** You must ensure *Show component in read-only* mode? is toggled to OFF if you want to display Upsell offers.
### 3 - Edit upsell offers
After publishing your initial upsell experience, you may want to change the upsell experience in the future.
If you update the display text attributes of an offer, remember to save and re-publish that offer. You will not need to publish the other upsell offers.
If you change which offers are associated with an upsell offer label, you will need to click the "Update attached items" button on each of your offers with that offer label. You will need to resave and republish the offers.
**Important:** If you do not click the "Update attached items" button, the new offers will not appear in any live upselling pages.
## Customer behaviour
Here’s how the will work for customers in an upsell scenario. Upselling will work on either a standalone cart page or a checkout page with cart components.
1. **Adding Upsell Offers**
* When a customer adds an offer to the cart that has upsell offers, and the Cart Items component is configured to display upsells, these upsell offers will be displayed automatically below the cart item.
* If the offer has no upsell configured or the Cart Items component has been configured not to display upsells, no upsell options will be shown.
2. **Selecting an Upsell Offer**
* If a customer selects an upsell, the original offer is removed from the cart.
* The selected upsell offer is added to the cart as a new line item.
* The upsells still displaying will depend on your configuration.
3. **Removing an Offer**
* If an offer with upsells is removed from the cart, all corresponding upsells will no longer be displayed to the customer.
## Tracking in the data layer
Upselling can be tracked with the Limio data layer. If a customer chooses an upsell offer, the following events will be triggered:
* add\_to\_cart for new offer
* remove\_from\_cart for old offer
These events help track the success of upsell promotions and provide valuable data for analysis. Read more about the Limio data layer here:
## Publishing offers and add-ons
To avoid your offers and add-ons being immediately available online while being configured, Limio versions offers and add-ons and require to publish them to make them available for sale. Learn more at [Manage Versions with Publish](/product/pricing/how-to-manage-offers-and-add-ons-versions-with-publish)
## Troubleshooting upsells
If your upsell offers aren't appearing as expected, check the following configuration settings:
1. **Cart Items configuration:** Ensure that the Display Upsell Offers prop is set to true in the Cart Items component. This is what allows the cart to display the upsell offers linked to the items in the basket.
2. **Offer publication status:** Make sure your upsell offers are published. You can verify this in the Offers table, where they should be listed with a status of ‘Published.’ Learn more at [Manage Versions with Publish](/product/pricing/how-to-manage-offers-and-add-ons-versions-with-publish).
# Order Complete Page
After a customer has completed the checkout journey on your shop, you can direct them onto an 'Order Complete' page that summarises their purchase.
In order to set up your own page, use our simple guide below:
1. Click the Pages tab in the left navigation menu.
2. Click Create > Add Page in the top right corner.
3. Click Create from scratch.
4. Add the Page name, select a template, and define page attributes (optional).
5. Click Save
Next, you'll be directed to the Page Builder, where you can add components to build your Order Complete page.
In the Component menu, we recommend using the Order Complete Details component, along with the Cart Items and Cart Summary component. Alternatively, you can use the legacy Order Confirmation component.
Read more about how to set up an order complete page with the cart components here: [https://docs.limio.com/components/component-library/cart-components/using-cart-components-for-acquisition](https://docs.limio.com/components/component-library/cart-components/using-cart-components-for-acquisition "mention")
Read about the legacy Order Confirmation component here: [https://docs.limio.com/components/component-library/legacy-configuration-components/component-order-confirmation](https://docs.limio.com/components/component-library/legacy-configuration-components/component-order-confirmation "mention")
{% content-ref url="" %}
{% endcontent-ref %}

# Self-Service Overview
The Limio Self-Service portal enables subscribers to manage their subscriptions. Below is a description of its standard functionalities. You can also find all the Self-Service components here:
{% content-ref url="" %}
{% endcontent-ref %}
Changes made in the self-service portal are synced to your billing provider in real time:
* If you use Zuora, see [https://docs.limio.com/integrations/keeping-zuora-and-limio-in-sync/how-limio-events-updates-zuora-for-commerce](https://docs.limio.com/integrations/keeping-zuora-and-limio-in-sync/how-limio-events-updates-zuora-for-commerce "mention")
* If you use Stripe Billing, see [https://docs.limio.com/integrations/keeping-stripe-and-limio-in-sync/how-limio-events-update-stripe](https://docs.limio.com/integrations/keeping-stripe-and-limio-in-sync/how-limio-events-update-stripe "mention")
## **View Subscriptions**
Limio allows subscribers to see 1 or multiple subscriptions stored in Limio. For each subscription, they can see key information such as their Product, Term, Start Date and Renewal Date. They can then go into different part of the self-service portal, such as the cancel or upgrade/downgrade experience.
The Limio Self-Service portal can aggregate multiple subscriptions that might sit on different accounts/systems to provide a unified view to the subscriber. Each subscription can have different level of allowed changes.

## **Claim a Subscription Purchased Anonymously**
For scenarios where someone purchases as a guest and later signs in to manage their subscription, Limio supports **claiming ownership** of a guest-purchased subscription. Once claimed, the subscription appears in the self-service portal exactly like one purchased while signed in. See [Guide: Claim subscription ownership after guest checkout](https://docs.limio.com/guides/feature-implementation-guides/guide-claim-subscription-ownership-after-guest-checkout) for the full implementation pattern.
## **View and Edit Payment Methods**
Subscribers can also manage their payment methods within the Limio Self-Service Portal. Depending on your billing provider and payment gateway, Limio can support updates to debit/credit cards, ACH, and PayPal. Subscribers can also edit their default payment method.
{% tabs %}
{% tab title="Saved Payment" %}
The **Saved Payment Methods** component allows customers to view, manage, and delete their saved payment methods within a self service Finance Portal. This reduces reliance on sales or support staff and helps businesses avoid lost revenue by allowing multiple methods to be stored and a fallback method used if the default fails.

{% endtab %}
{% tab title="Payment History" %}
The **Payment History** component allows customers to view their historical payments in a self-service Finance Portal. This improves transparency and reduces support requests by letting users check payment dates, statuses, amounts, and methods directly, without contacting sales or account managers.

{% endtab %}
{% tab title="Self-Service Form" %}
The **Self-service Form** component allows your customers to perform a variety of self-service use cases. It is designed for use cases such as adding a new payment method and updating contact details. Unlike the Checkout Form, the Self-service Form is dedicated to post-purchase account management.
{% endtab %}
{% endtabs %}
## **View and Pay Invoices**
Customers can view their invoices in self-service. Users can download a specific invoice, and pay any open invoices, both partially or in full. This makes it easier and quicker for users to pay outstanding balances, as well as having one central view to see all invoices.

## **Upgrade/downgrade subscription**
Subscribers can switch (upgrade or downgrade) their subscriptions via two dedicated flows:
{% tabs %}
{% tab title="Update Subscription (B2B)" %}
Update subscription: This flow is geared towards multi-products, hybrid pricing, concurrent changes that are typical in B2B scenarios. It could be for example an upgrade to a higher tier, a change in seats, and an add-on purchase on volume pricing. Learn more at [Create Update Subscription Experience](/product/self-service/what-are-the-standard-functionality-of-limio-self-service-manage-my-account/how-to-configure-an-update-subscription-flow).
{% endtab %}
{% tab title="Switch (B2C)" %}
Switch flow: This flow is geared towards simple, one-product changes that are typically in B2C scenarios. They could be do a different product or a change in term, for example monthly to annual. The upgrade or downgrade experience can be defined either via links between offers or via customer segmentation. Learn more at [Create Personalised Switch Experience](/product/self-service/what-are-the-standard-functionality-of-limio-self-service-manage-my-account/how-to-create-a-personalised-switch-upgrade-or-downgrade-experience)

{% endtab %}
{% endtabs %}
## **Cancel & Cancel/Save**
Subscribers can cancel a subscription by going into a dedicated experience. The experience can be customised to collect cancel reasons, offer special discounts, and be personalised. More details is available on [Create Personalised Cancel/Save Experience](/product/self-service/what-are-the-standard-functionality-of-limio-self-service-manage-my-account/how-to-create-a-personalised-cancelsave-experience)
## **Renew subscription**
The Limio Self-Service portal can also detect subscriptions due for renewal or that are inactive and could be renewed. Learn more on [Create Personalised Renewal Experience](/product/self-service/what-are-the-standard-functionality-of-limio-self-service-manage-my-account/how-to-create-a-personalised-renewal-experience)
## **View Customer Details**
The Limio Self-Service portal can allow a customer to see and manage their personal details, such as their email, name, password and phone.

## **View and Edit Addresses**
Billing and delivery addresses can be managed by subscribers in the Limio Self-Service Portal. Billing address will be tied to the payment methods, whereas the delivery address will only be shown for physical subscriptions.

### **Custom experiences**
Limio Self-Service use the same component framework as the Limio Shop and can be extended to cover more use cases. Learn more at: [https://docs.limio.com/developers/custom-components](https://docs.limio.com/developers/custom-components "mention").
# Create Update Subscription Experience
The Update Subscription flow in Limio allows customers to change their current subscription — upgrading, downgrading, or adding/removing add-ons. While the [Switch](/product/self-service/what-are-the-standard-functionality-of-limio-self-service-manage-my-account/how-to-create-a-personalised-switch-upgrade-or-downgrade-experience) experience already allowed simple mid-term or end-of-term changes, it has more powerful capabilities for multi-product companies such as B2B SaaS, such as displaying proration calculations, supporting multi-product changes, hybrid pricing such as per unit recurring and usage pricing, and add-on purchases.
{% hint style="warning" %}
For simple, B2C changes, consider using the Switch experience: [Create Personalised Switch Experience](/product/self-service/what-are-the-standard-functionality-of-limio-self-service-manage-my-account/how-to-create-a-personalised-switch-upgrade-or-downgrade-experience).
{% endhint %}
This guide explains how to configure offers, add-ons, and pages to configure the Update Subscription experience.
## Step 1: Configure offers
This step assumes you have already created the offers and add-ons you want to use during the update subscription flow.
First, you will need to configure offer attributes related to the update subscription flow.
| Offer attribute | What it controls | How to populate |
| -------------------- | ----------------------------------------------------------------------------------------------------------------------------------------------------------------------------------------------------------------------------------------------------------------------------------------------------------------------------------------------------------------------------------------------------------------------------------------------------------------------------------------------------------------------------------------------------------------------------------------------------------------------------------------------------------------------------------------------------------------------------------------------------------------------------------------------------------------------------------------------------------------------------------------------------------------------------------- | ----------------------------------------------------------------------------------------- |
| Downgrade CTA | Text shown on the [https://docs.limio.com/components/component-library/self-service-components/component-update-subscription-offers](https://docs.limio.com/components/component-library/self-service-components/component-update-subscription-offers "mention") button to users when this offer is defined as a downgrade compared to the offer the user currently owns | Populate with text, typical examples are "Downgrade", "Downgrade plan", or "Change plan". |
| Upgrade CTA | Text shown on the [https://docs.limio.com/components/component-library/self-service-components/component-update-subscription-offers](https://docs.limio.com/components/component-library/self-service-components/component-update-subscription-offers "mention") button to users when this offer is defined as an upgrade compared to the offer the user currently owns | Populate with text, typical examples are "Upgrade", "Upgrade plan", or "Change plan". |
| Update configuration | Determines the next page to send the user to when they select this offer to change to | Populate with a Limio page tag, such as /update-cart (step 2 below). |
| Downgrade offers | Determines which offers are shown as downgrade options in the [https://docs.limio.com/components/component-library/self-service-components/component-update-subscription-offers](https://docs.limio.com/components/component-library/self-service-components/component-update-subscription-offers "mention") component when this offer is the current offer that the customer owns | Populate with an offer label. Note that only published offers will be displayed. |
| Upgrade offers | Determines which offers are shown as upgrade options in the [https://docs.limio.com/components/component-library/self-service-components/component-update-subscription-offers](https://docs.limio.com/components/component-library/self-service-components/component-update-subscription-offers "mention") component when this offer is the current offer that the customer owns | Populate with an offer label. Note that only published offers will be displayed. |
| Cross-sell add-ons |
Determines the cross-sells shown in both the (used in acquisition) and the (used in update subscription) when this offer is the current offer in the basket
Also determines whether an existing add-on will be removed during an upgrade or a downgrade. If an add-on is compatible with the new offer the user has selected, the add-on will be kept on the subscription. Otherwise, the add-on will be removed when the upgrade or downgrade happens.
| Populate with a cross-sell label. Note that only published add-ons will be displayed. |
## Step 2: Configure pages
You will typically need 3 pages for the update subscription flow:
1. Subscription Details page - displays the customer’s current subscriptions and provides the starting point for initiating update actions such as upgrade, downgrade, or add add-ons
2. Update Offers page - presents available upgrade and downgrade options when the customer chooses to change their offer
3. Update Cart page - summarizes the pending update and allows the customer to review and submit the order
#### a. Subscription Details page
Use the Subscription Details component on this page.
#### b. Update Offers page
This page uses the [https://docs.limio.com/components/component-library/self-service-components/component-update-subscription-offers](https://docs.limio.com/components/component-library/self-service-components/component-update-subscription-offers "mention") component.
#### c. Update Cart page
| Key | Component name | Notes |
| --- | ------------------------------------------------------------------------------------------------------------------------------------------------------------------------------------------------------------------------------ | ------------------------------------------------------------------------------------------------------------------------------------------- |
| A | [https://docs.limio.com/components/component-library/self-service-components/component-update-cart-items](https://docs.limio.com/components/component-library/self-service-components/component-update-cart-items "mention") | Displays the offers and add-ons in the customers update cart (not the offers or add-ons the customer currently owns) |
| B | [https://docs.limio.com/components/component-library/self-service-components/component-compatible-add-ons](https://docs.limio.com/components/component-library/self-service-components/component-compatible-add-ons "mention") | Displays add-ons configured in the cross-sell add-ons attribute of the offer currently in the update cart |
| C | [https://docs.limio.com/components/component-library/standard-components/component-text](https://docs.limio.com/components/component-library/standard-components/component-text "mention") | Generic text field |
| D | [https://docs.limio.com/components/component-library/self-service-components/component-change-summary](https://docs.limio.com/components/component-library/self-service-components/component-change-summary "mention") | Only displays when the customer is being credited an amount, so they understand the total owed |
| E | [https://docs.limio.com/components/component-library/cart-components/component-cart-summary](https://docs.limio.com/components/component-library/cart-components/component-cart-summary "mention") | Displays what the customer owes today. If the customer owes an amount in the future, the amount will be 0.00. |
| F | [https://docs.limio.com/components/component-library/self-service-components/component-billing-schedule](https://docs.limio.com/components/component-library/self-service-components/component-billing-schedule "mention") | Displays the customer's upcoming charges |
| G | [https://docs.limio.com/components/component-library/self-service-components](https://docs.limio.com/components/component-library/self-service-components "mention") | In an update subscription flow, is only used for the Submit button to submit the order, error display, and rerouting upon successful order. |
## Step 3: Testing end-to-end behaviour
Using this configuration, the following flows will be supported:
* Upgrade an offer (effective immediately)
* Upgrade an offer, and add add-ons (effective immediately)
* Downgrade an offer (effective at end of term)
* Downgrade an offer, and add add-ons (effective at end of term)
* Add add-ons (effective immediately)
During all of these flows, existing add-ons will be kept if they are a compatible add-on to the new offer. An add-on is compatible if it is in the offer's **Cross-sell add-ons** attribute. If an existing add-on is not compatible, it will be removed at the order effective date (see above).
# Create Personalised Cancel/Save Experience
If subscribers decide to cancel their subscriptions, you need to be able to offer an online cancellation experience that maximises retention. Limio offers you the ability to create a personalised cancel/save experience and potentially prevent cancellations.
You are fully in control on the experience, whether it's a one-step, simple cancel button or a multi-steps, personalised, flow. This is achieved by preparing Limio Pages and Journeys. Pages may capture **cancel reasons**, surfacing **unique discounts**, suggesting **personalised upgrades or downgrades with incentives**, embedding **live chat options,** offering **free periods**, or surfacing **contact forms** that aim to persuade the subscribers to reconsider. Journeys will allow you to redirect customers to the most relevant pages, leveraging data such as the **original Offer** the customer has purchased, or the **Customer Segment**.
If the customer does cancel, Limio also enables you to collect valuable information about the reason for the cancellation to help you improve your offering.
In this guide, we are assuming that you have set up a Limio Self-Service Portal, if not then please read our [guide to setting up the My Account portal](https://docs.limio.com/product/self-service/what-are-the-standard-functionality-of-limio-self-service-manage-my-account).
You can create any cancel/save sequence you like. However, for this guide, we will create the most popular flow:
## **1. Create Cancel Reason Page**
The first thing we will do is create a cancel reason page in the **Pages** tab. The aim will be to collect the reason for the cancellation as to route the subscriber to the correct cancel/save experience.
Create your page by adding a survey. Various survey are available:
* **Cancel Survey** (card layout)
* **Cancel Survey Dropdown** (picklist layout)
* **Cancel Survey Radio Buttons** (radio button layout)
On all, you will be able to edit the text, add reasons for cancellation, and define the URL links to which the user will navigate.
The URL could go either:
* Directly into a Limio Page.
* Trigger a Limio Journey to dynamically route the customer to a personalised experience. By defining a URL that is a starting point for a Limio Journey, it will trigger the Journey and look whether the subscriber meet its conditions. Learn more here: [What are Limio Journeys](/product/journey/what-are-limio-journeys).
Note that if you'd like to have an alternate design for the Cancel Reason Page, the most flexible way to achieve it will be a Custom Component. Learn more on [https://docs.limio.com/developers/custom-components/custom-components](https://docs.limio.com/developers/custom-components/custom-components "mention").
Each Cancel Reason could lead a subscriber to different experience, for example:
* A **static Page**, for example a page that prompts subscribers to contact customer support which a Live Chat options such as Salesforce Live Chat or Intercom added via the [Custom Code](https://docs.limio.com/integrations/other-integrations/custom-code).
* A **Discount Page**, where you can offer the subscriber a discount (e.g. -10% for 1 month, or -50% for your year). This page is compatible with Limio Journey and can be segmented.
* % discounts are useful if you handle a lot of currencies as it reduces the amount of offers to configure.
* A **Switch Page,** to suggest alternative retention offers. This page is compatible with Limio Journey and can be segmented. Switch offers are dependent on currency, e.g. $1 per month for your next 3 months.
* Switch page are useful if you'd like to have a change of term or products.
To go to a specific page or trigger a journey, define the Url prop.
## **2.1. Create Discount Pages**
If you want to offer a % discount to the customer (-10% per month for the next 3 months), the next thing you will need to do is create Pages with Discount Offers. You will need to:
* In the Page Builder:
* Drag and drop the **Cancel Save Offer** component (see details [https://docs.limio.com/components/component-library/standard-components/component-cancel-save-offer](https://docs.limio.com/components/component-library/standard-components/component-cancel-save-offer "mention")) on the Page Builder.
* Note that 'Only show same term offers?' is true by default. This settings will mean that subscribers will only see the relevant term for their current subscription (e.g. 50% on the next month for a monthly subscription).
* If you'd like them to be able to cancel, add the **Cancel Button** component ([https://docs.limio.com/components/component-library/standard-components/component-cancel-subscription-buttons](https://docs.limio.com/components/component-library/standard-components/component-cancel-subscription-buttons "mention")) on the Page Builder.
* In Offers:
* You will then need to add Discount(s) on the Pages. Discount Offers are a separate concept from other Offers as they are %-based. See how to do that [Cancel/Save Discount](/product/pricing/what-are-offers-and-how-to-configure-them/cancel-save-discount)
The Cancel Save Offer component will look as follow:
## **2.2 Create Switch Pages**
As part of the cancel experience, you might want to suggest alternative retention offers to the subscribers to switch to (upgrade or downgrade to). To do that, you will need to:
* In the Page Builder:
* Create campaigns with a Switch Offers. Drag and drop the **Switch Subscription** components (see details [https://docs.limio.com/components/component-library/standard-components/component-switch-subscription](https://docs.limio.com/components/component-library/standard-components/component-switch-subscription "mention")) on the Page Builder.
* You can also add the **Subscription Info** (see [https://docs.limio.com/components/component-library/standard-components/component-subscription-info](https://docs.limio.com/components/component-library/standard-components/component-subscription-info "mention")) component to show to the subscriber their current subscription.
* If you'd like them to be able to cancel, add the the Cancel button (see [https://docs.limio.com/components/component-library/standard-components/component-cancel-subscription-buttons](https://docs.limio.com/components/component-library/standard-components/component-cancel-subscription-buttons "mention")) on the Page Builder.
* In Offers:
* Add regular Offer(s) on the Page. Those are created similarly to regular offers (see [Configure Legacy Offers (Legacy)](/product/legacy-features/how-to-configure-legacy-offers-legacy)). The only difference is you should set a Switch Date on the Offer.
The following experience is achieved with the **Subscription Info + Switch Subscription** components:
## **3.** **Create Cancel/Save Success, Switch Success or Cancel Success Pages**
There are now 3 possible scenarios:
* 3.1. Subscriber cancels.
* 3.2. Subscriber cancel/saves with a discount.
* 3.3. Subscriber cancel/saves with a different offer.
For all scenario, it is possible to just go back to the initial My Account page, which will display the status of the subscription. However, you may want to show the impact of the change. Let's go through them:
* **3.1. Cancels:** In the cases where subscribers still decide to cancel their subscription, they will need to see the Cancel Success Page. This Limio Component will inform subscribers that their cancellation has been canceled. Use the Order Change Success component (see [https://docs.limio.com/components/component-library/legacy-configuration-components/component-order-change-success](https://docs.limio.com/components/component-library/legacy-configuration-components/component-order-change-success "mention")).
* **3.2. Cancel/saves with a discount.** In the cases where subscribers still decide to cancel/save their subscription with a discount. Set the **"Redirect Url to subscription change confirmation page"** of the Cancel/Save Offer component to go to a Cancel/Save Success Page. This page will inform subscribers that they will receive a special offer. Use the Order Change Success component (see [https://docs.limio.com/components/component-library/legacy-configuration-components/component-order-change-success](https://docs.limio.com/components/component-library/legacy-configuration-components/component-order-change-success "mention")).
* **3.3. Cancel/saves with a different offer.** In the cases where subscribers still decide to cancel/save their subscription with a switch offer. We recommend you set the "**redirectUrl**" of the Switch Subscription component to go to a Switch Success Page. This page will inform subscribers that they will change to a different offer. Use the Order Change Success component (see [https://docs.limio.com/components/component-library/legacy-configuration-components/component-order-change-success](https://docs.limio.com/components/component-library/legacy-configuration-components/component-order-change-success "mention")) or the Order Change Table to show changes [https://docs.limio.com/components/component-library/legacy-configuration-components/component-order-change-table](https://docs.limio.com/components/component-library/legacy-configuration-components/component-order-change-table "mention").
## **4. Create a Journey for your Cancel/Save experience**
This is where the fun starts! You can create personalised experiences through Journeys. Journeys are triggered by URLs, so it can be inserted at any point in the the cancel/save flow.
You will then need to create a Limio journey where you will set which Discount Page(s) or Switch Page(s) a subscriber will go to based on their cancel reason (defined through the starting point URL), segment (defined through the journey condition), or product (defined through a journey condition)
To learn more, go to:
* For conditions based on **customer segments**: [Journey Based on Limio Segments](/product/journey/what-are-limio-journeys/create-a-journey-based-on-limio-segments)
* For conditions based on **customer's products/terms/offers**: [Journey Based on Subscription Offer Labels](/product/journey/what-are-limio-journeys/create-a-journey-based-on-subscription-offer-labels)
* For the cancel reason: [https://docs.limio.com/components/component-library/standard-components/component-cancel-survey](https://docs.limio.com/components/component-library/standard-components/component-cancel-survey "mention")
## **(Optional) Passing Cancel Reasons via URL Parameters**
The cancel flow supports passing cancellation reasons as URL query parameters between pages. This allows you to pre-populate or bypass the cancel survey.
### How cancel reasons flow between components
When a subscriber selects a reason on the Cancel Survey component, the component redirects to the next page with the reason encoded in the URL:
```
/next-page?subId=&reason=
```
The **Cancel Subscription Buttons** component on that downstream page reads the `reason` parameter from the URL and includes it in the cancel order sent to the backend.
Only the subscription ID and the reason are passed in the URL. If the subscriber types free-text feedback into the survey, that text stays with the survey component and is not carried over to the next page, so a downstream page cannot read it. Free-text feedback is only captured when the **Cancel Survey** component submits the cancellation itself, in which case it is sent on the cancel order as `data.reason.feedback` (which the Zuora integration writes to the cancellation reason details).
### URL parameters reference
| Parameter | Description | Required |
| --------- | ------------------------------ | -------- |
| `subId` | The subscription ID | Yes |
| `reason` | The cancellation reason string | No |
### Linking directly with a reason (bypassing the survey)
You can skip the cancel survey entirely by constructing a URL that includes the reason:
```
https://.limio.com/cancel-confirm?subId=&reason=Too%20Expensive
```
The **Cancel Subscription Buttons** component will pick up the reason from the URL and send it with the cancel order. No survey interaction is needed.
This is useful when:
* The cancellation is initiated from an external system (e.g. a CRM or customer service tool) and the reason is already known.
* You want to simplify the cancel flow by removing the survey step while still capturing a reason.
### Storing the cancel reason in Zuora
To have the cancel reason stored on the Zuora subscription, you need to:
1. Enable **"Set a cancel reason custom attribute"** in General Settings > Zuora > Cancel.
2. Ensure a `CancellationReason__c` custom field exists on the Zuora Subscription object.
When both are in place, Limio will automatically store the `reason` value as `CancellationReason__c` and any free-text feedback as `CancellationReasonDetails__c` on the subscription.
For a full list of recommended Zuora custom fields, see [https://github.com/innovate42/innovate42-service-template/tree/main/docs/\_external/spaces/integrations/zuora-integration/getting-started/recommended-custom-fields-to-set-up-in-zuora-to-receive-enriched-limio-data.md](https://github.com/innovate42/innovate42-service-template/tree/main/docs/_external/spaces/integrations/zuora-integration/getting-started/recommended-custom-fields-to-set-up-in-zuora-to-receive-enriched-limio-data.md "mention").
## **5. Testing your Cancel Save Experience**
To view your cancel/save experience from your customers perspective, you'll need to carry out a 'Live Test' through the Manage My Account portal in a sandbox environment.
* **Pre-Conditions:** You will need to order one of your product through an authenticated checkout. Once ordered, you can add manually a segment on the Limio Customer by navigation to Subscriptions > Customer and adding the Segment.
* **Step 1** - Go to My Account portal (e.g. /mma)
* **Step 2** - Go to your subscriptions and click on the '*Cancel*' button.
* **Step 3** - View your cancel survey page and go through the different cancel reasons to make sure you are taken to the right Pages.
If you have any questions about how to create a personalised cancel save experience, please email us at .
## (Optional) How to avoid subscribers abusing a discount?
| 🛠 This feature is in **beta**. Please contact if you have issues with it. |
| ---------------------------------------------------------------------------------------------- |
If you want to prevent customers from getting multiple discounts during the cancel/save experience, you can add the block discount dialog component to the cancel/save page. This will display a modal preventing the customer from applying a discount to their subscription if it detects that there is already one present.
The customer will be presented with a message explaining that they already have a discount and a button which will redirect them to a different page in the shop. The heading, body, button label and redirect destination are all configurable through the Limio props on the right hand side of the page builder.
Learn more at [https://docs.limio.com/components/component-library/standard-components/component-block-discount-dialog](https://docs.limio.com/components/component-library/standard-components/component-block-discount-dialog "mention").
# Create Personalised Renewal Experience
Renewals can be used when a subscriber is a on fixed-term subscription, i.e. it ends on a specific date. Fixed-term subscriptions are used in various ways:
* A subscription for a business based on a 2-years contract that requires a manual renewal at the end of term.
* A lapsed or cancelled subscription that is being renewed.
* A gift subscription that is ending and needs to be renewed into an auto-renew subscription.
* A free trial that requires a manual conversion.
If subscribers decide to renew their subscriptions, they need to be able to offer an online renewal experience with specific offers that encourages renewals. Limio offers you the ability to create a personalised renewal experience to accelerate renewals. This is possible by directing the customer to renewal Pages with personalised offers.
## **1. Create a Renewal Page to start the renewal process**
A customer will access the Renewal journey primarily by authenticating and choosing which Subscription to renew. This is the recommended way of starting the renewal process.This can be facilitated via the Limio Renewal Options Component:
Carefully configure the **Login button URL** to take the customer to your authentication provider and then on to the starting point of a Limio Journey or directly to a specific Renewal Page. This would take the form of a URL to the authentication page and a redirect URL post-authentication. For example, [`https://{{domain}}.com/s/login/?estartURL=https%3A%2F%2F{{domain}}.com%2Fsso-auth%2F%3Flmo_redirect_url%3Dhttps%3A%2F%2F{{domain}}.com%2F{{campaignTag}}`](https://{{domain}}.com/s/login/?estartURL=https%3A%2F%2F{{domain}}.com%2Fsso-auth%2F%3Flmo_redirect_url%3Dhttps%3A%2F%2F{{domain}}.com%2F{{campaignTag}}.)
Alternatively, you can also directly start a renewal process from a link inside an email or an app. Skip this step if this is the case
### (Optional) How to handle renewals for customers who don't have an account
Limio can support renewal for an unauthenticated Customer. This use case is tailored to companies selling physical subscription (e.g. print newspapers) or for companies selling license code that need to be manually renewed. It will require to use a Subscription Number and Post Code to renew a specific Subscription
Fill in the **Manual entry renewal text** rich text field to provide some copy and a URL to take the customer to the unauthenticated version of the Renewal journey. The page where the user is redirected here should contain the **Limio Renewal Form Component**:
Here the customer will be able to use the Subscription Number and their Post Code to update their subscription without the need to authenticated.
|
❗️This page can also be used to direct users to renew from other channels subRef and email query parameters can be used to initiate a renewal on this page.
e.g.
|
| -------------------------------------------------------------------------------------------------------------------------------------------------------------------------------------------------------------------------------------------------------------------------------------------------- |
Setup the **Continue button url** prop to send your customer to your Renewal Pages after the subscription has been successfully looked up. This time be careful to add the **subRef** query parameter variable to your URL so that the Limio Renewal Page knows which subscription your customer is attempting to renew.
Additionally, the **lmo\_co** query parameter can be used to make sure your customer is directed to the correct country's pricing in the case of global Pages.
e.g. `/renew?subRef={{subRef}}&lmo_co={{country}}`
## 2. Create a modular checkout for renewal
Now, we need to allow customers to check out for their renewal. This checkout is typically used to capture the details required for payment.
Set up a new checkout called Renewal Checkout with a link such as /renewal-checkout with the Form component ( [https://docs.limio.com/components/component-library/modular-checkout-components/component-checkout-form](https://docs.limio.com/components/component-library/modular-checkout-components/component-checkout-form "mention")) .
Then, you will need to capture the payment details within this checkout. Use the following subcomponents:
| Subcomponent name | Limio field name | Type | Required |
| ----------------- | ---------------- | ---- | -------- |
| AddressFields | N/A | N/A | Yes |
| LimioPaymentField | N/A | N/A | Yes |

## **3. Create Renewal Pages that maps to your catalog**
As part of the renewal experience, you will want to suggest alternative offers to the subscribers to renew. These can be the:
1. The same as your acquisition Offers, in which case you will simply point them to your existing Acquisition Page.
2. Special Renewal Pages to entice your customers to resubscribe through special segmented deals.
In the 2nd option, you will likely need to create Renewal Pages that maps to your Acquisition Pages. For example, if you have specific pages for UK customers with GBP£ pricing, then you will need a Renewal Pages in GBP£ for UK customers. Similarly, if you have Acquisition Pages for Product A, you will want a Renewal Page for Product A. Those routing are achieved via Journeys, onto which you can layer on segmentation. To set up Renewal Pages, you can follow our guide on [creating Pages](https://docs.limio.com/product/page-builder/page-builder-overview-of-key-features?q=How-to-create-Campaigns#creating-a-page).
For the **checkout** and **order complete**, you can similarly use your existing acquisition checkout and order complete, or create a more personalised renewal and order complete checkout that may include different messaging.
## **4. Create Journeys to direct customers to the relevant Renewal Pages**
To serve the right renewal page, you will then need to create Limio journeys. This is where you will set which Renew Page(s) a subscriber will receive based on:
* their initial product (if you sell multiple products)
* their segment (defined through the condition)
* their purchase country (if you have localised pricing)
To learn more how Limio journeys work and how to set one up, go to:
* For conditions based on customer's products/terms/offers: [Journey Based on Subscription Offer Labels](/product/journey/what-are-limio-journeys/create-a-journey-based-on-subscription-offer-labels)
* For conditions based on customer segments: [Journey Based on Limio Segments](/product/journey/what-are-limio-journeys/create-a-journey-based-on-limio-segments)
* For conditions based on purchase country: [Journey Based on Customer Location](/product/journey/what-are-limio-journeys/create-a-journey-based-on-the-customer-location)
## **5. Check how renewals are integrated with Zuora**
There are 3 kinds of customers that can renew a subscription:
* 1\. A subscriber with an active fixed term (not auto renewing) subscription
* 2\. A subscriber with a lapsed or cancelled subscription
* 3\. A subscriber with an active gift subscription
For each one of these Limio will impact the Zuora Billing Accounts and Subscriptions as follows:
| | **Type** | **Active Subscription** | **Zuora Billing Account** | **Zuora Subscription** |
| ----- | ---------------------- | ----------------------- | ------------------------- | ---------------------- |
| **1** | **Active Fixed Term** | Yes | Update Existing | Update Existing |
| **2** | **Lapsed / Cancelled** | No | Update Existing | Create New |
| **3** | **Active Gift** | Yes | Create New | Create New |
In the case of a new Subscription being added in Zuora, the start date of this new Subscription will be **after** the existing Subscription ends.
In the case of updating existing subscription, Limio will perform an **Add Product** action followed by a **Renew Subscription** to the Subscription at the end of the current active term.
## **6. Test the Renewal Experience**
To view your renewal experience from your customers perspective, you'll need to carry out a 'Live Test' through the Manage My Account portal in a sandbox account. This step involves you ordering up your own product and logging-in to Limio Self Service Manage My Account page with the email of your order, or using your Subscription Number
**Step 1** - Go to your Renewal Page and either log in to your account or use your Subscription Number & Post Code to look up the subscription you want to renew
**Step 2**- You will now be displayed a selection of Offers, choose a renewal offer
**Step 3** - Go through Limio Checkout and confirm your renewal
**Step 4** - Once you reach the Limio Order Confirmation page, proceed to Limio Self Service Manage My Account to observe your newly renewed Subscription.
If you have any questions about how to create a renewal experience, please email us at .
# Create Personalised Switch Experience
The Switch experience allows to manage simple upgrades and downgrades, such as **transitioning from one product to another** (e.g., from Digital Light to Digital) or **changing the billing frequency** (e.g., from annual to monthly). It's typically used in B2C scenarios.
This functionality is achieved by directing customers to tailored switch campaigns, ensuring that each subscriber's experience is customised to their needs and preferences.
{% hint style="info" %}
If you are a B2B company and need upgrades/downgrades to handle multi-products, hybrid pricing or quantities, consider using the [Create Update Subscription Experience](/product/self-service/what-are-the-standard-functionality-of-limio-self-service-manage-my-account/how-to-configure-an-update-subscription-flow).
{% endhint %}
## **1. Route Traffic to the Switch experience**
Customers may access the switch page by a variety of channels. They could arrive directly from an email encouraging them to upgrade, from Limio's My Account, or your own My Account experience.
If they only have **one subscription**, you could send them directly to the Switch page's URL (e.g. /switch) and Limio will automatically pick their subscription.
If they have **multiple subscriptions**, then you should provide the Limio subscription id in your link (e.g. `/switch?subId=ABC123`). If subscribers come from Limio My Account page, then we will automatically append `?subId=ABC123`.
You can track where traffic has come from via UTM parameters. Those will be tracked in the Limio Order and passed to third-party integrations. Learn more at [Configure Tracking in Salesforce and Zuora](/product/analytics/how-to-configure-limio-for-tracking-and-attribution-in-salesforce-and-zuora)
## **2. Create one or multiple Switch Pages**
As part of the switch experience, you will want to suggest alternative offers to the subscribers to upgrade or downgrade to.
To do that, you will need to create Page(s) with Offers. Let's create your first Switch Page.
|  |
Your Switch page will need to be authenticated, as the customer's subscription should be identified. Toggle the Require Authentication? to True. The customer will only be able to access the page if they are authenticated and the subscription found in Limio is associated to this customer.
Advanced: If multiple users may be authorized to modify a subscription (for example a company subscription), add the authorized persons via the External Identity API. This is typical of B2B subscriptions.
|
| --------------------------------------------------------------------- | ------------------------------------------------------------------------------------------------------------------------------------------------------------------------------------------------------------------------------------------------------------------------------------------------------------------------------------------------------------------------------------------------------------------------------------------------------------------------------------------------------------------------------------------------------------------------------------------------------- |
Now let's build your page. Drag and drop the **Switch Subscription** components (see details [https://docs.limio.com/components/component-library/standard-components/component-switch-subscription](https://docs.limio.com/components/component-library/standard-components/component-switch-subscription "mention")) on the Page Builder. The Switch Subscriptions components allows you to:
* **Filter Same Term:** This filter hides offers with the same terms as the customer's current subscription. For example, if a customer has 'Product A Monthly', they won't see 'Product A Monthly' offers again. Instead, they'll see options like 'Product A Annual'. This filter is usually on, except when customers want to change the subscription quantity.
* **Block Product Switch:** This filter lets customers see offers for different products but prevents them from switching to a different product. For instance, if a customer has 'Product A', they will see offers for other products but can only switch to another 'Product A' offer online.
Finally, you will need to add Offer(s) on the Campaign. Those are created similarly to regular offers (see [Configure Legacy Offers (Legacy)](/product/legacy-features/how-to-configure-legacy-offers-legacy)). One key difference is you should set a Switch Date on the Offer. The Switch Date has two settings:
* **Immediately:** When a customer switches their subscription, the new one starts right away, effective today. The charge will be made using their default payment method.
* **End of Term:** If a customer chooses to switch at the end of their current term, the new subscription starts at renewal.
There are a few other default behaviours:
* The charge will be processed using their default payment method.
* If moving to a product with a physical component, the billing address will be used as the default delivery address, however the user can modify this address.
You can also drop different components to better explain the features across different products.
{% hint style="info" %}
Create Your Own Custom Switch Component with Limio. If you prefer a personalised touch over Limio's standard Switch component, you can build your own using [Limio Custom Components and SDK](https://docs.limio.com/developers/custom-components).
{% endhint %}
## **2.** **Create Switch Success Page**
When subscribers choose to switch their subscription, they should be directed to the 'Switch Success Page' via the redirectUrl of the Switch Component.
To facilitate showing the changes that have been made, use the [https://docs.limio.com/components/component-library/legacy-configuration-components/component-order-change-success](https://docs.limio.com/components/component-library/legacy-configuration-components/component-order-change-success "mention") or [https://docs.limio.com/components/component-library/legacy-configuration-components/component-order-change-table](https://docs.limio.com/components/component-library/legacy-configuration-components/component-order-change-table "mention").
## **3. Create a Journey for your Switch experience**
You will need to create a Journey in Limio where you can specify which Switch Pages (or Campaigns) a subscriber should see. This decision will be based through set conditions, such as their segment or their initial product.
To learn more how Limio journeys work and how to set one up, go to:
* For conditions based on customer segments: [Journey Based on Limio Segments](/product/journey/what-are-limio-journeys/create-a-journey-based-on-limio-segments)
* For conditions based on customer's offers (which includes products/terms/offers): [Journey Based on Subscription Offer Labels](/product/journey/what-are-limio-journeys/create-a-journey-based-on-subscription-offer-labels)
One of the most common use case will be to use the label on your acquisition offer to determine which Switch page is the customer eligible for. For example, if you labelled your bottom-tier offer 'Basic', use the Basic label and direct them to a Switch Page that would have Pro and Premium Offers.
## **4. How Switch update Limio and Zuora.**
Limio will send a Remove Product, Add Product, and Terms & Conditions Orders to Zuora. If done mid-term, this will create a prorated invoice. If done end of term, the changes will be effective at the next renewal.
Read more on [https://docs.limio.com/integrations/keeping-zuora-and-limio-in-sync/how-limio-events-updates-zuora-for-commerce](https://docs.limio.com/integrations/keeping-zuora-and-limio-in-sync/how-limio-events-updates-zuora-for-commerce "mention")
## **5. Testing your Switch Experience**
To see what your switch experience looks like from a customer's perspective, conduct a 'Live Test' via the 'Manage My Account' portal. This will involve making a purchase and then going through Limio Self-Service 'Manage My Account' page in a sandbox environment. In more details:
1. Make an initial purchase
2. Login to your account through the My Account self-service portal.
3. Go to your subscriptions and click on the '*Change my subscription*' button (it may be labelled differently based on your configuration).
4. View your switch page and process the switch.
5. In the Limio App, go to Events to see if the switch order (Order Change Offer) went through.
If you have any questions about how to create a personalised switch experience, please email us at .
# Partner Portal Overview
You can create a dedicated **partner experience** in Limio, where each partner accesses their own Offers, places orders via a custom Partner Checkout, and views existing customers and subscriptions through a tailored Self-Service experience.
### What is the partner experience?
A **partner experience** in Limio is a personalised journey where:
* **Secure Login**: Partners access the portal through a secure identity provider.
* **Custom Pricing**: Partners view pricing tailored to their organization.
* **Order Placement**: Partners place new orders using a dedicated checkout flow.
* **Customer and Subscription Management**: Manage all customer details and subscriptions through Limio Self-Service.
* **Subscription Upgrades/Downgrades**: Partners can upgrade or downgrade customer subscriptions.
* **Add-On Purchases**: Process additional purchases on customer subscriptions.
* **Subscription Cancellations**: Partners can cancel customer subscriptions.
The Limio partner experience setup is fully compatible with the [Page Builder](/product/page-builder/page-builder-overview-of-key-features), allowing you to design branded [pricing](/product/pricing/what-are-offers-and-how-to-configure-them), [checkout](/product/checkout/overview-how-to-customise-the-limio-modular-checkout), and [self-service](/product/self-service/what-are-the-standard-functionality-of-limio-self-service-manage-my-account) pages for specific partners without writing code. For advanced use cases, you can extend pages using and the to build dynamic, identity-aware functionality.
Limio integrates effortlessly with platforms like Zuora, Stripe, and Salesforce. This integration streamlines the customer lifecycle, from order placement and invoicing to subscription management and CRM visibility.
You can also create new partner orders via the [API](https://api.limio.com). This is helpful if your product is being white-labeled from a partner's external system and they want to submit orders directly in Limio without a UI interface.
If you are setting up Partner Portal for the first time, we recommend to read:
{% content-ref url="" %}
{% endcontent-ref %}
### What is a Partner Organisation in Limio?
A **partner organisation** is the account you use to scope access and data to a specific partner.
Each partner organisation has a unique **Partner Organisation ID**.
Partner pages use this ID to:
* Filter offers a partner can buy.
* Filter customers and subscriptions a partner can view.
* Attribute orders and downstream billing/CRM records to the right partner.
To set up partner organisations and partner users, see [Creating and Managing Partners](/product/partner-portal/creating-and-managing-partners).
### **What is a Partner Login in Limio?**
Partner Portal pages are protected with a **partner authentication provider**.
Learn how to configure and apply partner authentication: [Creating Partner-Specific Pages](/product/partner-portal/creating-partner-specific-pages)
### **How do I implement partner-specific pricing across the lifecycle?**
Partner Portal supports partner-specific pricing for net new orders as well as expansion and renewals. Learn more at [Creating Partner Offers](/product/partner-portal/creating-partner-offers).
Roadmap note
Limio is actively improving the partner portal experience. Expect more administration flexibility, more granular reporting, more flexible integrations, and more automation.
# Creating and Managing Partners
You can use the **Limio Partner Management Tool** to create and manage **partner organisations** and assign **partner users**. This is useful for supporting third-party resellers or distributors who need to manage subscriptions, offers, and invoices on behalf of their customers.
Each **partner organisation** is assigned a unique ID and can have one or more associated **partner users** who are granted access to Limio Shop or Self-Service pages, depending on configuration.
***
## Creating a partner organisation
A **partner organisation** represents the business entity you work with (e.g., a reseller or channel partner).
To create a new partner organisation:
1. Go to **Settings > Profile > Partners**.
2. Click **Create Partner.**
3. Fill in the required details:
* Partner organisation name - required
* Logo (URL) - optional
* Zuora account ID - required
* Salesforce account ID - option, although required if you are planning to use Salesforce
* Zuora Invoice Owner - required
* Partner - If partner is selected, the resulting subscription in Zuora will have the invoice owner field set to the Zuora account ID of the partner organisation populated above.
* End customer - If end customer is selected, the resulting subscription in Zuora will have the invoice owner field set to the Zuora account ID of the customer that is created when a new subscription is made.
4. Click **Create Partner Organisation**.
The organisation is now available and will be assigned a **Partner Organisation ID**, which will be visible in the partners table.
***
## Adding partner users
A **partner user** is an individual who will have access to Limio Shop or Self-Service pages associated with their partner organisation.
To add a user:
1. Go to **Settings > Profile > Partners**.
2. Click on the organisation you'd like to add users to.
3. Click **Create user**.
4. Enter:
* Name
* Email address - please note that creating multiple partners with the same email address is not allowed
5. Click **Save**.
Once you add a partner user, the user will be able to log into partner pages using Cognito as an authentication method.
***
## Editing partner organisations
To edit a **partner organisation**:
1. Go to **Settings > Profile > Partners**.
2. Click on the organisation name.
3. Click the pencil icon. The only editable fields are partner organisation name and logo.
# Creating Partner Offers
You can make specific offers available to partners through the Partner Portal by configuring key attributes in the **Limio Commerce** platform. This ensures that only eligible partner organisations can view and purchase the offers, while end customers or ineligible partners are restricted.
### Creating partner offers
1. Create your offer, or open an existing offer that you want to sell through a partner
2. In the offer editor, find the attribute **Sales Channel**
3. Select **Partner** if the offer is only for partners
* (Optional) Select **Online** as well if you want to make the offer available to both partners and end customers, or **Salesforce** if you want to sell the offer through Limio for Salesforce (LFS)
* Note: If you do not select **Partner**, the offer will not appear in the Partner Portal — even if you configure Eligible Partner in the next step.
4. Locate the **Eligible Partners** attribute (multi-picklist)
5. Select one or more partner organisations from the list. These values are sourced from the .
6. Click **Save** on the offer
7. When you are ready to sell the offer online, ensure it is published by building and publishing the page it is attached to.
> Tip: If partners are unable to see, add to basket, or purchase an offer, always check both **Sales Channel** and **Eligible Partners**.
# Creating Partner-Specific Pages
You can restrict access to specific pages in Limio Commerce so only authenticated partner users can view them. This guide explains how to set up the authentication in the Limio settings and how to apply the partner authentication to certain pages.
## Set up new partner authentication
*This guide applies only to **OpenID Connect** authentication. The **Is Partner** setting is not available for other authentication types.*
1. In Limio Commerce, go to **Settings → Authentication Providers**.
2. Create a new authentication provider by clicking **OpenID Connect.**
3. Fill out the fields normally.
4. Find the **Is Partner Auth?** field. Tick the checkbox to mark this provider as a partner authentication provider.
* **Default**: Unticked (false)
* Leave it unticked for regular customer login flows.
5. Click **Save**.
Please note that you will typically only need to configure one partner authentication provider. Partner eligibility to purchase certain offers is configured on the offer itself. Read this article to find out more:
When this authentication provider is used on a Limio Shop page, if the user’s email matches a partner user in the :
* the user will be provided with a OTP via email
* upon successful login, the JWT token will include the following claim:
```auto
"lmo:partner_org": "12345"
```
If the user’s email **does not** match any partner user:
* the user will not be sent a OTP via email, so they will not be granted access to partner-only pages.
## Apply partner authentication to pages
On each page you want to restrict to partners, follow these steps:
1. Open the Page.
2. Open the Settings.
3. Set **Require Authentication?** to true.
4. Set **Auth Provider** to the partner authentication method you set in in the stage above.
5. Click confirm.
6. Click Save.
7. Rebuild and republish your page.
## Typical partner pages required
This is a list of typical partner pages you will need for your partners to create and manage customer subscriptions.
Read our [Partner Portal Guide](https://docs.limio.com/guides/feature-implementation-guides/guide-partner-portal) for step-by-step instructions.
**Purchasing a new subscription:**
* Offers page
* Checkout page - see our [Modular Checkout guide](https://docs.limio.com/product/~/revisions/odxPCKTJ4escQ74ZDQLs/checkout/overview-how-to-customise-the-limio-modular-checkout) to get started
* Order complete page
**Managing existing customers and subscriptions:**
* List of all of partner's customers - use the [Partner Customers Table](https://docs.limio.com/components/component-library/partner-portal-components/component-partner-customers-table)
* List of all subscriptions for one specific customer - use the Subscription Details component
* Update subscription pages - see our [Update Subscription guide](https://docs.limio.com/product/~/revisions/gC564qJSw4wiACLAgMiY/self-service/what-are-the-standard-functionality-of-limio-self-service-manage-my-account/how-to-configure-an-update-subscription-flow) to get started
# Set up Authentication for Customers
Limio Shop and Self-Service offers subscription management with authenticated access. Integrate with identity providers via Limio SSO using OAuth and OpenID Connect for secure authentication.
Within your **Limio Shop and Self-Service**, customers (end-users) have the ability to log in to their accounts, view their subscriptions and edit their details. To do so, customers must authenticate.
{% hint style="warning" %}
You are reading the SSO docs to login into the Limio Shop and Self-Service. If you are looking at how your employees can access the Limio application via SSO, go to [Login options (SSO)](/product/settings/security/login-options-sso).
{% endhint %}
Limio allows users to log in using their current Identity Provider (IdP) through identity federation. This means they can access Limio's secure pages without needing a separate Limio login. Limio supports major IdPs like [AWS Cognito](#openid-value-definitions-with-example-from-aws-cognito), [Auth0](/product/authentication/sso-your-authentication/use-auth0-with-limio-for-customers), [Microsoft Entra (formerly Azure)](/product/authentication/sso-your-authentication/use-microsoft-azure-with-limio-for-customers), Salesforce, Keycloack, Clerk, Firebase and more. If you have a custom-built identity solution, it's recommended to have an [OpenID layer](https://openid.net/developers/how-connect-works/) to enable SSO.
The integration uses OAuth and OpenID Connect, providing a smooth login experience as users directly interact with your company's IdP login page.
This approach avoids identity duplication and enhances the customer experience by using their existing authentication setup.
**Setting up Identity Federation requires some pre-existing knowledge around Identity and security, and this document is aimed at Architect, DevOps Engineer, or IT Engineers.**
What is OAuth?
OAuth (Open Authorization) is primarily the authorization framework. It allows the company to grant permission to the Limio application (client) to access protected resources on their behalf. This is the first item to setup.
What is OpenID Connect (OIDC)?
OpenID Connect (OIDC) is built on top of OAuth 2.0 and adds an authentication layer. It provides a standardized way for Limio to verify the identity of the end-user and obtain user profile information. OIDC is focused on authentication, enabling clients to authenticate users, receive identity claims, and establish trust in the identity information provided by an identity provider (IdP). This is the second item to setup.
Can I authenticate my Limio Commerce app user via SSO?
If you want to federate login into Limio Commerce app, this is managed differently. Go to [How to federate your Authentication provider for Limio app users](/product/settings/security/login-options-sso) for more details.
## Overview
### How does Limio Identity work in practice
Limio uses a standard identifier, such as `sub` (subject), to determine a user's identity. In the JSON Web Token (JWT) standard, the `sub` is a string that identifies the principal that is the subject of the JWT. This is usually the user and may look like `"sub": "1234567890"`. Limio will create a **Limio Identity** that maps to this `sub`.
From a customer flow in Limio Shop or Self-Service, the Identity will usually work in this way:
{% stepper %}
{% step %}
**Customer visits an authenticated Limio page**
Customer hits a Limio Page that is marked as Authenticated, usually a checkout or a self-service page.
{% endstep %}
{% step %}
**Customer is redirected to login or register**
Limio redirects the customer to your Identity Provider
{% endstep %}
{% step %}
**Customer registers or authenticate**
This is done in your identity provider
{% endstep %}
{% step %}
**Customer is redirected to the authenticated Limio page**
At this point, Limio will check the `sub` in the JWT token and either:
{% tabs %}
{% tab title="Not known to Limio" %}
Create a **Limio Identity** that maps to your JWT token (defined as a **Limio External Identity**).
If the customer is known to an external system such as Zuora, it is possible to sync it in Limio on-the-fly. See [Configure Zuora to Limio Hot Sync](/integrations/keeping-zuora-and-limio-in-sync/configuring-zuora-to-limio-hot-sync).
{% endtab %}
{% tab title="Known to Limio" %}
Finds the corresponding **Limio Identity**, and identifies the relevant **Limio Subscription(s)** to display in My Account or whether the customer is authorised to access the specific Self-Service Page
{% endtab %}
{% endtabs %}
{% endstep %}
{% step %}
**Customer proceeds with the order or change on the authenticated Limio page**
At the time of purchase, Limio creates first objects like Limio Subscription and **Limio Customer** which are tied to a **Limio Identity**.
{% endstep %}
{% step %}
**Customer completes the order or change action**
In the next step, Limio processes the order by creating a Limio Order and Event that creates objects in the connected system, such as Zuora and Salesforce. The Zuora and Salesforce Accounts objects will then be linked back to the Limio Customer through **Limio** **Identities.**
{% endstep %}
{% endstepper %}
Below is an example of the **Limio Identities** stored on a Limio Customer:
A couple of points:
* Limio will usually expect the `sub` to be the primary identifier. However, it is possible to use Claims to define alternative identifier. See Claims in this document for more information.
* It is possible to append more External Identity to a Limio Customer, for example to facilitate multiple B2B users manipulating Limio Subscription(s). Learn more [here](https://docs.limio.com/developers).
## Set up OAuth & OpenID
### Adding an Authentication Provider via OAuth and OpenID with Limio
{% stepper %}
{% step %}
Set the authentication type to `OAuth` in General Settings → Site Security
{% endstep %}
{% step %}
Now you're ready to add the Authentication Provider, first select Authentication Providers on the left side panel. You should see this view:
{% endstep %}
{% step %}
Click on the **OpenID Connect** button to add a new provider. You will be presented with a modal like this.
{% endstep %}
{% step %}
The details you need to enter are marked with an asterisk. Enter the data from your authentication provider.
{% endstep %}
{% endstepper %}
### OpenId Value Definitions (with example from AWS Cognito)
In this example we will specifically be going through adding AWS Cognito to OpenID, however, the process will work for any OAuth provider:
{% hint style="info" %}
This setup assumes an Amazon Cognito User Pool with OIDC endpoints already configured. See:
{% endhint %}
Limio uses named instances for environments. We'll refer to `{tenant}` as the identifier for your Limio application and `{tenant-shop}` as the identifier for Limio Shop & Self-Service, your customer-facing portal. Append `.prod.limio.com` for EU hosting or `.prod-us.limio.com` for US hosting. If unsure, log into Limio and check your browser window.
#### OAuth Callback / Redirect URI
When registering Limio as a client in your Identity Provider, you must whitelist the redirect URI that Limio uses after authentication. This is always:
```
https://{tenant-shop}/auth/callback
```
For example: `https://{tenant-shop}.prod.limio.com/auth/callback`
Register both your staging and production shop domains as separate allowed redirect URIs in your IdP.
#### Provider Name
The hostname of your Limio Shop & Self-Service — no `https://` prefix, no trailing slash. For example: `{tenant-shop}.prod.limio.com` or a custom domain such as `dev-subscriptions.company.com`.
{% hint style="warning" %}
The Provider Name must match your shop domain exactly. A mismatch will cause redirect loops after authentication. See the troubleshooting table below if you encounter auth redirect loops.
{% endhint %}
{% hint style="info" %}
Limio can support multiple identity providers in the same application, so make sure to use a descriptive name. You can always change it later.
{% endhint %}
#### Issuer Name
The issuer name, also known as the Issuer Identifier, is a unique identifier used to identify the issuer or entity that issued a security token, such as a JSON Web Token (JWT) or a SAML assertion. It provides a means for the recipient of the token to validate the token's authenticity and determine the authority responsible for its issuance. The issuer name typically takes the form of a URL or a string identifier that uniquely identifies the issuing entity. It could be the URL of the identity provider or authorization server, or it could be a custom identifier specific to the issuer.
For example, it could be:
```
https://cognito-idp.us-east-1.amazonaws.com/us-east-1_u11AtClaO
```
For other services, the Issue Name can be:
```
https://server.dev.company.com/auth-server
```
#### Client ID
This can be found in the AWS Console. Look in Cognito → Relevant user pool → App Client Settings. The ID is labelled and centrally placed just under the app client and will take the form of a series of letters and integers.
#### Client Secret
This isn't necessary to work for AWS Cognito, but can be found in App Clients → Show Details.
#### JWKS URI
A JWKS URI is a link to a JSON document listing public keys in the JSON Web Key format. It's used with JSON Web Tokens (JWTs) to verify JWT signatures securely. Limio uses the JWKS URI to access these public keys to check the signature and ensure the JWT is valid and authentic.
For AWS Cognito, it will look like:
```
https://cognito-idp.eu-central-1.amazonaws.com/eu-central-1_ElEDB2Rnh/.well-known/jwks.json
```
For other services, the URI could be:
```
https://server.dev.company.com/auth-server/oauth2/jwks
```
#### Authorization Endpoint\*
Authorization Endpoint is important in OAuth 2.0. It's part of the server that lets users log in and approve access to their data. When an app wants to use someone's data, it sends the user to this endpoint. The app includes details like client ID, requested data access, and redirect URI.
To find the AWS Cognito Domain navigate to Domain Name in Cognito. You will then need to append to /oauth2/authorize to the end of it. It will look like:
```
https://{tenant}-limio.auth.us-east-1.amazoncognito.com/oauth2/authorize
```
For other services, it would look like:
```
https://server.dev.company.com/auth-server/oauth2/authorize
```
#### Logout Endpoint
**Logout Endpoint Overview**
The Logout Endpoint, or Logout URL/API, is provided by an identity provider to allow users to log out. When a user clicks "Logout" in an app, the app redirects them to this endpoint to properly end their session.
If you are using AWS Cognito as an authentication provider, it will look like:
```
https://{tenant}.auth.us-east-1.amazoncognito.com/logout?logout_uri=https://{tenant-shop}.prod.limio.com&
```
It's also important to note the `logout_uri` parameter is for the Limio Shop (i.e. your customer-facing portal) and will need to match the one configured in your AWS Cognito instance.
#### Token Endpoint\*
The Token Endpoint is an endpoint provided by the authorization server where client applications can exchange authorization grants, such as authorization codes or client credentials, for access tokens.
In AWS Cognito, it will be the domain with /oauth2/token appended to it. It will look like:
```
https://{cognito-domain}.auth.{region}.amazoncognito.com/oauth2/token
```
#### Token Endpoint Type\*
The token endpoint is part of the OAuth 2.0 system that lets apps get access tokens by exchanging authorization codes or client credentials. There are usually two ways to send client credentials to the token endpoint:
1. **Basic Authentication:** In this method, the client sends its credentials (client ID and client secret) in the HTTP request's Authorization header using "Basic" authentication. The credentials are encoded in Base64.
2. **POST Request:** In this method, the client includes its credentials (client ID and client secret) in the body of the POST request as URL-encoded parameters. The parameters are typically named "client\_id" and "client\_secret" respectively.
Both methods authenticate the client and get the access token from the token endpoint. The choice between basic authentication and a POST request depends on the OAuth 2.0 server's needs and security.
**Recommended setting by provider:**
| Identity Provider | Token Endpoint Type |
| ------------------------------ | ------------------- |
| AWS Cognito | Basic |
| Auth0 | Basic |
| Microsoft Entra / Azure AD B2C | Basic |
| Okta | Basic |
| Firebase / Google | POST |
If you are unsure, use **Basic** — it is the more common default and is supported by most major providers.
#### User Info Endpoint
In OAuth 2.0 and OpenID Connect, the user info endpoint lets applications get data about the logged-in user, like their name and email. This helps apps personalize experiences without storing user data themselves.
This is optional for AWS Cognito. For other services, it could look like:
```arduino
https://example-identity-provider.com/userinfo
```
#### Scope
In OAuth 2.0, a scope defines what access or permissions a client app is asking for when accessing a protected resource. Scopes help limit what the client can do or see. By listing the needed scopes, the app specifies what it needs access to. The available scopes depend on the authorization server or identity provider. During the authorization process, the server shows these requested scopes to the resource owner, who can approve or reject them. For instance, a scope could be:
```
openid email profile customer_ids address
```
Limio usually expects at a minimum:
```
openid profile email
```
#### Claims
Identity claims in authentication systems are bits of information about a user. These claims are found in security tokens like JSON Web Tokens (JWTs) or SAML assertions. Limio uses these claims to control access and customize the user experience.
{% hint style="info" %}
AWS Cognito uses **custom attributes** for user-defined fields, which can be included as claims in ID tokens. Claims can also be modified dynamically using a pre-token generation Lambda trigger:
{% endhint %}
Let's take a few examples of **custom claims**:
{% tabs %}
{% tab title="Passing Zuora Account ID" %}
If you wanted to automatically provide the Zuora Account ID of the User that is defined as `zuora_account_id` in your JWT token, go to **OpenID Connect >** **Identity Claims** section and add the following Claim:
* Claim-1\*: `zuora_account_id`
* Service: `zuora`
* Type: `account`
* Issuer: `zuora`
This will allow Limio to then run a Hot Sync, and automatically retrieve the Zuora Accounts to display in Self-Service. Learn more at [Configure Zuora to Limio Hot Sync](/integrations/keeping-zuora-and-limio-in-sync/configuring-zuora-to-limio-hot-sync).
{% endtab %}
{% tab title="Passing a Salesforce ID" %}
If you wanted to automatically provide the Salesforce Account ID of the User that is defined as `crm_id` in your JWT token, go to **OpenID Connect >** **Identity Claims** section and add the following Claim:
* Claim: `crm_id` (This value must match the custom claims set in your Identity Provider)
* Service: `salesforce` (This identifies the service or system from which the claim originates)
* Type: `account` (This indicates the type of entity being claimed, such as an account or user)
* Issuer: `salesforce`

{% endtab %}
{% tab title="Passing a User ID" %}
If you wanted to automatically provide a User ID of an application that is defined as `user_id` in your JWT token, go to **OpenID Connect >** **Identity Claims** section and add the following:
* Claim: `user_id` (This value must match the custom claims set in your Identity Provider)
* Service: `user` (This identifies the service or system from which the claim originates)
* Type: `id` (This indicates the type of entity being claimed, such as an account or user)
* Issuer: `user`
{% endtab %}
{% endtabs %}
#### Limio Session
The session length can be set in the Limio Session section of the provider settings. This controls the duration in which a user session remains active in Limio before requiring re-authentication. It defaults to 24 hours if no value is provided.
## Troubleshooting SSO / OpenID Connect
Common issues encountered during SSO setup:
| Issue | Cause | Resolution |
| ----------------------------------- | ------------------------------------------------------------------------------------------------------------------------------------ | --------------------------------------------------------------------------------------------------------------------------------------------------------------------------------------------------------------- |
| `invalid_request` at token endpoint | Limio sends `client_id` and `client_secret` in the request body or via Basic Auth depending on your **Token Endpoint Type** setting. | Verify your IdP accepts the method you selected (Basic vs POST). Switch the setting if your IdP expects the other. |
| JWT signature verification fails | JWKS URI is missing or incorrect, or the IdP uses a signing algorithm Limio doesn't expect. | Confirm the **JWKS URI** returns valid keys. Limio supports RS256 signed tokens. Ensure your IdP is configured to sign with RS256. |
| Issuer mismatch error | The **Issuer Name** in Limio doesn't match the `iss` claim in the JWT. | Copy the exact issuer URL from your IdP's `.well-known/openid-configuration` endpoint. Trailing slashes matter. |
| Auth redirect loops or blank page | The **Provider Name** doesn't match the domain of the Limio page, or page hasn't been rebuilt after changing auth settings. | Ensure the Provider Name matches your shop domain. After changing auth settings, **rebuild and republish** the page, then test in an incognito window. |
| PKCE-related errors | Your IdP requires PKCE (Proof Key for Code Exchange). | Limio uses the standard **Authorization Code flow as a confidential client** and does **not** support PKCE. Configure your IdP to allow the standard Authorization Code flow without PKCE for the Limio client. |
{% hint style="info" %}
After any authentication configuration change, you must **rebuild and republish** affected pages in the Page Builder. Changes won't take effect until this is done. Always verify in an incognito browser window.
{% endhint %}
## Restricting Access to Specific Users
**Limio does not enforce user-level access control.** When a user presents a valid JWT from your Identity Provider, Limio grants access. The decision of *who can authenticate* belongs entirely to your IdP.
If you need to restrict which users can reach your Limio pages (for example, only members of a specific plan tier, an organisation, or an approved group), configure that restriction in your Identity Provider **before** the token is issued.
{% hint style="info" %}
Limio trusts every valid JWT issued by your configured IdP. There is no per-user or per-group allowlist inside Limio itself.
{% endhint %}
### Common patterns by provider
**AWS Cognito**
* **Pre-Token Generation Lambda trigger** — throw an error inside the Lambda to block token issuance for users who should not have access. [AWS docs](https://docs.aws.amazon.com/cognito/latest/developerguide/user-pool-lambda-pre-token-generation.html)
* **User Pool Groups** — add eligible users to a Cognito group, then check group membership inside a trigger and deny the token for non-members.
**Azure AD B2C**
* **Custom Policies (IEF)** — add a validation technical profile that calls an external REST API to check eligibility before returning a token.
* **User Flow conditions** — gate access by requiring a specific attribute value (for example, a custom `isBillingEnabled` attribute).
**General pattern**
Your application owns the "are they eligible?" decision. Only redirect users to the Limio Shop URL once your application has confirmed they should have access. Limio handles authentication from that point and associates their identity with the correct subscription.
***
## How do I know this has worked?
**From the user experience:** You will need to find to [set the authentication](https://docs.limio.com/product/authentication/authentication-provider-per-page) that you create on a page in Limio (for example the checkout page), rebuild and republish it.
Then, access a pricing page or go through a purchase flow. When you access the checkout, you should now be redirected to your authentication provider. Complete the order via the newly authenticated checkout and then go in the Limio application.
**In Limio:** After the order has been taken, navigate to **Limio Subscriptions > Limio Customer > Identity** and click on the Limio identity (Service: Limio).
Then scroll down to find the identity that has **@limio/external-id.**
You will then see the full identity token received from your Identity Provider, for example:
```json
"root":{
"email": string"dev@yopmail.com"
"entitlements":[]
"sub": string"dev@yopmail.com"
"address":
{
"postal_code":
"region":
"country": string"CA"
}
"email_verified": boolfalse
"tgam_id": int114517357
"iss": string"https://domain.com/auth-server"
"given_name": string""
"aud": string"limio"
"isValidated": booltrue
"crm_id": string"001Sv00000GVVcoIAH"
"azp": string"limio"
"exp": int1738168134
"iat": int1738166334
"family_name": string""
}
```
# Use Auth0 with Limio for Customers
Please take a look at [Set up Authentication for Customers](/product/authentication/sso-your-authentication) to understand how Limio works with Auth0. This page is intended as a quick guide to help you setup Auth0 with Limio.
> **Looking for passwordless authentication?** If you want to use magic link (passwordless) login with Auth0, see [Use Auth0 Passwordless (Magic Link) with Limio](/product/authentication/sso-your-authentication/use-auth0-passwordless-with-limio).
### Auth0 Configuration
In Auth0, you will need to add on your Application > Settings to add the following:
**Application Login URI:**
`https://{limio-tenant}-shop.prod.limio.com/api/sf`
**Allowed callback URI:**
`https://{limio-tenant}-shop.prod.limio.com/api/sf`
**Allowed Logout URLs:**
`https://{limio-tenant}-shop.prod.limio.com/api/sf/logout`
The full information on how to setup Limio as an Application is defined on Auth0's support portal: .
### Limio Configuration
Go to Settings > Authentication > OpenID Connect and provide the following:
**Provider Name**\
An arbitrary name that helps you to recognise the authentication mechanism, e.g., `auth0-test-dev-shop.prod.limio.com`.
**Issuer Name**\
The Issuer URL from Auth0, which typically looks like: `https://{auth0-tenant}.auth0.com/` (⚠️ it is important to include https\:// and the final /)
**Client ID**\
This is the Client ID generated in the Auth0 Management Portal for Limio.
**Client Secret**\
This is the Client Secret associated with the Client ID in the Auth0 Management Portal.
**JWKS URI**\
The JWKS URI for Auth0, which provides the JSON Web Key Set for token verification: `https://{auth0-tenant}.auth0.com/.well-known/jwks.json`
**Authorization Endpoint**\
The Authorisation Endpoint provided by Auth0, e.g.: `https://{auth0-tenant}.auth0.com/authorize`
**Token Endpoint**\
The Token Endpoint from Auth0, e.g.: `https://{auth0-tenant}.auth0.com/oauth/token`
**Logout Endpoint**\
The Logout Endpoint for Auth0, e.g.: `https://{auth0-tenant}.auth0.com/v2/logout`
**Token Endpoint Type**\
This is typically set to `Basic`.
**Scope**\
Define the necessary scopes required for your application, such as `openid profile email`, within the Auth0 Management Portal.
# Use Auth0 Passwordless (Magic Link)
This guide explains how to set up passwordless authentication using Auth0's Email Magic Link feature with Limio. This is ideal for customers who want a frictionless login experience without passwords but don't have an existing Identity Provider (IdP) that supports magic links.
> **Looking for standard Auth0 SSO?** If you want traditional username/password authentication with Auth0, see [Use Auth0 with Limio for Customers](/product/authentication/sso-your-authentication/use-auth0-with-limio-for-customers).
## How Magic Link Authentication Works
When a user enters their email address on your Limio shop:
1. Auth0 sends an email containing a unique, time-limited link
2. The user clicks the link in their email
3. Auth0 authenticates the user and redirects them back to Limio
4. The user is logged in without entering a password
> **Important Browser Requirement**: The user must click the magic link in the same browser where they initiated the login request. This is particularly important for iOS users, as Safari is the default browser for opening email links and cannot be changed.
## Prerequisites
* An Auth0 account with access to the Auth0 Dashboard
* Auth0 Classic Login enabled (Universal Login does not support Magic Links)
* A custom email domain configured in Auth0 (recommended for production)
## Auth0 Configuration
### Step 1: Create an Application
In the Auth0 Dashboard, create a new Application (or use an existing one) and configure the following under **Settings**:
**Application Login URI:**
```
https://{limio-tenant}-shop.prod.limio.com/api/sf
```
**Allowed Callback URLs:**
```
https://{limio-tenant}-shop.prod.limio.com/api/sf
```
**Allowed Logout URLs:**
```
https://{limio-tenant}-shop.prod.limio.com/api/sf/logout
```
### Step 2: Enable Passwordless Email
1. Navigate to **Authentication > Passwordless** in the Auth0 Dashboard
2. Toggle **Email** to enabled
3. Click on the **Email** connection to configure it:
* Select **Link** as the authentication method
* Customise the email **From Address**, **Subject**, and **Message** as needed
### Step 3: Enable for Your Application
1. In **Authentication > Passwordless**, click the **Email** connection
2. Go to the **Applications** tab
3. Enable passwordless for your Limio application
### Step 4: Configure Email Provider (Production)
For production use, configure an external SMTP provider instead of Auth0's default:
1. Go to **Branding > Email Provider**
2. Configure one of the supported providers:
* SendGrid
* Amazon SES
* Mailgun
* Mandrill
* SparkPost
* Custom SMTP
## Limio Configuration
Go to **Settings > Authentication > OpenID Connect** and provide the following:
**Provider Name**\
An arbitrary name to identify the authentication mechanism, e.g., `auth0-passwordless-{limio-tenant}`.
**Issuer Name**\
The Issuer URL from Auth0: `https://{auth0-tenant}.auth0.com/` (include `https://` and the trailing `/`)
**Client ID**\
The Client ID from your Auth0 Application settings.
**Client Secret**\
The Client Secret from your Auth0 Application settings.
**JWKS URI**\
`https://{auth0-tenant}.auth0.com/.well-known/jwks.json`
**Authorization Endpoint**\
`https://{auth0-tenant}.auth0.com/authorize`
**Token Endpoint**\
`https://{auth0-tenant}.auth0.com/oauth/token`
**Logout Endpoint**\
`https://{auth0-tenant}.auth0.com/v2/logout`
**Token Endpoint Type**\
Set to `Basic`.
**Scope**\
`openid profile email`
## Security Considerations
* **User Enumeration**: By default, Auth0 will send emails even if the user doesn't exist. Consider enabling "Disable Sign Ups" if you want to restrict access to pre-registered users only.
* **Link Expiration**: Magic links expire after a configurable period (default is 5 minutes). Adjust based on your security requirements.
* **Custom Domain**: Use a custom email domain for production to improve deliverability and trust.
## Troubleshooting
| Issue | Solution |
| ------------------------- | ------------------------------------------------------------------------------------------------- |
| User not receiving emails | Check spam folders; verify email provider configuration |
| Link expired error | User took too long to click; request a new link |
| Invalid state error | User clicked the link in a different browser; must use the same browser |
| iOS users having issues | Ensure users understand they must open the email in Safari or use the same browser for both steps |
## Further Reading
* [Auth0 Passwordless Documentation](https://auth0.com/docs/authenticate/passwordless)
* [Auth0 Email Magic Link Setup](https://auth0.com/docs/authenticate/passwordless/authentication-methods/email-magic-link)
* [Configuring Email Providers in Auth0](https://auth0.com/docs/customize/email/smtp-email-providers)
# Use Okta with Limio for Customers
## Introduction
This guide provides step-by-step instructions for integrating Okta with Limio for authentication purposes. By completing this setup, you can enhance your system's security and streamline user authentication. This guide assumes you have admin-level access to both Okta and Limio.
Note this is for your end-users or customers, aiming to logging to manage their subscriptions. Learn more at [Set up Authentication for Customers](/product/authentication/sso-your-authentication).
***
## Prerequisites
Before you begin, ensure you have the following:
* Admin access to your Okta Developer Console.
* Access to the Limio platform with appropriate permissions to modify authentication settings.
* The following information prepared:
* Your Okta domain.
* Redirect URIs required for Limio.
***
## Okta Configuration
1. **Access Your Okta Developer Console**
* Log in to [Okta Developer Console](https://developer.okta.com/).
2. **Create a New Application**
* Navigate to **Applications** > **Applications** > **Create App Integration**.
* Choose **OIDC - OpenID Connect** as the sign-in method.
* Select **Web Application** and click **Next**.
3. **Set Up Application Settings**
* Configure the following:
* **Sign-in redirect URIs:**\
`https://{tenant}-shop.prod.limio.com/api/sf`
* **Sign-out redirect URIs:**\
`https://{tenant}-shop.prod.limio.com/api/sf/logout`
* Click **Save** to complete the setup.
4. **Retrieve Integration Credentials**
* Note down the following:
* **Client ID**
* **Client Secret**
* **Issuer URL** (e.g., `https://{okta-domain}/oauth2/default`)
***
## Limio Configuration
1. **Access Limio Authentication Settings**
* Log in to Limio and navigate to **Settings > Authentication > OpenID Connect**.
2. **Add a New Authentication Provider**
* Configure the following:
* **Provider Name:** A unique name to identify the provider, e.g., `okta-test-dev-shop.prod.limio.com`.
* **Issuer Name:** The Issuer URL from Okta.
* **Client ID:** As provided by Okta.
* **Client Secret:** As provided by Okta.
* **JWKS URI:**\
`https://{okta-domain}/oauth2/default/v1/keys`
* **Authorization Endpoint:**\
`https://{okta-domain}/oauth2/default/v1/authorize`
* **Token Endpoint:**\
`https://{okta-domain}/oauth2/default/v1/token`
* **Logout Endpoint:**\
`https://{okta-domain}/oauth2/default/v1/logout`
* **Token Endpoint Type:** Basic
* **Scope:** `openid profile email`
3. **Save and Test the Configuration**
* Save the changes and test the authentication flow to ensure proper integration.
## Conclusion
You have now configured Okta as an authentication provider for Limio. For further assistance or troubleshooting, refer to the [Okta Integration Guide](https://help.okta.com/en-us/content/topics/apps/apps_app_integration_wizard_oidc.htm) or contact Limio Support.
# Use Microsoft Azure with Limio for Customers
Populate the following value from your Azure instance:
**Provider Name**\
The name of the Limio Shop, e.g., `test-dev-shop.prod.limio.com`.
**Issuer Name**\
The Issuer URL:\
`https://{tenant}b2csandbox.b2clogin.com/{tenant}b2csandbox.onmicrosoft.com/v2.0/`
**Client ID**\
Retrieve this from the Azure AD B2C Portal.
**Client Secret**\
Obtain this from the Azure AD B2C Portal.
**JWKS URI**\
This provides the JSON Web Key Set (JWKS) for token verification, e.g.: `https://{tenant}b2csandbox.b2clogin.com/{tenant}b2csandbox.onmicrosoft.com/B2C_1A_SIGNUP_SIGNIN/discovery/v2.0/keys`
**Authorization Endpoint**\
The URL for user authorisation, e.g.: `https://{tenant}b2csandbox.b2clogin.com/{tenant}b2csandbox.onmicrosoft.com/B2C_1A_SIGNUP_SIGNIN/oauth2/v2.0/authorize`
**Token Endpoint**\
The endpoint for obtaining tokens, e.g.: `https://{tenant}b2csandbox.b2clogin.com/{tenant}b2csandbox.onmicrosoft.com/B2C_1A_SIGNUP_SIGNIN/oauth2/v2.0/token`
**Logout Endpoint**\
The endpoint for user logout, e.g.: `https://{tenant}b2csandbox.b2clogin.com/{tenant}b2csandbox.onmicrosoft.com/B2C_1A_SIGNUP_SIGNIN/oauth2/v2.0/logout`
**Token Endpoint Type**\
Typically set to `Basic`.
**Scope**\
Define the required scopes in the Azure AD B2C Portal, such as `openid`, `profile`, and `email`.
# Authentication per Page
This feature allows you to configure authentication providers on a per-page basis. The main advantage is the ability to conduct A/B testing of different authentication methods. For example, you can compare the conversion rates between a flow using and another using [Anonymous Authentication](https://docs.limio.com/product/authentication/authentication-provider-per-page/configuring-anonymous-authentication-for-your-checkout-flow) your default authentication provider.
**Prerequisites:**
* You must have more than one authentication method configured in your Limio App. See the following articles on [how to configure external authentication providers](https://docs.limio.com/product/authentication/sso-your-authentication) and how to configure Limio's [Anonymous Authentication](https://docs.limio.com/product/authentication/authentication-provider-per-page/configuring-anonymous-authentication-for-your-checkout-flow).
* You must have the authentication per page setting enabled in your environment. Please contact to have this setting enabled.
**Important things to note:**
* You do not need to specify authentication per page if you want that page to use your default authentication method.
### How to configure
1\. On the page you wish to set an authentication method, click the Settings button in the top right corner.
2\. Toggle on the "Require Authentication?" setting. This will display a dropdown of all configured authentication methods.
3\. Select the authentication method you wish to use on that page.\
4\. Don't forget to confirm and save your changes. Pages will need to be rebuilt and republished for the change to take effect.
### Know limitations
* We do not support authentication providers named "landing". When defining [external](https://docs.limio.com/product/authentication/sso-your-authentication) or [anonymous](https://docs.limio.com/product/authentication/authentication-provider-per-page/configuring-anonymous-authentication-for-your-checkout-flow) authentication please refrain from using "landing" as the provider name.
# Configuring Anonymous Authentication
## Introduction
Optimising your checkout process is crucial for reducing cart abandonment and improving conversion rates. One effective strategy is implementing a guest checkout option through anonymous authentication. This guide will walk you through the process of configuring anonymous authentication in your Limio checkout flow.
## Why Anonymous Authentication Matters
Research by the Baymard Institute has identified key reasons for checkout abandonment, excluding customers who were "just browsing". One of the top reasons cited was the requirement to create an account.

At Limio, we understand the importance of flexibility in checkout solutions. By implementing anonymous authentication, you can offer a guest checkout option while still creating a Limio identity for the user. This approach balances user convenience with your need for customer data.
## Benefits of Guest Checkouts with Anonymous Authentication
1. Reduced cart abandonment rates
2. Improved user experience
3. Flexibility for future account creation
4. Ability to track guest user behaviour
## Configuring Anonymous Authentication
Follow these steps to set up anonymous authentication for your checkout flow:
1. Navigate to Developer Settings in your Limio dashboard.
2. Select the "Authentication Providers" option.
3. Choose "Anonymous Auth" from the available options.
4. Enter a name for your authentication provider. This should be unique to any other authentication provider names you have already configured.
5. Save your changes.
## Implementing Anonymous Authentication
After configuring the authentication provider:
1. Go to the pages where you want to implement the guest checkout flow.
2. Enable the "Require Authentication?" toggle for each relevant page, and select the anonymous authentication option you configured earlier.
3. Save the Settings.
4. Save the page.
5. Rebuild and republish the affected pages to apply the changes.
## Advanced Implementation: Connecting Anonymous Identities
For a more robust solution, you can use Limio's [Add External Identity API](https://docs.limio.com/api/external-identities-api) to connect anonymous identities to existing external identities, such as organisational accounts. This workflow allows you to:
1. Capture guest user data during checkout
2. Link the anonymous identity to an existing account later if the user decides to create one
3. Maintain a cohesive user journey across guest and registered experiences
## Next step: let customers claim their guest-purchased subscriptions
Once guest checkout is enabled, you may want to give those buyers a way to sign in later and link the subscription to their account so they can manage it themselves. See [Guide: Claim subscription ownership after guest checkout](https://docs.limio.com/guides/feature-implementation-guides/guide-claim-subscription-ownership-after-guest-checkout) for the full pattern.
## Conclusion
By implementing anonymous authentication in your checkout flow, you're providing customers with the flexibility they desire while still capturing valuable user data. This approach can significantly reduce cart abandonment rates and improve overall conversion.
Remember to regularly review your checkout process and gather user feedback to continually optimise the experience.
For more information or assistance, please contact [Limio support](https://docs.limio.com/support).
# Limio Analytics Overview
Track and analyze subscription commerce performance with Limio's analytics capabilities.
## Overview
Limio Commerce Analytics provides insights into your subscription business, from customer acquisition through retention and revenue. Monitor key metrics, track customer behavior, and integrate with third-party analytics platforms.
## What's Covered
* **Limio Analytics** - Built-in analytics and reporting
* **Conversational Analytics** - Ask questions about your data in plain language via the MCP Server
* **Third-Party Analytics** - Integration with external analytics platforms
## Key Capabilities
### Built-in Analytics
Track essential subscription metrics:
* Subscription growth and MRR/ARR
* Customer acquisition and retention
* Conversion rates and funnel analysis
* Churn analysis and trends
* Revenue tracking and forecasting
### Data Insights
Understand customer behavior:
* Customer journey tracking
* Product and offer performance
* Campaign effectiveness
* Checkout conversion optimization
* Self-service usage patterns
### Conversational Analytics
Query your order and subscription data in plain language using the [Limio MCP Server](https://docs.limio.com/product/mcp-server/mcp-server). Connect Claude or another AI assistant to your Limio environment and ask questions like:
* *"How many orders came through our student offers this month?"*
* *"Show me a breakdown of orders by offer over the last 30 days."*
* *"Which offers drove the most new subscriptions last week?"*
No SQL, dashboards, or exports required — the assistant calls the MCP Server with your Limio credentials and returns the answer directly. See the [MCP Server overview](https://docs.limio.com/product/mcp-server/mcp-server) for setup and the full list of capabilities.
### Third-Party Integrations
Connect with your analytics stack:
* Google Analytics integration
* Tag Manager configuration
* Custom event tracking
* Data layer implementation
* Analytics platform setup
## Getting Started
Explore the analytics documentation to set up tracking and gain insights into your subscription commerce performance.
# Cancel and Save Orders Analytics
*Available from Release 104 and onwards. Please note that data will only begin to be collected once you adopt Release 104 or above.*
**Purpose:**
The Cancel and Saves report displays all orders from the last 30 days that are order.cancel\_subscription (cancellations) or order.add\_offer (cancel/saves with discount offer). If a customer initiated a cancel and was saved with a new offer, that would be registered as order.change\_offer and will appear in the [Switch Orders report](https://docs.limio.com/product/analytics/limio-commerce-analytics/limio-analytics-switch-orders). The Cancel and Saves report can be exported for easy data analysis.
The Cancel and Saves report can help answer questions like:
* What is the most common cancel reason?
* How many customer-initiated cancels resulted in save offer being accepted?
* What is the most successful save offer?
* What is the breakdown of saves or cancels online versus with customer service (Limio for Salesforce)?
* How much money did we retain via successful save offers?
The report can be accessed by clicking "Catalog" in the top left corner, switching to "Analytics", and then selecting "Cancel & Saves" in the left panel.
**Data details**
* **Order Type:** Possible values are *order.cancel\_subscription* (subscription has been cancelled) or *order.add\_offer* (customer initiated cancellation but was saved with a discount offer)
* **Order Status**: Status of the event associated with the order. Possible values are *submitted* and *error*.
* **Save Offer**: Will only be populated if the order type is order.add\_offer (cancel/save)
* **Save Product:** Will only be populated if the order type is order.add\_offer (cancel/save)
* **Save Next Payment**: Will only be populated if the order type is order.add\_offer (cancel/save)
* **Source**: Possible values are *shop* (if purchased online through a Limio checkout) or *salesforce* (if purchased through Limio for Salesforce)
# Checkout Conversion Analytics
*Available from Release 106 and onwards. Please note that data will only begin to be collected once you adopt Release 106 or above.*
**Purpose:**
The Checkout Conversion Rate report displays your conversion rate per checkout for the last 30 days. The conversion rate is calculated by the number of order.new events with status submitted (successful), divided by the number of baskets that entered a checkout. This report can be exported for easy data analysis, and can be helpful for running A/B checkout testing.
The Checkout Conversion Rate report can help answer questions like:
* What is my checkout success rate for each of my checkouts?
* What is my best performing checkout?
* What is my worst performing checkout?
The report can be accessed by clicking "Catalog" in the top left corner, switching to "Analytics", and then selecting "Checkout Conversion" in the left panel.
**Data details**
* **Checkout Entries:** Number of baskets that entered that particular checkout
* **Successful Orders:** Number of order.new with status submitted completed from that particular checkout
* **Checkout Conversion Rate:** Successful Orders divided by Checkout Entries
# New and Renew Orders Analytics
*Available from Release 104 and onwards. Please note that data will only begin to be collected once you adopt Release 104 or above.*
**Purpose**
The New and Renew Orders report displays all orders from the last 30 days that are order.new or order.renew. The report also includes utm data so you can understand how your customers got to your offer pages and checkout. This report can be exported for easy data analysis.
The New and Renew Orders report can help answer questions like:
* What is the breakdown of new orders coming from customer service (Limio for Salesforce) versus online?
* What is the total value of new subscriptions over the last month?
* What is the total value of renewed subscriptions over the last month?
* What is the most commonly purchased offer?
* Where do most of our customers come from before they reach our offers page?
The report can be accessed by clicking "Catalog" in the top left corner, switching to "Analytics", and then selecting "Orders" in the left panel.
**Data details**
* **Total**: Total price of order with discounts (eg promo codes) and without tax
* **Order type:** Possible values are *order.new* or *order.renew*
* **Order status:** The status of the event associated with the order. Possible values are *submitted*, *error*, and *pending-payment*
* **Source:** Possible values are *shop* (if purchased online through a Limio checkout) or *salesforce* (if purchased through Limio for Salesforce).
# Switch Orders Analytics
*Available from Release 104 and onwards. Please note that data will only begin to be collected once you adopt Release 104 or above.*
**Purpose:**
The Switch report displays all orders from the last 30 days that are order.change\_offer. Order.change\_offer can be triggered from a switch journey or a cancel/save with a new offer. This report can be exported for easy data analysis.
The Switch report can help answer questions like:
* How much money did we make or lose from customers switching their subscription?
* What's the most popular switch subscription?
* What is the offer most customers switch away from?
The report can be accessed by clicking "Catalog" in the top left corner, switching to "Analytics", and then selecting "Switch Orders" in the left panel.
**Data details**
* **Order Type:** Possible value is *order.change\_offer*
* **Order Status**: Status of the event associated with the order. Possible values are *submitted* or *error*.
* **Switch Reason**: This is only populated if you collect a cancel reason, and then the customer is saved by a new non-discount offer.
* **Source**: Possible values are *shop* (if purchased online through a Limio checkout) or *salesforce* (if purchased through Limio for Salesforce)
# Configure Limio Data Layer
The Data Layer serves as a centralized repository for user interactions and transactional data, crucial for configuring analytics through Limio.
Limio now allows you to feed data to a Tag Manager through a data layer. The Tag Manager, such as Google Tag Manager or Tealium, will then be responsible for sharing the collected data to your analytics' tool of choice, such as Google Analytics or Snowplow. The Limio solution provides the maximum control and flexibility for enterprise clients to track all the real-time user data and map it to their analytics' custom dimensions.
For example, if you use Google Tag Manager, this [representation from Analytics Mania](https://www.analyticsmania.com/post/ultimate-google-tag-manager-data-layer-tutorial/) explains how the Limio Shop & Self-Service (website), the Limio data layer, Google Tag Manager, and analytics service such as Google Analytics will relate:
The solution described below allows to collect customer data via the data layer object as well as any real-time user events, such as adding to a cart or pressing a cancel button.
If you want to embed a tracking technology, please embed the code in Inject Script Code or Inject Document and/or use the Data Layer.
## What is a Data Layer?
A Data Layer is an object in the window which contains all the information you wish to add to a Tag Manager such as [Google Tag Manager](https://marketingplatform.google.com/intl/en_uk/about/tag-manager/) or [Tealium](https://tealium.com/). The types of data contained in a data layer can vary greatly. It can consist of things like e-commerce transactional information, the objects currently present on the page, and user data.
Limio allows you to take in information about the user, Campaigns, Offers and transactional data and add it to your data layer. This is the primary supported way of configuring the analytics within Limio.
## Setting up your Tag Manager
First you will need to set up your Tag Manager to be added to each Limio page To do this you will need to navigate to your analytics settings (Developer -> General Settings -> Analytics):
Here you should see a number of settings relating to Analytics setup for Limio, the most important one here is:
* Inject Document
* Allows for global injection of HTML code into Limio Landing Pages
To initialise the Data Layer you will firstly need to define your Tag Manager. It's important to remember that this is a **global** setting and so all changes made here will be applied to each page. Please refer to your Tag Manager documentation for more details on how to inject your configuration into an external site e.g.:
* [Google Tag Manager](https://support.google.com/tagmanager/answer/6103696?hl=en)
* [Tealium](https://docs.tealium.com/platforms/javascript/install/)
You will then need to add any URLs relating to your tag management solution to the Content Security Policy section in your Limio app instance. This can be found under Allowed Hosts (Developer -> Allowed Hosts):
You can use the Add New Host section to add the relevant host - once that is done, you may need to wait for around 5 to 10 minutes for the changes to be reflected in your Limio environment. This does not require pages to be rebuilt and republished.
Once you have connected your Tag Manager to Limio, you will then need to use your Tag Manager to connect the data layer events to the destination, for example Google Analytics 4. You will need to create Tags in Google Tag Manager, use the Tag Google Analytics: GA4 Event and map the Limio Data Layer User Events, e.g. add\_to\_cart (more details [here](https://docs.limio.com/product/analytics/how-to-configure-the-limio-data-layer-to-collect-user-events-for-analytics)). Alternatively, you can map your data to via the Custom HTML tag (more details [here](https://www.facebook.com/business/help/1021909254506499)).
Once your events feeds into Google Analytics 4, you can start leveraging ecommerce reports, such as Purchase Journey.
## Capturing Events within the Data Layer
### Setting up Event capture with your Tag Manager
It is possible to capture events in the following way:
```auto
```
This callback function is configurable by the user and can be used to push events to the limio.dataLayer object on the window. This function can take the documented Limio events and convert them to a format your Tag Manager can manage ([Google Tag Manager example](https://developers.google.com/tag-platform/devguides/events)).
To check the data layer is firing events on your Limio shop and self-service, build and publish your page. Inspect the page, go to the Network tab and filter for events. You will see the relevant Limio user events firing.
## **Page View**
A **page\_view** event will fire every time a user lands on a page. It provides data of all offers/add-ons visible on the page as well as page information such as page path, page tag, meta title, and page referrer.
### Example page\_view event payload:
```auto
{
"event": "page_view",
"label": "Page View",
"campaign_name": "{{The Limio Page name}}",
"offers": [
{
"offer_name": "{{Limio Offer Name for Offer Present on Limio Landing Page}}",
"currency": "GBP",
"price": 15,
"term": "month",
"attributes": {
"rate_plan__zuora": "",
"ltm_firstPaymentAmount": "9.80",
"ltm_product": "DIGITAL",
"ltm_recurringPaymentAmount": "11.99",
"ltm_journey": "acquisition"
},
"products": [
{
"sku": "DIGITAL001",
"rate_plan": "Monthly Offer"
}
]
}
],
"addOns": [
{
"addon_name": "add-on name",
"products": [
{
"sku": "DIGITAL001",
"rate_plan": "Monthly Add On"
}
],
"currency": "GBP",
"price": 5,
"attributes": {
"discount_field": {
"value": "4",
"termLength": "1",
"termType": "months"
}
}
}
],
"tag": "{{Limio Page tag}}",
"path": "{{Limio App Page path}}",
"page_path": "{{Current Page Path}}",
"page_location": "{{Current URL}}",
"page_title": "{{Current Page Meta Title}}",
"referrer": "{{URL which referred to Limio Landing Page}}"
}
```
## **User authentication**
A **user-authentication** event will fire when a customer successfully logs in.
### Example user-authentication event payload:
```auto
{
event: "user-authentication",
user: {
email: "customer@limio.com",
family_name: "Customer",
given_name: "Name"
},
userSubscriptionType: "New" || "Returning"
}
```
## **Add to cart**
An **add\_to\_cart** event will fire when an item (for example offer or add-on) is added to a basket. An add\_to\_cart event will be triggered in the following scenarios:
* Customer adds an item to their cart through and [offers component](https://docs.limio.com/components/component-library/standard-components/component-offers).
* Customer accepts an upsell with the [Cart Items component](https://docs.limio.com/components/component-library/cart-components/component-cart-items) (both an add\_to\_cart and remove\_from\_cart event will be triggered)
* Customer accepts a cross-sell with the [Cross Sell component](https://docs.limio.com/components/component-library/cart-components/component-cross-sell)
* Customer clicks a [purchase link](/product/checkout/how-to-configure-purchase-links) which names specific offers or an offer label
* Note: purchase links that use a basket ID will not trigger the add\_to\_cart event
The event can contain one or more items, and the value field will be the total value of the items added to cart in that action.
### Example add\_to\_cart event payload:
```auto
{
event: "add_to_cart",
label: "Add items: /offers2/offer name, /add_on/add-on name",
currency: "USD",
value: 150,
items: [
{
offer_name: "offer name",
attributes: {}
products: [
{
sku: "DIGITAL001",
rate_plan: "Monthly Offer"
}
],
term: "month" | "year" | "week",
currency: "USD",
price: 50,
quantity: 1
},
{
addon_name: "add-on name",
attributes: {}
products: [
{
sku: "DIGITAL001",
rate_plan: "Monthly Add On"
}
],
term: "month" | "year" | "week",
currency: "USD",
price: 100,
quantity: 1
},
]
}
```
## **Remove from cart**
A **remove\_from\_cart** event will fire when an item is removed from a basket. A remove\_from\_cart event will be triggered in the following scenarios:
* Customer removes manually removes an item from their cart, for example through the Cart Items component, or the floating basket
* Customer accepts an upsell offer in the Cart Items component (both an add\_to\_cart and remove\_from\_cart event will be triggered)
This event will only every contain one item, and the value is that of the item.
### Example remove\_from\_cart event payload:
```auto
{
event: "remove_from_cart",
label: "Remove offer: xxxxx",
currency: "USD",
value: 50.00
}
```
## **Apply promo code**
An **add\_promo\_code** event will fire when a promo code is added to the cart. This could be through the [Promo Code Redeem component](https://docs.limio.com/components/component-library/cart-components/component-promo-code-redeem), or a [purchase link](https://docs.limio.com/product/checkout/how-to-configure-purchase-links) using the \&pc=xxx syntax. Note that if an abandoned basket contains a promo code, and a purchase link is used which uses the basket ID, the add\_promo\_code event will not be triggered.
### Example add\_promo\_code event payload:
```auto
{
event: "add_promo_code",
name: "Promo code name",
value: 40.00 (The order total post promo code being applied),
currency: "USD",
discount: 10.00 (The discount on the order expressed as a monentary value),
items: [
{
offer_name: "offer name",
attributes: {}
products: [
{
sku: "DIGITAL001",
rate_plan: "Monthly Offer"
}
],
term: "month" | "year" | "week",
currency: "USD",
price: 50,
quantity: 1
}
]
}
```
## **Remove promo code**
A **remove\_promo\_code** event will fire when a promo code is removed from the cart. In most scenarios, this would be through the [https://docs.limio.com/components/component-library/cart-components/component-promo-code-redeem](https://docs.limio.com/components/component-library/cart-components/component-promo-code-redeem "mention").
### Example remove\_promo\_code event payload:
```auto
{
event: "remove_promo_code",
name: "Promo code name"
}
```
## **Begin Checkout**
A **begin\_checkout** event will fire when a user initiates a checkout. It will contain all basket items, and the total value of the basket when initiated, including any discounts applied.
This event will be triggered in the following scenarios:
* Customer adds an offer to their basket which is configured to go straight to checkout
* Customer navigates to a checkout, potentially through the [https://docs.limio.com/components/component-library/cart-components/component-initiate-checkout-button](https://docs.limio.com/components/component-library/cart-components/component-initiate-checkout-button "mention")
* Customer clicks on a [Purchase Links](/product/checkout/how-to-configure-purchase-links) which is configured to go to a checkout page
### Example begin\_checkout event payload:
```auto
{
event: "begin_checkout",
label: "Begin Checkout",
currency: "USD",
value: 65.00 (The total value of checkout at that point post discount),
discount: 10.00 (The discount on the order expressed as a monentary value),
promoCode "Name of promo code"
items: [
{
offer_name: "offer name",
attributes: {},
products: [
{
sku: "DIGITAL001",
rate_plan: "Monthly Offer"
}
],
term: "month" | "year" | "week",
currency: "USD",
price: 50,
quantity: 1
},
{
addon_name: "add-on name",
attributes: {}
products: [
{
sku: "DIGITAL001",
rate_plan: "Monthly Add On"
}
],
term: "month" | "year" | "week",
currency: "USD",
price: 25,
quantity: 4
}
]
}
```
## **New order**
An **order** event will fire once the order has been sent before the order complete page. The data includes all items in the cart at the time of checkout and the total value of the entire basket, including information about any promo codes applied.
### Example order event payload:
```auto
{
event: "order",
order_type: "new",
subscriptionId: "sub id",
userSubscriptionType: "New" | "Returning",
payment_type: payment method used,
total: 65 (The order total post discount),
discount: 10.00 (The discount on the order expressed as a monentary value),
promoCode: "Name of promo code",
currency: "USD",
quantity: 5,
items: [
{
offer_name: "offer name",
attributes: {},
products: [
{
sku: "DIGITAL001",
rate_plan: "Monthly Offer"
}
],
term: "month" | "year" | "week",
currency: "USD",
price: 50,
quantity: 1
},
{
offer_name: "offer name 2",
attributes: {},
products: [
{
sku: "DIGITAL001",
rate_plan: "Monthly Offer"
}
],
term: "month" | "year" | "week",
currency: "USD",
price: 25,
quantity: 4
}
]
}
```
## **Order Complete**
In the event of a customer getting to the order complete page, an order complete event will fire.
**Note:** This requires the Synchronous Process Order setting to be enabled in your shop to populate correctly and a standard checkout flow to be implemented.
### Example order complete event payload:
```auto
{
event: "order_complete_view",
page_path: "/complete/,
page_location: "https://my-shop.com/complete/",
page_title: "Order Complete",
tag: "/tags/new-page",
campaign: "/pages2/new-page",
referrer: referrer,
subscriptionId: "XXXXXXXX",
order_id: "XXXXXXXX",
currency: "EUR",
value: 49.99,
payment_type: "card",
promoCode: "Promo code name",
discount: 10.00 (The discount on the order expressed as a monentary value)
}
```
## **Chat widget events**
The Limio chat surfaces report engagement events. Unlike the events above, these are pushed directly onto your Tag Manager's own `window.dataLayer` — no subscribe bridge is needed — and they fire wherever chat runs: on Limio pages and on your own (non-Limio) pages using the chat embed snippet. If a page does not run a Tag Manager, no events are produced. The floating chat widget emits all three events; the inline chat panel component emits `limio_chat_message_sent` (it has no open/close state).
| Event | Fires when | Payload |
| ------------------------- | ----------------------------------------------------------------------------------------------------------------------------------------------------------------------------------------- | --------------------------------------------------------------------------------- |
| `limio_chat_open` | The chat panel is opened | `agent_id`, `identity` |
| `limio_chat_closed` | The chat panel is closed | `agent_id`, `identity` |
| `limio_chat_message_sent` | The visitor sends a message | `conversation_id` (`null` on the visitor's first message), `agent_id`, `identity` |
| `limio_chat_error` | A message fails to send (`reason: "send_failed"` — the `limio_chat_message_sent` event still fires, so failure rates can be measured) or chat fails to start (`reason: "session_failed"`) | `reason`, `conversation_id`, `agent_id`, `identity` |
`agent_id` identifies the agent resolved when the chat session started, so engagement can be segmented per agent (attribution is per session — long conversations that move across pages keep the original agent id). `identity` is `"guest"` or `"user"` (signed-in visitors).
Example payload:
```auto
{
event: "limio_chat_message_sent",
conversation_id: "XXXXXXXX",
agent_id: "XXXXXXXX",
identity: "guest"
}
```
Payloads never include message content, names, or email addresses — only pseudonymous identifiers. To send these to Google Analytics 4, create a Custom Event trigger per event (or one trigger with regex matching on `^limio_chat_`) and map them to GA4 event tags — commonly named `chat_open`, `chat_closed` and `chat_message_sent`.
## Saving and publishing your changes
Once you have configured your data layer in Settings, save your changes. **Note that at this time, they won't be published online.** You will need to rebuild all your pages, then publish each of them individually. See:
{% content-ref url="/pages/p3Ouf92IKoyJSP6wmuAB" %}
[Publish/Unpublish Pages](/product/page-builder/how-to-publishunpublish-your-pages-online)
{% endcontent-ref %}
# Set Up Google Tag Manager and Google Analytics
This guide will walk you through the process of integrating Limio Analytics with Google Tag Manager (GTM) and Google Analytics (GA). This setup will allow you to capture and analyse Limio events in your Google Analytics dashboard.
## Prerequisites
* A Google Tag Manager account
* A Google Analytics account
* Access to your Limio account and settings
## Event Flow Outline
## Step 1: Initial Setup
1\. Ensure you have active Google Tag Manager (GTM) and Google Analytics (GA) accounts.
2\. In your Google Tag Manager account, locate and copy the GTM setup code.
***Note: you will just need to copy the section of the GTM installation script. That should look something like:***
```
(function(w,d,s,l,i){w\[l\]=w\[l\]||\[\];w\[l\].push({'gtm.start':
new Date().getTime(),event:'gtm.js'});var f=d.getElementsByTagName(s)\[0\],
j=d.createElement(s),dl=l!='dataLayer'?'&l='+l:'';j.async=true;j.src=
'https://www.googletagmanager.com/gtm.js?id='+i+dl;f.parentNode.insertBefore(j,f);
})(window,document,'script','dataLayer','GTM-YOUR\_GTM\_CONTAINER\_ID');
```
3\. Navigate to the Analytics section in the General Settings of your Limio account.
4\. In the Inject Document section, paste the GTM setup code you copied.
5\. Copy the standard Limio code from the "Capturing Events within the Data Layer" section. You can find this at: [Limio Data Layer Configuration](https://docs.limio.com/product/analytics/how-to-configure-the-limio-data-layer-to-collect-user-events-for-analytics#capturing-events-within-the-data-layer)
```
```
6\. Paste the Limio code into the Inject Document section, directly below the GTM code you added earlier.
7\. Save your changes.
8\. Rebuild and republish any relevant pages where you want to capture Limio events.
***Note: Limio can also provide a template container file which can be imported into your environment to configure basic tags, events and variables which map Limio datalayer events to Google Analytics 4 events. Please contact*** [***support@limio.com***](mailto:support@limio.com) ***if you wish to use this.***
## Step 2: Setting Up a Custom Event in GTM
We'll use the "add\_to\_cart" event as an example.
1\. In your GTM workspace, go to the Triggers section.
2\. Click on "New" to create a new trigger.
3\. Configure the trigger as follows:
* Trigger Type: Custom Event
* Event name: add\_to\_cart
* This trigger fires on: Some Custom Events
* Fire on: Event contains / equals "add\_to\_cart"
4\. Save the trigger.
## Step 3: Creating a New Tag in GTM
1\. In your GTM workspace, go to the Tags section.
2\. Click on "New" to create a new tag.
3\. Configure the tag as follows:
* Tag Type: Google Analytics: GA4 Event
* Configuration Tag: Select your GA4 Configuration tag (create one if it doesn't exist)
* Event Name: add\_to\_cart
* Event Parameters: Add relevant parameters (see next step)
4\. Add Event Parameters:
* Follow the [GA4 eCommerce event naming conventions](https://developers.google.com/analytics/devguides/collection/ga4/ecommerce?client_type=gtag#add_or_remove_an_item_from_a_shopping_cart)
* Reference values sent by the Limio datalayer event
* Example for currency:
* Parameter Name: currency
* Value: {{DLV - currency}} - this can be a custom variable that you configure in the Variables section
5\. For more complex parameters, you may need to create custom JavaScript variables. Here are some code examples you can use a basis:
* Creating an items array:
```javascript
function () {
try {
var products = google_tag_manager[{{Container ID}}].dataLayer.get("items");
var itemsOutput = [];
for (var i = 0; i < products.length; i++) {
var item = products[i];
var itemOutput = {
item_name: item.offer_name,
item_id: item.products[0].sku,
item_variant: item.term,
price: item.price,
quantity: item.quantity
};
itemsOutput.push(itemOutput);
}
return itemsOutput;
} catch (e) {
return undefined;
}
}
```
* Calculating a value based on items in the basket:
```javascript
function () {
try {
var items = google_tag_manager[{{Container ID}}].dataLayer.get("items");
var value = 0;
for (var i = 0; i < items.length; i++) {
var item = items[i];
value += item.price;
}
return value;
} catch (e) {
return undefined;
}
}
```
These can be used by creating a variable in the Variables tag, selecting a type of Custom JavaScript and then pasting in your code.
The variable can then be referenced in the Event Parameters section:
6\. Set the trigger for this tag to the custom "add\_to\_cart" trigger you created earlier.
7\. Save the tag.
## Step 4: Publishing and Testing
1\. Save all changes in your GTM workspace.
2\. Click "Submit" to publish your changes.
3\. To test your event, you can use the following tools:
* [Analytics Debugger Chrome Extension](https://chromewebstore.google.com/detail/analytics-debugger/ilnpmccnfdjdjjikgkefkcegefikecdc?hl=en)
* GTM Preview Mode
4\. Trigger the "add\_to\_cart" event on your website and verify that:
* The tag is triggered in GTM
* The event data is correctly sent to GA4
## Additional Notes
* You may need to add a generic GA4 tag that fires on the standard "Initialization - All Pages" trigger in your GTM container.
* Always test thoroughly to ensure all events are being captured and sent correctly.
* Consider setting up additional Limio events following a similar process.
By following this guide, you should now have a basic setup for capturing Limio Analytics events in Google Analytics via Google Tag Manager. Remember to adjust and expand this setup based on your specific needs and the particular events you want to track.
# Configure Tracking in Salesforce and Zuora
Limio provides a generic analytics tracking solution that can be integrated with your analytics or tracking provider. This solution is particularly useful for campaign or partner attribution - especially when you need to report on accurate order numbers from specific campaigns to internal teams or for referral or co-marketing initiatives with partners.
Limio ensures that URL parameters such as UTM and custom tracking parameters persist all the way to the Limio Order. Reporting is available on [Limio Analytics](https://docs.limio.com/product/analytics/limio-commerce-analytics/limio-analytics-new-and-renew-orders), however since full reporting usually takes place in external systems like Zuora or Salesforce, Limio includes native integration with Zuora and supports attribution in Salesforce via Zuora Z360. Limio also offers real-time webhooks, enabling you to push Limio Order data to your analytics systems for accurate attribution.
A separate analytics approach is available for collecting user events via a data layer object. This can be consumed by a tag management system (e.g., Google Tag Manager) and forwarded to tools like Google Analytics or Snowplow. Learn more here: [Configure Limio Data Layer](/product/analytics/how-to-configure-the-limio-data-layer-to-collect-user-events-for-analytics).
### Standard parameters, LTM custom parameters, LMO parameter and others
You can configure three types of parameters:
* **Standard parameters**, including [UTM tags](https://en.wikipedia.org/wiki/UTM_parameters) and platform-specific tags from Meta, Google, Reddit, TikTok, and X (Twitter). These are configurable via the referrer. Supported tags include:
* "utm", "ltm", "lmo", "fbclid", "dclid", "gclid", "rdt\_cid", "ttclid", "twclid"
* **Custom parameters (LTM)**, usable in two ways:
* 1\. Configured on a Limio Offer. When a user clicks a Limio Offer via a component (e.g., Offer Cards), LTM parameters (any attribute starting with `ltm_`) will be appended to the URL. These values are offer-specific.
* 2\. Appended directly by the referrer, e.g., `?ltm_partner=BA`.
* These parameters propagate through the registration/log-in, checkout, and order-complete pages.
* **LMO parameter**: This is not customisable. The `lmo_offer` parameter always includes the offer path, e.g., `lmo_offer=/offer2/test-offer`.
Once an order is submitted, Limio stores all tracking parameters in the **tracking** object, which appears in Limio Basket, Limio Orders, Limio Events, and Limio Subscription. Example:
```json
{
"tracking": {
"offers": [
"/offers2/premium"
],
"ltm_OfferDescription": "Premium Monthly Plan - Flash Deal",
"utm_source": "web",
"ltm_CampaignName": "Flash+Sale+$1+first+month,+then+$12.99+per+month",
"ltm_CampaignCode": "PLG_PREM_JUL25",
"addOns": [],
"ltm_ProductType": "SaaS",
"ltm_AccessType": "Direct",
"ltm_analytics_offer_type": "PLGSAAS",
"ltm_CampaignDescription": "$1+for+first+month,+then+$12.99+monthly,+cancel+any+time",
"lmo_offer": "/offers2/PremiumFirstMonth_1USD_Then_1299USD_Monthly",
"referrer": "https://www.example-saas.com/features/project-tracking",
"ltm_TransactionSource": "Web",
"campaign": "/pages2/flash-sale-premium-plan",
"ltm_Target": "5000",
"tag": "/tags/flashsale-premium",
"ltm_CampaignType": "Acquisition"
}
}
```
You can easily access reporting for UTM parameters via Limio Analytics. However, to set up full reporting, the tracking data above can be forwarded to the following systems:
| Destination | How? | Details |
| ----------- | ------------------------------------------------------ | ----------------------------------------------------------------------------------------------------------------------------------------------------------------------------------------------------------------------------------------------------------------------------------------------------------------------------------------------------- |
| Zuora | Via Limio's native integration using custom parameters | Map parameters to Zuora custom fields. [How to populate custom fields in Zuora.](https://docs.limio.com/integrations/zuora-integration/how-to-populate-custom-fields-in-zuora) |
| Salesforce | Via Zuora Z360 |
You will first need to set up the Zuora integration above. Requires setup of custom object mapping in Salesforce. Zuora Z360 documentation.
|
| Salesforce | Via Limio-generated Salesforce Platform | Requires Salesforce Lightning Flows. [Activate feature](https://docs.limio.com/integrations/salesforce-data-integration/limio-updates-salesforce) and [set up integration](https://docs.limio.com/integrations/salesforce-data-integration). |
| Any system | Via Limio real-time webhooks | Use the [Order webhook](https://docs.limio.com/developers/webhooks/overview) to send tracking data externally in real-time. |
| Any system | Via Limio APIs | Use the [Get Object -> Order API](https://docs.limio.com/api/objects-api/objects) to pull tracking data externally. You can also do this in batch with the Get Objects operation on the same API. Both are served from your Limio tenant domain (`https://{tenant}/api`). |
To configure custom attributes on Limio Offers that can carry LTM parameters, refer to this guide: [How to work with Templates and Custom Attributes](/product/settings/config-settings/templates-and-custom-attributes).
# What are Limio Journeys
Limio Journeys enable you to deliver dynamic and personalised experiences to your customers, such as geographic routing, A/B testing, or segmentation. With Limio Journeys, you can ensure customers see the most relevant content based on various conditions.
## **The technology behind Limio Journeys**
Limio Journeys are powered by a **Content Delivery Network (CDN)** with an **Edge Handler**. This technology allows custom code to run closer to the user's location, enabling functionalities such as:
* Modifying HTTP requests and responses
* Making decisions based on user location
* A/B testing
* Authentication
This architecture provides a highly personalised and efficient user experience by dynamically redirecting customers based on predefined conditions. For example:
* A US-based user accessing the Limio Shop homepage can be redirected to the US-specific homepage.
* A French user may be routed to a French-language page.
From the app user’s perspective, Limio Journeys operate via **URLs**. You define a starting point URL (e.g. `/landing-page`) and set conditions to redirect users to destination URLs (e.g. `/us/landing-page` or `/fr/landing-page`).
## **Creating a Journey**
1. Select **Journeys** from the left-hand navigation pane.
2. Click the **plus** **+** button and select **Add Journey Group**.
3. Enter a name for the group and click **Save**.
4. Click the **pencil** ✏️ icon next to **Starting Point** to define how users enter the journey:
* Choose an existing tag or create a new one.
* (Recommended) Set a **Fallback Tag** to ensure proper routing.
5. Select or deselect **Domains** to determine where the journey applies.
6. Set your **Conditions** and **Actions** based on the desired journey behaviour\
(see Limio Journey usage below)
* Click **Add Condition** to include an additional condition for the journey.
* Click the **plus +** button below an existing condition to add an **AND** criteria within that condition.
7. Finally, click **Save** to put the Journey live
### Important Considerations for Limio Journeys
* **Preserved Display URL:** Users will continue to see the **starting point URL** in their browser, even after redirection. This helps prevent URL manipulation to access ineligible deals.
* **Journey Activation:** Clicking **Save** immediately activates the journey. To prevent premature activation, use a **placeholder starting point** (e.g., `/placeholder250120`). Replace it with the actual starting point when you're ready to go live.
## **Limio Journey usage**
### Acquisition Journeys:
* [**Create a Journey based on the customer location**](https://docs.limio.com/product/journey/what-are-limio-journeys/create-a-journey-based-on-the-customer-location): Direct users to country-specific Pages using their IP address (e.g. UK customers see UK-specific offers).
* [**Create a Journey based on devices**](https://docs.limio.com/product/journey/what-are-limio-journeys/create-a-journey-based-on-devices): Redirect users to device-specific Pages (e.g. mobile users see a mobile-friendly page).
* [**Create a Journey based on a A/B Test**](https://docs.limio.com/product/journey/what-are-limio-journeys/create-a-journey-based-on-a-ab-test): Show different Pages to the same users at random to measure performance.
* [**Create a Journey based on a Session Cookie**](https://docs.limio.com/product/journey/what-are-limio-journeys/create-a-journey-based-on-a-session-cookie): Route users to specific offers based on the presence of a session cookie.
* [**Create a Journey based on Subscription Offer Labels**](https://docs.limio.com/product/journey/what-are-limio-journeys/create-a-journey-based-on-subscription-offer-labels): Route users who just purchased a subscription to a different order complete page.
### Cancel/Save and Switch Journeys:
* [**Create a Journey based on Subscription Offer Labels**](https://docs.limio.com/product/journey/what-are-limio-journeys/create-a-journey-based-on-subscription-offer-labels): Route logged-in users to Pages based on their subscribed offers.
* [**Create a Journey based on Limio Segments & Journeys**](https://docs.limio.com/product/journey/what-are-limio-journeys/create-a-journey-based-on-limio-segments): Show Pages tailored to customer segments.
* [**Create a Journey based on Query String**](https://docs.limio.com/product/journey/what-are-limio-journeys/create-a-journey-based-on-query-string): Redirect users based on specific query strings in the URL.
* [**Create a Journey based on Subscription Status**](https://docs.limio.com/product/journey/what-are-limio-journeys/create-a-journey-based-on-subscription-status): Differentiate experiences for active subscribers vs. non-subscribers.
* [**Create a Journey based on the customer location**](https://docs.limio.com/product/journey/what-are-limio-journeys/create-a-journey-based-on-the-customer-location): Direct logged-in customers to offers based on their original purchase country.
### Example:
A company wants to run a **limited-time promotional campaign** but wants to ensure that only **active subscribers** accessing the site from a **mobile device** see the offer. Additionally, they want to **A/B test two different landing pages** to determine which version performs better.
Users will be randomly split if:
* ✅ They have an **active subscription** based on **Subscription Status** criteria
* ✅ Is visiting from a **mobile device** based on **Device** criteria
📷 *Screenshot: Example above in action*
## Debugging Journeys
If a journey isn't routing as expected, here are some things to consider to help understand what is causing the behaviour.
### Multiple Journeys with Conflicting Starting Points
This occurs when multiple live journeys share the same starting point. This can cause end-users to be routed to the incorrect path depending on the conditions present in the other journeys with the same starting point.
In this situation, you may need to unify the logic into one journey. If the new journey was created for a promotional campaign, you can remove the starting point from the BAU journeys that are clashing. This can be done by duplicating them under a slightly different name, then deleting the originals. To revert to the BAU journeys, you can do the same with the promotional journey, or delete it, and then re-add the starting point to the BAU journeys.
### Incorrect Ordering of Journey Groups
The ordering of your journey groups can impact where end-users are routed within a specific journey, so it is important to consider this carefully when building your journeys.
### Cached Content Not Updating
When testing a journey update immediately after making a change, it can take a moment to reflect in your browser if you were already loading associated pages prior to the change. If the changes don't appear right away and you are matching your target journey conditions, you will likely need to clear your cache and hard reload the page.
# Journey Based on A/B Test
## **Overview**
Configuring a journey to perform **A/B testing** allows you to direct users to different pages and measure the effectiveness of each experience. This approach helps optimize conversions, engagement, and customer satisfaction. For example, you might want to:
* Test **two different landing pages** to see which drives higher conversions.
* Experiment with **different messaging or layouts** to determine user preference.
* Split traffic between **two checkout flows** to measure drop-off rates.
The **Split** function in Limio Journeys enables you to create multiple destinations for the same conditions. You can define the percentage of traffic allocated to each destination, ensuring that users are distributed as needed. By leveraging **A/B testing in Limio Journeys**, businesses can optimize customer experiences and improve key performance metrics
## **Before you start**
Before setting up an A/B test, ensure that both pages exist and are ready for users.
## **Adding A/B test Criteria**
1. Define your **Condition** criteria.
2. Under **Actions**, ensure **Type** is set to **Destination**.
3. Click the **pencil** ✏️ icon next to **Starting Point** to define how users enter the journey:
* Choose an existing tag or create a new one.
* (Recommended) Set a **Fallback Tag** to ensure proper routing.
4. Change the **Split (%)** to your desired split e.g **50%**
5. Click **Add Split** and follow repeat steps 3 & 4
**Verification Steps**:
1. Open an incognito window, visit the journey URL, and confirm the variant assignment.
2. Repeat multiple times to verify randomization.
* Expected behaviour (using below example) is to randomly be redirected to journeytest or journeytestalt
## **Example:**
If a user is part of an **A/B test campaign**, they will be **randomly routed** to either the **journeytest** page or the **journeytestalt** page. This ensures that different experiences can be tested with equal traffic distribution.
In this setup, **50% of users** will be directed to the **journeytest** page, while the other **50%** will be sent to the **journeytestalt** page. This allows businesses to compare engagement, conversion rates, and overall effectiveness of each variation.
By analyzing user interactions on both pages, teams can determine which version performs better and optimize future campaigns accordingly.
📷 *Screenshot: View of the example above in action*
# Journey Based on Session Cookie
## **Overview**
Configuring a journey based on cookies allows you to personalize user experiences by directing them to different pages depending on their authentication status or browsing history. For example, you might want to:
* Route **logged-in users** to the **Manage My Account** page.
* Redirect **guest users** to a sign-in or promotional page.
Limio supports all cookies starting with the prefixes `lmo_` and `limio-`, making it easy to segment users dynamically. This guide explains how to create a journey and apply cookie-based criteria to control user flow.
*Example: If a user has the `lmo_uid` cookie (indicating they are authenticated), they can be automatically routed to the **Manage My Account** page. Users without this cookie can be directed to a **sign-in page** or **subscription offer**.*
## **Creating a Journey**
1. Select **Journeys** from the left-hand navigation panel.
2. Click the **plus** **+** button and select **Add Journey Group**.
3. Enter a name for the group and click **Save**.
4. Click the **pencil** ✏️ icon next to **Starting Point** to define how users enter the journey:
* Choose an existing tag or create a new one.
* (Recommended) Set a **Fallback Tag** to ensure proper routing.
5. Select or deselect **Domains** to determine where the journey applies.
## **Adding Cookie Criteria**
1. Under **Conditions**, open the **Type** dropdown and select **Cookie Exists**.
2. In the **Cookie String** field, enter one or multiple cookie names, separated by commas (e.g `lmo_uid`).
3. Under **Actions**, ensure **Type** is set to **Destination**.
4. Click the **pencil** ✏️ icon next to **Split (%)**, which defaults to **100%**, and specify the endpoint.
* Click **Add Condition** to include an additional condition for the journey.
* Click the **plus +** button below an existing condition to add an **AND** criteria within that condition.
5. Finally, click **Save** to put the Journey live.
**Verification Steps**:
1. Open a browser and ensure the cookie is set (e.g `lmo_uid`).
* Right-click> Inspect
* Click the Application tab
* Under the Storage heading > Cookies
2. Access the starting point URL.
3. Confirm that the browser redirects to the specified destination URL.
📷 *Screenshot: View of the "Cookie Exists" condition in the Journeys tab.*
# Journey Based on Devices
## **Overview**
Device-based routing allows you to personalize user journeys by directing users to specific pages based on their device. This is useful for optimizing user experiences across different devices, such as:
* Redirecting **mobile users** to a mobile-optimized page.
* Routing **iOS users** to an **App Store landing page**.
* Directing **desktop users** to a **full-featured web experience**.
This guide explains how to configure **device-based conditions** within Limio Journeys.
*Example: If a user is on an iOS device (e.g., iPhone), they can be automatically redirected to an App Store page. Android users can be routed to a Google Play Store page, while desktop users remain on the main site.*
## **Before you start**
The page(s) you are routing to should already have been created with the relevant tag e.g 'App Store landing page'.
## **Creating a Journey**
1. Select **Journeys** from the left-hand navigation panel.
2. Click the **plus** **+** button and select **Add Journey Group**.
3. Enter a name for the group and click **Save**.
4. Click the **pencil** ✏️ icon next to **Starting Point** to define how users enter the journey:
* Choose an existing tag or create a new one.
* (Recommended) Set a **Fallback Tag** to ensure proper routing.
5. Select or deselect **Domains** to determine where the journey applies.
## **Adding Device Criteria**
1. Under **Conditions**, open the **Type** dropdown and select **Device**.
2. In the **Device** field, choose one or several options from the drop-down.
3. Under **Actions**, ensure **Type** is set to **Destination**.
4. Click the **pencil** ✏️ icon next to **Split (%)**, which defaults to **100%**, and specify the endpoint.
* Click **Add Condition** to include an additional condition for the journey.
* Click the **plus +** button below an existing condition to add an **AND** criteria within that condition.
5. Finally, click **Save** to put the Journey live.
**Verification Steps**:
1. Access the starting point URL.
2. Toggle the device to check for expected behaviour (e.g., Chrome's mobile emulator).
3. Confirm that the browser redirects to the specified destination URL.
📷 *Screenshot: View of the "Device" condition in the Journeys tab.*
# Journey Based on Limio JWT
## **Overview**
Configuring a journey based on **Limio JSON Web Token (JWT)** allows you to personalize user experiences by directing customers to specific pages depending on their Identity Token. This approach ensures that different customers can receive different experiences. For example, you might want to:
* Route **high-value subscribers** to an **exclusive upgrade offer**.
* Redirect **trial users** to a **conversion-focused page**.
* Send **churned customers** to a **win-back campaign**.
Limio JSON Web Token will look at attributes defined in your Identity System JWT token. Learn more on how to configure your Identity System to pass information to Limio on [Set up Authentication for Customers](/product/authentication/sso-your-authentication).
## **Before you start**
* Ensure that the required Claims in your Identity system.
* Once done, go through a purchase journey and check that the JWT token has the Claims. You can do by going to Limio Subscription > select a Limio Customer > click on Limio Owner > then identify the Identity with @limio/external-id.
## **Creating a Journey**
1. Select **Journeys** from the left-hand navigation panel.
2. Click the **plus** **+** button and select **Add Journey Group**.
3. Enter a name for the group and click **Save**.
4. Click the **pencil** ✏️ icon next to **Starting Point** to define how users enter the journey:
* Choose an existing tag or create a new one.
* (Recommended) Set a **Fallback Tag** to ensure proper routing.
5. Select or deselect **Domains** to determine where the journey applies.
## **Adding Segment Criteria**
1. Under **Conditions**, open the **Type** dropdown and select **JSON Web Token**.
2. In the **JSON Web Token** field, press (+) and fill in the **Condition, Operator and Value** you need.
3. Under **Actions**, ensure **Type** is set to **Destination**.
4. Click the **pencil** ✏️ icon next to **Split (%)**, which defaults to **100%**, and specify the endpoint.
* Click **Add Condition** to include an additional condition for the journey.
* Click the **plus +** button below an existing condition to add an **AND** criteria within that condition.
5. Finally, click **Save** to put the Journey live.
**Verification Steps**:
Check JSON Web Token has **status is equal to trial**:
1. Identify test users and confirm the JSON Web Token (JWT) has a custom attribute **status** and a value of **trial.**
2. Access the starting point URL.
3. Verify that changing value of status updates the user’s journey.
# Journey Based on Limio Segments
## **Overview**
Configuring a journey based on **Limio Segments** allows you to personalize user experiences by directing customers to specific pages depending on their segment membership. This approach ensures that different customer groups receive relevant content, offers, or promotions. For example, you might want to:
* Route **high-value subscribers** to an **exclusive upgrade offer**.
* Redirect **trial users** to a **conversion-focused page**.
* Send **churned customers** to a **win-back campaign**.
Limio Segments are predefined groups of customers based on factors such as engagement level, subscription history, or purchase behaviour. These segments can be managed within Limio and applied dynamically within Journeys.
This guide explains how to apply **segment-based criteria** to control user flow.
## **Before you start**
Ensure that the required OSegments have been created in the Limio app.
Check this by navigating to Offers in the left-hand navigation, selecting your Segments > search in the navigation panel.
## **Creating a Journey**
1. Select **Journeys** from the left-hand navigation panel.
2. Click the **plus** **+** button and select **Add Journey Group**.
3. Enter a name for the group and click **Save**.
4. Click the **pencil** ✏️ icon next to **Starting Point** to define how users enter the journey:
* Choose an existing tag or create a new one.
* (Recommended) Set a **Fallback Tag** to ensure proper routing.
5. Select or deselect **Domains** to determine where the journey applies.
## **Adding Segment Criteria**
1. Under **Conditions**, open the **Type** dropdown and select **Segment**.
2. In the **Segment** field, select one or multiple segments you want to target.
3. Under **Actions**, ensure **Type** is set to **Destination**.
4. Click the **pencil** ✏️ icon next to **Split (%)**, which defaults to **100%**, and specify the endpoint.
* Click **Add Condition** to include an additional condition for the journey.
* Click the **plus +** button below an existing condition to add an **AND** criteria within that condition.
5. Finally, click **Save** to put the Journey live.
**Verification Steps**:
Check Segment Membership:
1. Identify test users and confirm they belong to the expected segment (e.g Weekly Term)
2. Access the starting point URL.
3. Verify that changing segment conditions updates the user’s journey.
Test Redirections for Different Segments:
1. Set up multiple test journeys with different segments.
2. Access the journey URL with different segment criteria and confirm expected behaviour.
## **Example:**
If a user belongs to the **Weekly Term** segment, they can be automatically routed to a **rescue campaign page**. Users who do not meet this segment condition will be directed to the **fallback rescue-weekly page**.
In this setup, **10% of users** who meet the segment condition are split and routed to a **rescue trial fortnight page**. This allows for controlled testing or gradual rollout of different experiences.
📷 *Screenshot: View of the example above in action*
# Journey Based on Query String
## **Overview**
Configuring a journey based on a **URL query string** allows you to personalize user experiences by directing them to specific pages based on parameters in the URL. This approach ensures that users arriving from different campaigns, sources, or user groups receive relevant content. For example, you might want to:
* Route users arriving from a **partner campaign** to a **custom landing page**.
* Redirect visitors with a **specific tracking parameter** to a **personalized offer**.
* Send users from a **corporate account** to a **dedicated business portal**.
By using **query string conditions** in Limio Journeys, you can dynamically route users based on these parameters.
## **Before you start**
A basic understanding of URL query strings, including how parameters are structured and how they affect webpage behaviour is required.
`www.example.com/over/there?company=limio`
The query string is `company=limio`
## **Creating a Journey**
1. Select **Journeys** from the left-hand navigation panel.
2. Click the **plus** **+** button and select **Add Journey Group**.
3. Enter a name for the group and click **Save**.
4. Click the **pencil** ✏️ icon next to **Starting Point** to define how users enter the journey:
* Choose an existing tag or create a new one.
* (Recommended) Set a **Fallback Tag** to ensure proper routing.
5. Select or deselect **Domains** to determine where the journey applies.
## **Adding Query String Criteria**
1. Under **Conditions**, open the **Type** dropdown and select **Query String**.
2. In the **Query String** field, input your query string (use commas to separate multiple).
3. Under **Actions**, ensure **Type** is set to **Destination**.
4. Click the **pencil** ✏️ icon next to **Split (%)**, which defaults to **100%**, and specify the endpoint.
* Click **Add Condition** to include an additional condition for the journey.
* Click the **plus +** button below an existing condition to add an **AND** criteria within that condition.
5. Finally, click **Save** to put the Journey live.
**Verification Steps**:
1. Open an incognito/private browsing window.
2. Enter the URL with the specified query string (e.g `https://example.com/?company=limio`).
3. Ensure that the expected journey behaviour is triggered.
Example: If a user arrives with the query string **company=limio** in their URL, they will be automatically routed to the **UK default campaign page**. This ensures that users from a specific company or campaign receive a tailored experience.
Since the **split is set to 100%**, all users matching this query string condition will be directed to the defined destination without variation.
📷 *Screenshot: View of the example above in action*
# Journey Based on Subscription Offer Labels
## **Overview**
Configuring a journey based on **subscription offer labels** allows you to personalize user experiences by directing customers to different pages depending on their current subscription status. For example, you might want to:
* Route **existing subscribers** to an **upgrade or renewal page**.
* Direct **non-subscribers** to a **special promotional offer**.
Limio allows you to segment users dynamically by checking their associated subscription offer labels. This guide explains how to create a journey and apply **subscription-based criteria** to control user flow.
*Example: If a user is subscribed to an offer labelled **"Premium Subscription"**, they can be routed to a **special upgrade page**. Users without this label can be directed to a **promotional subscription page**.*
## **Before you start**
Ensure that the required Offer Label(s) have been created in the Limio app and applied to the relevant Offers.
Check this by navigating to Offers in the left-hand navigation, selecting your Offer > locating the section Categorisation > then checking the Labels here.
## **Creating a Journey**
1. Select **Journeys** from the left-hand navigation panel.
2. Click the **plus** **+** button and select **Add Journey Group**.
3. Enter a name for the group and click **Save**.
4. Click the **pencil** ✏️ icon next to **Starting Point** to define how users enter the journey:
* Choose an existing tag or create a new one.
* (Recommended) Set a **Fallback Tag** to ensure proper routing.
5. Select or deselect **Domains** to determine where the journey applies.
## **Adding Subscription Offer Label criteria**
1. Under **Conditions**, open the **Type** dropdown and select **Subscription Offer Label**.
2. In the **Subscription Offer Label** field, enter the specific label(s) associated with the subscription offers you want to target.
3. Under **Actions**, ensure **Type** is set to **Destination**.
4. Click the **pencil** ✏️ icon next to **Split (%)**, which defaults to **100%**, and specify the endpoint.
* Click **Add Condition** to include an additional condition for the journey.
* Click the **plus +** button below an existing condition to add an **AND** criteria within that condition.
5. Finally, click **Save** to put the Journey live.
**Verification Steps**:
1. Impersonate a user with a subscription with the specified Offer Label attached(e.g Premium Subscription).
2. Access the starting point URL.
3. Verify that the user is redirected to the correct destination.
📷 *Screenshot: View of the "Subscription Offer Labels" condition in the Journeys tab.*
# Journey Based on Subscription Status
**This feature is currently in beta. Please test it in a sandbox environment before deploying it to production.**
## **Overview**
Configuring a journey based on **subscription status** allows you to personalize user experiences by directing them to specific pages depending on whether they have an active subscription. For example, you might want to:
* Route **active subscribers** to exclusive content or account management pages.
* Redirect **non-subscribers** to sign-up or promotional pages.
This approach enhances user engagement by ensuring that each user encounters content relevant to their subscription status.
*Example: If a user has an **active subscription**, they can be automatically routed to a **premium content page**. Conversely, users without an active subscription can be directed to a **subscription offer** or **sign-up page**.*
## **Before you start**
Check that the Limio customer is authenticated with an Identity that is correctly linked to an active Subscription. If the identity is missing or incorrect, the journey may not work as expected.
You can verify this by clicking the Subscriptions dropdown in the left-hand navigation > clicking Subscriptions > the left-hand navigation changes click Subscriptions here > search for the Subscription to verify > click Details > Owner will be populated as will Identity.
## **Creating a Journey**
1. Select **Journeys** from the left-hand navigation panel.
2. Click the **plus** **+** button and select **Add Journey Group**.
3. Enter a name for the group and click **Save**.
4. Click the **pencil** ✏️ icon next to **Starting Point** to define how users enter the journey:
* Choose an existing tag or create a new one.
* (Recommended) Set a **Fallback Tag** to ensure proper routing.
5. Select or deselect **Domains** to determine where the journey applies.
## **Adding the Subscription Status criteria**
1. Under **Conditions**, open the **Type** dropdown and select **Subscription Status**.
2. In the **Subscription Status** field, choose an option of **activeSub** or **noActiveSub**.
3. Under **Actions**, ensure **Type** is set to **Destination**.
4. Click the **pencil** ✏️ icon next to **Split (%)**, which defaults to **100%**, and specify the endpoint.
* Click **Add Condition** to include an additional condition for the journey.
* Click the **plus +** button below an existing condition to add an **AND** criteria within that condition.
5. Finally, click **Save** to put the Journey live.
**Verification Steps**:
1. Authenticate as a user with the relevant subscription status (e.g activeSub).
2. Access the starting point URL.
3. Confirm that the redirection aligns with the defined journey.
📷 *Screenshot: View of the "Subscription Status" condition in the Journeys tab.*
# Journey Based on Customer Location
**This feature is currently in beta. Please test it in a sandbox environment before deploying it to production.**
## **Overview**
Configuring a journey based on **customer location** allows you to personalize user experiences by directing them to specific pages tailored to their geographical area. Journeys can route users based on **geolocation (IP-based)**. This approach can enhance engagement by presenting region-specific content, offers, or language preferences.
**Note:** For more specific geographical routing, you can target users based on their region using ISO 3166-2 subdivision codes.
*Example:* *If a user is located in the **Bayern region of Germany (DE-BY)**, they can be automatically routed to a **German-language promotional page**. Users from other regions can be directed to a **default English-language page**.*
## **Before you start**
Ensure you understand how Limio determines customer location (e.g IP address) and what factors may affect accuracy (e.g customer using a VPN).
Note: The Country and Region conditions are based on the user’s geolocation (IP address).
## **Creating a Journey**
1. Select **Journeys** from the left-hand navigation panel.
2. Click the **plus** **+** button and select **Add Journey Group**.
3. Enter a name for the group and click **Save**.
4. Click the **pencil** ✏️ icon next to **Starting Point** to define how users enter the journey:
* Choose an existing tag or create a new one.
* (Recommended) Set a **Fallback Tag** to ensure proper routing.
5. Select or deselect **Domains** to determine where the journey applies.
## **Adding customer location criteria**
1. Under **Conditions**, open the **Type** dropdown and select **City**, **Country (IP-based), or** **Region**.
2. In the chosen field, type to search your desired journey location (see table below)
3. Under **Actions**, ensure **Type** is set to **Destination**.
4. Click the **pencil** ✏️ icon next to **Split (%)**, which defaults to **100%**, and specify the endpoint.
* Click **Add Condition** to include an additional condition for the journey.
* Click the **plus +** button below an existing condition to add an **AND** criteria within that condition.
5. Finally, click **Save** to put the Journey live.
**Verification Steps**:
1. Use a VPN or online geolocation tester to simulate different locations.
2. Access the starting point URL.
3. Confirm that the following journey redirects based on the expected location.
| **Country** | country name as the input |
| ----------- | ------------------------------------------------------------- |
| **City** | city name as the input |
| **Region** | ISO 3166-2 subdivision code (use commas to separate multiple) |
📷 *Screenshot: View of the "Region" condition in the Journeys tab.*
# Set Canonical URLs in Journeys
In order to optimise your SEO performance, you may want your journeys to all be attributed to the same URL. It is now possible to set a Canonical URL for all pages at the Journey level.
First, you'll need to configure a canonical domain in the Limio Settings. In the Settings view, navigate to General Settings > Analytics.
Under "Allowed Canonical Domains", click "Add New". Add your domain and click Save in the top right corner.
That will make the Canonical URL field visible in the Journeys tab.
Now, navigate to the Journeys tab.
Then, select a journey.
There is a field called "Canonical URL". You may need to hard reload your browser in order to see this field for the first time on existing journeys.
Enter the URL that you would like your pages in the journey to be attributed to, and click Save.
Now, all your pages in a journey (including the start point) will be attributed to the Canonical URL specified.
# Configure SEO Metadata
Within Limio, you're able to configure certain aspects related to Search Engine Optimisation (SEO) to improve how your pages appear in search results, indexation options, canonical tags and more.
### **What are core SEO metadata?**
If you're not an expert on SEO, let's start with some definitions:
* **Meta Title:** Meta titles (also known as title tags) appear as the titles on browser tabs/windows well as on the clickable page title on Google
* **Meta Description:** Meta descriptions are the block of text that appear below the URL of a website on Google Search Results Pages (SERP).
Those are important for branding and improving click-through rates and can be configured directly in your Limio app.
### **At the page level**
Limio would recommend to set up SEO metadata at the page level.
Go to the page you want to configure.
Click on '**Attributes**' and look for these two fields: **Meta title and Meta Description.**
If you don't specify a Meta Title, we will use the Shop Title which is set at the shop level (see below).
If you don't specify a Meta Description, search engines like Google will usually identify the most relevant content, for example the H1 content in a hero banner.
### **At the shop level**
In the upper right corner, click on the profile icon and then Developers. Go to **General Settings > Shop > Shop Title.**
Here you can enter some text which will be used as the **meta title** for any pages that do not have a meta title configured.
You cannot set a global **meta description**. Google and other search engines will automatically index the most relevant content if one isn't available on your page.
### **Indexation**
You can also specify whether or not you want the page to be indexed by search engine crawlers by toggling the Disable Index option on or off.
| ⚠️ Limio recommends to de-index all pages on sandboxes. |
| ------------------------------------------------------- |
Turning this setting on will add a meta tag to tell page crawlers e.g. Google, to not index this page.
# Add robots.txt File
You can control which files crawlers may access on your site with a robots.txt file. Read more about creating a robots.txt file [here](https://developers.google.com/search/docs/crawling-indexing/robots/create-robots-txt).
Once you have a robots.txt file created, you can upload in the Limio Console via the general settings.
1\. Navigate to the settings section.
2\. You will be taken to the shop settings.
3\. In the shop settings you will see field for Robots.txt. Here you can drag and drop your robots.txt file.
4\. Finally save your changes.
# Sitemaps in Limio
"*A sitemap is a file where you provide information about the pages, videos, and other files on your site, and the relationships between them. Search engines like Google read this file to crawl your site more efficiently. A sitemap tells Google which pages and files you think are important in your site, and also provides valuable information about these files. For example, when the page was last updated and any alternate language versions of the page.*" - [Google Search Central](https://developers.google.com/search/docs/crawling-indexing/sitemaps/overview)
In Limio, whenever a page is published or unpublished, it will get added to the sitemap.xml.
This file can be accessed at your shop URL /sitemap.xml - for example - limio.shop.com/sitemap.xml. You can add your sitemap to Google Search Console which will help Google with indexation of your pages.
# Overview
The Limio MCP Server connects AI assistants like Claude to your Limio environment. Instead of navigating the admin dashboard, you can ask questions and give instructions in plain language.
**Examples of what you can do:**
* "Show me all our published student offers"
* "Create a monthly digital subscription at $9.99"
* "Update the price on our annual plan to $129.99"
* "Where is the Black Friday offer shown?"
* "How many orders came through our student offers this month?"
The server uses the [Model Context Protocol](https://modelcontextprotocol.io/) (MCP), an open standard that lets AI tools talk to external services securely. Your existing Limio credentials handle authentication, so there is no separate account to create. Claude Desktop connects via [custom connectors](https://support.claude.com/en/articles/11175166-get-started-with-custom-connectors-using-remote-mcp); Claude Code connects via the [MCP CLI](https://code.claude.com/docs/en/mcp).
## How it works
You connect the MCP server to an AI assistant (like Claude Desktop or Claude Code). When you ask the assistant something about your Limio environment, it calls the server on your behalf, using your credentials. The assistant then returns the results in a readable format.
You stay in control. The assistant asks for your approval before taking any action that modifies data.
## Security and data privacy
The MCP server is designed with data isolation and customer control in mind:
* **Bring your own AI key.** The MCP server does not include an AI subscription. You use your own Claude, ChatGPT, or Gemini account. Your contractual relationship with the AI provider is between you and that provider. Limio is not a party to it.
* **No PII exposed.** Order queries use a limited index database, not the primary data store. The data available through MCP includes offer details, order numbers, dates, and aggregate counts, but no customer personal information.
* **Authenticated access only.** Only users with valid Limio credentials can connect. The server uses your existing Limio login, the same credentials you use to access the Limio app.
## Permissions and governance
The MCP server provides several layers of control over what actions can be taken:
* **Per-user access control.** MCP access is **off by default** for every user, existing and new. An admin — anyone with User Management access — turns it on for specific users from the user's profile screen, and the All Users list shows each user's MCP Access state in a read-only column. Turning access off takes effect immediately, and a user without access receives a clear error when their AI tool tries to connect. This lets you start with a small, trusted group and widen access as you build confidence.
* **Connector-level tool restrictions.** In Claude Desktop, you can [configure your connector](https://support.claude.com/en/articles/11503834-building-custom-connectors-via-remote-mcp-servers) to expose only read-only tools (retrieve offers, query orders) or include write tools (create, update). This lets you control what the AI assistant is allowed to do at the connection level.
* **Plan mode.** Claude Desktop and Claude Code support [plan mode](https://code.claude.com/docs/en/interactive-mode), where the assistant shows you exactly what it intends to do before executing. This is useful for bulk operations -- -you can review the full list of changes and approve, reject them, or ask for changes.
* **Environment separation.** Set up separate connectors for each environment (sandbox, pre-production, production). This prevents accidental changes to the wrong environment and lets you test workflows safely before applying them to production.
* **No destructive operations.** No MCP tool can delete data, for any user.
{% hint style="warning" %}
**Current limitation:** The MCP server does not yet enforce Limio app-level role permissions — a user with MCP access enabled can use all enabled tools, regardless of their role within the Limio app. Role-based enforcement is planned for a future release. In the meantime, use the per-user access switch, connector-level tool restrictions and environment separation to manage access.
{% endhint %}
## Capabilities
| Area | What you can do |
| ----------- | ----------------------------------------------------------------------------- |
| **Offers** | Retrieve, create, and update offers, including volume and usage-based pricing |
| **Pages** | Find which pages display a given offer |
| **Orders** | Query order and subscription events with filters |
| **Pricing** | Recurring, one-time, volume-tiered, and usage-based pricing types |
## Next steps
* [Setup](/product/mcp-server/setup): connect the server to your AI assistant
* [What You Can Do](/product/mcp-server/usage): a guide to available actions
* [Pricing Reference](/product/mcp-server/pricing): supported pricing configurations
# Setup
Connect your AI assistant to your Limio environment in a few steps. You'll sign in with your existing Limio credentials. There are no API keys or tokens to manage.
{% hint style="warning" %}
**Beta:** The Limio MCP Server is in beta and available on Release 115 onwards. If your environment is on an earlier release, contact your Limio admin about upgrading.
{% endhint %}
## What you'll need
* **Claude Desktop, Claude Code or Codex** (other MCP-compatible clients should also work)
* Your MCP server URL: your Limio environment URL with `/mcp` appended, for example `https://your-tenant.your-domain.com/mcp`
* Your Limio login: the same credentials you use to sign in to Limio
## Connect via Claude Desktop
Claude Desktop supports remote MCP servers as [custom connectors](https://support.claude.com/en/articles/11175166-get-started-with-custom-connectors-using-remote-mcp).
1. Open Claude Desktop and go to **Settings > Connectors**
2. Click **Add custom connector**
3. Enter your Limio MCP server URL (e.g., `https://your-tenant.your-domain.com/mcp`)
4. Click **Add**
5. Claude will open a browser window for you to sign in with your Limio credentials.
6. Once connected, enable the Limio connector in any conversation via the **+** button in the chat input, then **Connectors**.
7. Try asking: **"Show me my Limio offers"**
{% hint style="info" %}
**Team and Enterprise plans:** An admin must first add the connector in **Organization settings > Connectors**. Team members can then connect from their own **Settings > Connectors** page.
{% endhint %}
{% hint style="info" %}
**Multiple environments:** Add a separate connector for each environment (sandbox, pre-production, production). This keeps your environments isolated and lets you test workflows in sandbox before running them against production. You can name each connector to make it clear which environment it points to (e.g., "Limio Sandbox", "Limio Prod").
{% endhint %}
{% hint style="info" %}
**Read-only access:** When adding a connector, you can [restrict it to read-only tools](https://support.claude.com/en/articles/11503834-building-custom-connectors-via-remote-mcp-servers). In Claude Desktop, go to your connector settings and disable write tools (create, update) if you only need to query data. This is a good default for production environments.
{% endhint %}
## Connect to Claude Code
Run the following command in your terminal:
```zsh
claude mcp add --transport http limio https://your-tenant.your-domain.com/mcp
```
Replace the example URL with your environment URL. Claude Code will prompt you to authenticate through your browser on first use. You can use your existing credentials to authenticate. See the [Claude Code MCP docs](https://code.claude.com/docs/en/mcp) for more on managing MCP servers.
If you want to add multiple MCP servers (for example, one for each environment, you can name each one differently to make it clear which environment they refer to).
```zsh
claude mcp add --transport http limio-dev https://your-tenant-dev.your-domain.com/mcp
claude mcp add --transport http limio-stg https://your-tenant-stg.your-domain.com/mcp
```
**Tip:** To make your Limio MCP server available across all projects, install it with the `--scope user` flag:
```zsh
claude mcp add --scope user --transport http limio https://your-tenant-dev.your-domain.com/mcp
```
By default, Claude Code uses local scope, so the server is only available in the current project. Applying the user scope means you don't have to reinstall the server for each of your projects.
Once you have Claude Code open, you can run `/mcp` to see your available MCP servers. Select the one you just added and select Authenticate. This should open up a browser with a login screen. Use your regular Limio App credentials to sign in. It should display a success message. You can then close this window and start to use the Limio MCP inside of Claude Code.
## Connect to Codex
Run the following command in your terminal:
```zsh
codex mcp add limio --url https://your-tenant.your-domain.com/mcp
```
Replace the example URL with your environment URL. You can then run:
```zsh
codex mcp limio login
```
to initiate the authentication flow.
## Connect to Microsoft 365 Copilot
{% hint style="info" %}
This connection is only available via Federated MCP connector and required one of the following Microsoft addons:
* Researcher agent
* Deep research mode in Copilot Chat
* Copilot in Excel
This is typically found in the **Microsoft 365 Copilot Business** plan.
{% endhint %}
{% hint style="info" %}
You will require some configuration details from Limio for the below setup so it is recommend to raise a ticket with Support requesting details for Microsoft 365 Copilot setup for the environment you're targeting.
{% endhint %}
### Register the OAuth connection
1. Navigate to [https://dev.teams.microsoft.com](https://dev.teams.microsoft.com/) -> **Tools** -> **OAuth Client Registration**
2. Click **+ Register client** and enter:
| Field | Value |
| ------------------------------------- | ----------------------------------------------------------------------- |
| Registration name | Limio MCP \ |
| Base URL | https\://\/mcp |
| Restrict usage by organization | My organization only |
| Restrict usage by Teams app | *Select your relevant option* |
| Client ID | Use **client\_id** provided in support request |
| Client Secret | Use **client\_secret** provided in support request |
| Authorization endpoint | Use **authorization\_endpoint** provided in support request |
| Token endpoint | Use **token\_endpint** provided in support request |
| Refresh endpoint | Use **refresh\_endpoint** provided in support request |
| Scope | Copy and paste the value in **scopes** provided in the support request. |
| Enable Proof Key for Code Exchange | Enabled |
| Client password authentication method | HTTP Basic authentication |
3. Click **Save**
4. Copy and note down the **OAuth client registration ID**
### Configure MCP in M365 admin console
1. Navigate to the **Connectors** ([Admin home page](https://admin.cloud.microsoft/?#/homepage) -> Copilot -> Connectors) section.
2. Click **+ Add Connection** and select **Created by your org** from the Categories sections in the left**.**
3. Click **Add** within the Create a new connector box.
4. Click **Add** within the Connect to MCP server box.
| Field | Value |
| ------------------- | ------------------------------------------------- |
| Display Name | Limio MCP \ |
| MCP endpoint URL | https\://\/mcp |
| Authentication type | OAuth 2.0 |
| Reference ID | Use **OAuth client registration ID** from earlier |
5. Click **Authorize**.
6. You will be present with login screen, use your Limio credentials to log in.
7. Tick the Notice box and fianlly click **Create.**
## Other MCP clients
Any client that supports remote MCP servers can connect. Point it at your MCP server URL. The server handles authentication automatically through your browser.
## Troubleshooting
| Problem | Solution |
| -------------------------------- | ---------------------------------------------------------------------------- |
| No hammer icon in Claude Desktop | Check that the config file is valid JSON and restart Claude Desktop |
| Login page doesn't appear | Verify the MCP server URL with your Limio admin |
| "Unauthorized" after login | Your Limio account may not have MCP access enabled. Contact your Limio admin |
If you're stuck, reach out to [Limio Support](https://docs.limio.com/support).
# What You Can Do
Once the MCP server is connected, you can talk to your Limio environment through your AI assistant. Below are the actions available today, with examples of how to use them.
## Retrieve offers
Pull offers from your Limio catalog or published inventory. You can filter by tag, path, date, or custom attributes.
**Try asking:**
* "Show me all published offers"
* "List offers tagged as 'student'"
* "What offers were modified in the last 7 days?"
* "Get the first 10 offers in JSON format"
* "Show me all offers in India"
* "What are all the save offers?"
You can paginate through large result sets. The assistant tells you when more results are available and offers to fetch the next page.
## Create offers
Create one or more offers by describing what you want. The assistant converts your description into the right format and submits it to Limio.
**Try asking:**
* "Create a monthly digital subscription at $9.99 USD"
* "Set up two offers: a monthly plan at $14.99 and an annual plan at $129.99, both in GBP"
* "Create a student offer with a 3-month trial at $4.99/month, then $9.99/month after"
* "Create a volume-priced offer: 1-10 units at $10, 11-50 at $8, 51+ at $6"
You can also provide a CSV or JSON file with your offer data and ask the assistant to create them. For example, attach a spreadsheet export and say "Create these offers in Limio". The assistant parses the file and handles the rest.
For each offer, you can specify:
* Price: amount, currency, recurring or one-time. Supports [all pricing types](/product/mcp-server/pricing) including volume and usage-based
* Billing cycle: monthly, yearly, weekly, or custom intervals
* Offer type: standard, student, gift, trial, or cancel-save
* Display text: name, description, call-to-action button text, feature list
* Restrictions: allowed countries, labels and tags
* Renewal: auto-renew settings, initial and renewal terms
* Products: attach a product and rate plan to the offer
You don't need to remember field names. Describe what you want and the assistant fills in the details. It will confirm before creating anything.
## Update offers
Modify existing offers without losing any data. The assistant fetches the current offer, merges your changes, and saves the result, so attributes you don't mention stay untouched.
**Try asking:**
* "Update the annual plan price to $139.99"
* "Change the CTA text on the student offer to 'Start Free Trial'"
* "Add the 'premium' tag to all GBP offers"
* "Pull offers with label X, update the prices, and create a CSV audit trail"
You can update any offer attribute:
* Pricing: price amount, currency, billing interval
* Display fields: name, description, display price, features, CTA text
* Configuration: payment types, renewal terms, auto-renew, allowed countries
* Labels and tags: add or change labels for page targeting
{% hint style="info" %}
When updating prices, the assistant automatically updates the customer-facing display price fields to match. You can also provide custom display price HTML if needed.
{% endhint %}
## Find offer pages
Find which pages display a specific offer. The assistant follows the offer-to-label-to-page relationship, so you do not have to cross-reference labels yourself.
**Try asking:**
* "Where is the Canada Digital Annual offer shown?"
* "Which pages display offers tagged 'default'?"
* "Is the $8/mo offer still live on any page?"
The assistant will:
1. Look up the offer and extract its labels
2. Search for pages that reference each label
3. Show you the results grouped by label, noting any labels with no matching pages
Check where an offer appears before changing prices or removing labels.
## Query orders
Search order and subscription events. Filter by order type, date range, offer name, and source.
**Try asking:**
* "How many orders came in this month?"
* "Show me cancellations in the last 7 days"
* "How many people bought via our Black Friday offers?"
* "What orders came from shop.example.com?"
* "Show me all renewal events for the last 90 days"
* "Which checkout page had more orders in the last 2 weeks?"
* "Compare revenue between our two checkout pages this month"
Available filters:
* Order types: new orders, renewals, cancellations, offer changes, offer additions
* Date range: look back 1 to 365 days (default: 30), or an explicit from/to date window
* Offer name: match orders by offer name, such as "Black Friday"
* Source: filter by order source domain
* Status: filter by event status
* Checkout page: the page the order came through (Release 116 and later)
Results include order details like offer name, amount, currency, and source. For cancellations, you'll see the cancel reason. For offer switches, you'll see both the original and new offer.
**Use case: compare checkout A/B tests.** If you are A/B testing two checkout pages, you can measure the results directly through the MCP. From Release 116, orders record which checkout page they came through, so you can group orders by page and compare the groups by order count, total revenue, or average order value — for example: "Group last month's orders by checkout page and show me the count and total revenue for each." No data export or analyst required.
## Combine actions
You can chain actions together in a single question. The assistant picks the right tools and runs them in sequence.
**Try asking:**
* "Pull all offers with label 'annual', update their prices to $149.99, and show me a summary"
* "Where is the student offer shown, and has anyone ordered it in the last 30 days?"
* "Show me all India offers with orders in the last 6 months"
* "Find our Black Friday offers, check which pages they appear on, and count total orders"
## Build artifacts
Claude Desktop can turn Limio data into artifacts (charts, dashboards, and comparison tables) within the same conversation. Ask for what you want and the assistant pulls the data, then renders it as a visual you can iterate on.
**Try asking:**
* "Build me an orders dashboard showing new orders and cancellations over the last 90 days"
* "Create a chart comparing order volume across my top 5 offers"
* "Make a pricing comparison table for all GBP annual offers"
* "Show me a breakdown of orders by source as a pie chart"
Follow up to adjust the output: change date ranges, add filters, or switch chart types.
## Migrate between environments
If you connect multiple Limio environments to the same AI assistant, you can use the MCP server to move offers between them, for example from sandbox to pre-production.
**Try asking:**
* "Pull the Black Friday offer from my sandbox environment and create it in pre-production"
* "Compare the student offer between sandbox and production. Are they in sync?"
* "Migrate all offers tagged 'Q1-launch' from staging to production"
The assistant fetches the offer data from one environment and creates or updates it in the other. It will show you a preview of the changes before applying them.
{% hint style="info" %}
This requires separate MCP connectors for each environment. See the [Setup](/product/mcp-server/setup) guide for how to configure multiple environments.
{% endhint %}
## Tips
* **Ask for markdown or JSON.** By default, results come back as readable text. If you need structured data, ask for JSON.
* **Be specific.** "Show me published GBP offers tagged 'annual'" works better than "show me some offers."
* **Bulk operations work.** You can create or update multiple offers in a single request: describe them all at once.
* **Use plan mode for bulk changes.** In Claude Desktop or Claude Code, enable [plan mode](https://code.claude.com/docs/en/interactive-mode) before large operations like price rises. The assistant will outline every change it intends to make, and you can review and approve the full plan before anything executes.
* **Nothing happens without your approval.** The assistant will always confirm before creating or modifying data.
* **Pricing types are documented.** See the [Pricing Reference](/product/mcp-server/pricing) for details on configuring volume, usage-based, and other pricing types.
# Pricing Reference
The MCP server supports five pricing types when creating or updating offers. You don't need to remember the exact format: describe what you want and the assistant configures it. This page covers what's available.
## Quick selection guide
| Scenario | Pricing type |
| ---------------------------------------------- | ------------------ |
| Monthly or annual subscription | Recurring |
| Fixed-term one-off payment (e.g., annual pass) | One-time termed |
| Lifetime or perpetual access | One-time evergreen |
| Standalone product purchase | One-time line item |
| Quantity-based tiered pricing | Recurring volume |
| Pay-per-use metered billing | Usage per unit |
## Recurring
Standard subscription billing with a fixed price on a repeating schedule.
**Example:** "Create a monthly subscription at $15/month"
* Set the price, currency, and billing interval (monthly, yearly, weekly, etc.)
* Optionally set how many times it repeats before stopping
## One-time termed
A single charge with a defined term length. The subscription ends when the term expires.
**Example:** "Create an annual pass at $99 that expires after one year"
* Set the price and the term length
* After the term ends, the subscription does not renew
## One-time evergreen
A single charge with no end date. The customer gets access indefinitely.
**Example:** "Create a lifetime access offer at $299"
* Set the price. No billing interval needed
* Also covers standalone product purchases (line items) with no ongoing access
## Recurring volume
Tiered pricing based on quantity purchased. Each tier can charge per unit or a flat fee.
**Example:** "Create a volume-priced plan: 1-10 seats at $10/seat, 11-50 at $8/seat, 51+ at $6/seat, billed monthly"
* Define quantity tiers with start and end units
* Each tier has its own price and pricing format (per-unit or flat fee)
* Set the billing interval for recurring charges
## Usage per unit
Consumption-based billing where the charge depends on actual usage within a period.
**Example:** "Create a metered API plan at $0.05 per call, billed monthly"
* Set the per-unit price
* Set the billing interval for aggregating usage
## Shared options
All pricing types support these additional settings:
* Currency: GBP, USD, EUR, AUD, CAD, and others
* Charge trigger: when the first charge fires (on order date, subscription start, or after a delay)
* Delayed start: a delay before the first charge, such as a 7-day free trial before billing starts
* Fixed start day: start subscriptions on a specific day of the month
# Navigation
## Understanding the Limio Navigation Side Bar
The Limio app features a sidebar that helps users navigate and manage the key building blocks of subscription experiences. These are grouped into two categories:
* **Catalog User concepts**: For creating and customising the shop and acquisition experience
* **Subscription User concepts**: For reviewing, managing, and validating customer subscriptions
***
## **Catalog User concepts**
* **Pages**
* **Offers**
* **Add-Ons**
* **Products**
* **Entitlements**
* **Segments**
* **Tags**
* **Assets**
* **Promo Codes**
* **Journeys**
* **Search**
* **Operations**
* **Config**
***
### **Pages**
Marketing experiences designed to acquire, retain, cross-sell, or upsell customers (e.g. Black Friday campaign) and contain Offers that power the customer-facing Limio Shop experience.
[Page Builder Overview](/product/page-builder/page-builder-overview-of-key-features)
[Publish/Unpublish Pages](/product/page-builder/how-to-publishunpublish-your-pages-online)
***
### **Offers**
Defines a Product's pricing and displays what is being sold to the customer in the Limio Shop. Offers have a Product, a Price and their own set of Attributes based on the Offer Template. Offers can be part of a Campaign or standalone:
* Offers can be accessed from the sidebar
* Attached Offers can be accessed within the Page where they're being used
* Page > Settings > Attached Offers
[What are Offers and how to configure them?](https://docs.limio.com/product/pricing/what-are-offers-and-how-to-configure-them#what-are-limio-offers)
[How to create Offers and Add-Ons to Attach to Pages](https://docs.limio.com/product/pricing/how-to-create-offers-and-add-ons-to-attach-to-pages)
***
### **Products**
Can be physical or digital (e.g. print media subscription or digital SaaS licences), used for one-off or subscription offers and has unique Attributes based on the Product Template. Each product has a unique product code.
[How do products, offers and pages relate in Page Builder v2](https://docs.limio.com/product/page-builder/how-do-products-offers-and-pages-relate-in-page-builder)
***
### **Entitlements**
Features or access rights granted to a customer when subscribing to a product. They can be used to differentiate between Offers and ensure each customer receives the correct level of service. Each Entitlement is associated with specific Products and can vary based on the subscription type.
[How to propagate entitlements from Limio to Zephr](https://docs.limio.com/integrations/other-integrations/zephr/how-to-propagate-entitlements-from-limio-to-zephr)
[How to map temporary entitlements for new orders from Limio to Zephr](https://docs.limio.com/integrations/other-integrations/zephr/how-to-propagate-entitlements-from-limio-to-zephr/how-to-map-temporary-entitlements-for-new-orders-from-limio-to-zephr)
***
### **Segments**
Groups of subscribers defined by shared characteristics (e.g. cancel reason, engagement level, etc.). They can be used for configuring Journeys to target specific customer behaviours and are automatically assigned based on actions like purchasing a particular Product.
***
### **Tags**
The URLs at which Pages are published on your domain (e.g. `/welcome` or `/specials` results in `https://sandbox-shop.dev.limio.com/welcome`), determining where Offers appear within the Limio Shop. Note: The `/default` Tag is used to define the homepage.
[Default Tag](/product/page-builder/how-to-publishunpublish-your-pages-online/what-is-the-default-tag)
***
### **Assets**
Rich media files (e.g. images) are used to support and manage shop content within Limio. Once uploaded, Assets appear in the content hierarchy and can be searched and added to Pages, Offers, or Page Components.
[Add Images to Offers (Legacy)](/product/legacy-features/how-to-configure-legacy-offers-legacy/how-to-add-images-to-offers-and-display-them-on-the-page)
***
### **Journeys**
Rule-based flows that direct customers to specific Pages based on defined conditions (e.g. segment). When a customer matches the set conditions, an action is triggered to redirect them to a specified URL, commonly used to manage international customer experiences and to support A/B testing.
[What are Limio Journeys](/product/journey/what-are-limio-journeys)
***
### **Operations**
Provides tools for managing and monitoring key platform activities:
* **Jobs** displays whether jobs are successful, active, pending, or failing.
* **Export** allows you to generate CSV files for any objects in the Limio Catalog (e.g. Products) or Subscriptions
* **Mass Build and Publish** supports bulk publishing of content
* **Zuora Product Catalog** displays Zuora Products
[What are Operations & Config?](https://docs.limio.com/product/settings/config-settings)
***
### **Config**
Contains templates that define the structure and attributes available for objects in the Limio Catalog, These are fully configurable and vary by hierarchy level or template family. Each template includes:
* System Name
* User-visible Label
* Description (shown as a tooltip)
* Type (e.g. string, boolean, numeric, multi-picklist)
[How to configure the Layout for your Pagebuilder](https://docs.limio.com/product/page-builder/page-builder-overview-of-key-features/configure-layout)
[How to work with Templates and Custom Attributes](https://docs.limio.com/product/settings/config-settings/templates-and-custom-attributes)
***
## **Subscription User concepts**
* **Customers**
* **Subscriptions**
* **Orders**
* **Events**
* **Webhooks**
* **Gift Codes**
***
### **Customers**
Tracks all information related to the customer, including Subscriptions, Orders, Events and Address.
[How to Erase Personal Data for Data Privacy Requests](https://docs.limio.com/guides/administration-guides/how-to-erase-personal-data-for-data-privacy-requests)
***
### **Subscriptions**
Tracks all information relating to customers' subscription(s), and can be synced with an external billing system (e.g. Zuora).
***
### **Orders**
Tracks all Limio orders, including orders taken via Limio For Salesforce (LFS) and at all stages (e.g. cancel order).
***
### **Events**
Tracks all events related to a Customer or Subscription (e.g. checkout\_initiated).
[How Limio Events updates Zuora for Commerce](https://docs.limio.com/integrations/keeping-zuora-and-limio-in-sync/how-limio-events-updates-zuora-for-commerce)
***
### **Gift Codes**
Tracks all gift codes purchased and redeemed by customers.
[Guide: How to sell subscription gift codes in Limio Commerce](https://docs.limio.com/integrations/zuora-integration/manage-your-pricing/how-to-sell-gift-products-with-limio-and-zuora)
***
# Add Custom Domain
The Limio Shop and Self-Service pages are generated by the Limio Commerce app and **can be hosted on your custom domain.** By default, these pages are initially hosted on a Limio domain, such as `{tenant}-shop.prod.limio.com`. However, they are designed to be hosted on your company’s specific domain for a seamless user experience.
To host these pages on your custom domain, please follow these steps:
## How to setup an extra domain in Limio?
1. To set up a new domain, please contact Limio Support at with the following details:
* The desired domain name (e.g., `subscribe.mydomain.com`).
* The environment it applies to (e.g., `{tenant}-shop.prod.limio.com`).
2. Once the Limio team completes the domain configuration, we will provide you with the required technical specifications to set up the **CNAME aliases** for hosting the Limio site on your custom domain. These details will include:
1. **CNAME for routing**: Directs traffic to your Limio-hosted site.
2. **CNAME for SSL validation**: Ensures secure access via an SSL certificate.
It is essential for your technical team to review and approve these specifications, then add the necessary records to your domain registrar. **Please note that this process must be done within 48 hours or the CNAME records will expire.**
| **Record Name** | **Record Type** | **Record Value** | **Description** |
| ----------------------------------------------------------------------------------------------------------------------------------------------------------------------------------- | --------------- | ------------------------------------------------------------------- | ------------------------------------------------------------------------------------------------------------------------------ |
| [`subscribe.mydomain.com`](http://subscribe.irmi.com/) | CNAME | `{tenant}-shop.prod.limio.com` | Routes connection to limio |
|
| CNAME | \_93778965dsfjhssb4d17f523de203e12 .zxwlrjxpwn.acm-validations.aws. | [Authorises generation of SSL certificate for ](http://taskility.com/)[subscribe.your-website.com](http://subscribe.irmi.com/) |
Please ensure these configurations are applied accurately to avoid any disruptions. Once your technical team approves the configurations, the Limio team will finalise the setup process. Provisioning a domain name can take 48h to create and propagate.
After completion, your **Limio Shop** and **Self-Service** pages will be accessible on your custom domain. Additionally, the custom domain will be visible within the **Limio Commerce** application.
***
## Impact on Zuora Hosted Payment Methods (HPM)
If you use **Zuora HPM** (Hosted Payment Methods) for payment collection, switching to a custom domain requires an update to your Zuora HPM configuration.
Zuora HPM iframes validate the **host domain** of the parent page. After moving to a custom domain, the HPM iframe will reject requests from the new domain unless it is explicitly allowed.
{% hint style="warning" %}
**After configuring your custom domain**, update the allowed domain in your Zuora HPM page settings to match your new domain (e.g. `subscribe.mydomain.com`). If this is not updated, payment forms will fail to load or submit on the custom domain. Contact if you need assistance updating the HPM configuration.
{% endhint %}
# Default Favicon
This article provides a step-by-step guide to updating the default favicon for your shop globally across all pages in Limio Shop.
> **Note**: If your shop operates on multiple domains (multi-shop), refer to our [How to Set Up Shops on Multiple Domains (Multi-Shop)](https://docs.limio.com/product/settings/how-to-set-up-shops-on-multiple-domains-multi-shop) article for instructions on managing favicons within multi-shop implementations.
## Steps to Update the Favicon
1. **Navigate to the Settings Page**
* In the Limio Shop interface, click the **profile icon** in the top-right corner.
* From the dropdown menu, select **Settings**.
2. **Access Shop Settings**
* Once on the Settings page, navigate to **General Settings > Shop**.
3. **Enter the Favicon URL**
* In the **Favicon URL** field, enter the full URL for your desired favicon.
* *Example: `https://example.com/favicon.ico`*
* **Important**: A complete URL is required; file paths (e.g., `/images/favicon.ico`) will not work.
4. **Rebuild and Publish All Pages**
* After updating the favicon URL, rebuild and publish all pages from your shop to apply the changes.
* This step ensures the updated favicon appears across your entire site.
### Additional Notes
* The favicon update may take a few minutes to reflect across all pages due to caching.
# Fonts
Limio support custom fonts. To import them, go to General Settings > Fonts and drag & drop your font to upload. Then set a Label, Font Name and CSS Value.
The Font will then be available to users in the Style and Font Editor.
# Error Page
## Introduction
Errors happen sometimes. From configuration issues to timeouts with external providers, there are plenty of reasons your shop might generate an error. Limio provides the ability to configure an error page, which a customer is redirected to when an error occurs.
This feature works with Page Builder v1 and v2.
*Beta: we'll be rolling this out across the whole app soon, but for now we're focusing on the errors that affect our customers most. Some might still slip through!*
## Configuration
Go to the pages section of your app and add a new page with the tag of /error. That's it! You can now use the page builder to configure your error page and users will start being redirected there as soon as it's published.
# Multi-Shop
Serve pages across different domains
Multi Shop enables you to manage multiple shops with distinct domains using a single Limio App. This feature allows businesses to support various web domains from just one Limio application. This can be useful if you have:
* Different brands, e.g. brand1.com and brand2.com
* Different subdomains for different use cases, e.g. partners.brand.com and billing.brand.com
## How to configure Multi Shop
Navigate to the app, then select Config > Templates > Campaigns/Pages. Choose the desired Page template, and fill in the domain details under the Domain Tab.
#### Domain URL
This will be the Domain URL used for Pages generated from this Page Template.
#### Favicon URL
This will be the Favicon URL used for Pages generated from this Page Template.
#### Shop Title
This will be the [Meta Title](/product/seo/how-to-configure-the-seo-metadata-of-your-pages) of the Pages generated from this Page Template.
## Using Multi Shop in Pages
Once your multi shop config is completed, you can use it within the Pages section.
#### Creating a new page
When creating a new page you can select the template via the dropdown.
Upon creating a tag, you can see the relevant Domain URL show.
#### Changing an existing page
You can also change the template after a page has been created and the domain will change respectively. using the following steps:
1. Open the existing page in the page builder
2. Click on 'Settings'
3. Find the 'Template' dropdown button to reveal the list of available page templates
## Using Multi Shop in Journeys
Once your multi shop config is completed and you have created some pages you can use it within the Journey section.
#### Creating a multi-shop journey
Creating a multi-shop journey is fairly similar to creating a normal journey, the major difference being that you can now have one journey that works on multiple domains.
Under Domain just select the shop domains you wish to include in the journey and they will be automatically added in the starting point URL as well as the Fallback Tag.
You will then be able to use the normal conditions and actions to set journeys as before.
Keep in mind that the same tag will be used across all the different domains.
# Config Settings
The Limio Commerce Platform side-bar provides easy access to key functionalities, divided into the **Operations** and **Config** tabs.
### **Operations Tab**
* **Jobs**: Monitor, manage, and re-index bulk actions. Re-indexing is useful for resolving errors in search or data processing.
* **Mass Build and Publish**: Perform mass rebuilds and publish campaigns or pages.
* **Builds**: View and manage builds, including identifying and fixing build errors.
* **Zuora Product Catalog**: Sync and manage your product catalogue with Zuora.
### **Config Tab**
* **Templates**: Essential for managing layouts, domains, sections, core attributes, and custom attributes. It includes templates for all objects in Limio, such as offers, products, pages, and tags.
For further assistance, email us at .
# Templates and Custom Attributes
As mentioned in our [Config Settings](/product/settings/config-settings) guide the Config tab in Limio contains the Templates which are core to how Limio Catalog works.
A template defines the set of attributes available for the Offers, Products, Segments and Tags.
{% hint style="info" %}
**Config hierarchy — two levels to know:**
* **Config > \[Object]** (e.g. Config > Products) — where you define any attributes for that object type.
* **Config > \[Object] > \[Template name]** (e.g. Config > Products > Default) — a template. This controls which attributes appear on objects using that template.
{% endhint %}
{% hint style="info" %}
**Changes not showing?** After saving config or template changes, do a hard refresh to clear the cached layout: **Mac** Cmd+Shift+R · **Windows/Linux** Ctrl+Shift+R
{% endhint %}
You can add new templates in the config section of the catalog using the add icon under specific hierarchy. Make sure to select default in the dropdown while saving the new template as this is the baseTemplate.
*Screenshot: Adding an offer template.*
*Screenshot: Adding the name and saving the new template.*
## **How to display an Attribute on a Template**
You can then select the attributes that you want on the template by clicking on the checkboxes next to the attributes and save the changes. These selected attributes will be visible on the template configured.
*Screenshot: Selecting the attributes for the template.*
## **How to create new Custom Attributes**
{% hint style="info" %}
These changes are **self-service** — you don't need to contact support to add or modify attributes.
{% endhint %}
To modify a Template, go to Config and click a folder such as Offer. Scroll to the bottom and press the (+) button. You can then create a new field with:
* A name (see warning below)
* A label (editable)
* A type (editable): String, Numeric, Boolean, Picklist, Status, Chevron, Price, Date, Colour, Hidden, Rich Text and Multi-Picklist
{% hint style="warning" %}
**The attribute Name is permanent** — it cannot be changed after saving. Choose it carefully. The Label can be edited at any time.
{% endhint %}
These fields are now available for any templates to use.
For **Picklist** and **Multi-Picklist** attributes, you also need to configure the available options after creating the attribute. See [How to manage picklist options](#how-to-manage-picklist-options) below.
## **Attribute validation with JSON Schema**
From Release 116, if an attribute definition includes a **JSON Schema**, Limio validates values against that schema whenever a catalog item is saved — whether the save comes from the Limio app, the API, or an AI tool connected through the [Limio MCP](https://docs.limio.com/product/mcp-server/mcp-server). Invalid values are rejected with an error describing what is wrong.
This matters most for catalog changes made outside the app UI: the UI's field-level guardrails (dropdowns, inline validation, custom editors) don't apply to API or MCP edits, so the attribute schema is what enforces the correct data shape there.
Attributes without a schema keep the existing basic type validation, so nothing changes for your current templates unless you add schemas to them.
## **How to manage picklist options**
Picklist and Multi-Picklist attributes have a separate set of options (values) that users can select. These are managed at the **top-level config** (e.g. Config > Products), not inside a template.
{% stepper %}
{% step %}
### Navigate to the top-level config
Go to **Config > \[Object type]** — for example, **Config > Products**.
Make sure you are at the object level, **not** inside a template (e.g. not Config > Products > Default).
{% endstep %}
{% step %}
### Find the picklist attribute
Scroll through the attribute list to find your Picklist or Multi-Picklist attribute.
{% endstep %}
{% step %}
### Expand the options
Click the **chevron icon (▶)** on the right-hand side of the attribute row. The current picklist options expand below the attribute.
{% endstep %}
{% step %}
### Add or remove values
* Click the **+ icon** below the options list to add a new value. Type the label and save.
* Click the **− icon** next to an existing value to remove it.
{% endstep %}
{% endstepper %}
## **How to hide Custom Attributes in Limio for Salesforce**
It is possible to hide custom attributes in Limio for Salesforce so that they are not visible to agents assisting customers. To do this, slide the "Hide in Limio for Salesforce" toggle.
* By default custom attributes are not hidden in Limio for Salesforce.
* Named attributes cannot be hidden in Limio for Salesforce.
## **How to select a Template on an object**
Go to the object (e.g. offer) and press 'Select Template' to see a dropdown of your available templates.
{% hint style="info" %}
**Removing an attribute from a template** hides it in the Limio UI but does **not** delete the existing data on objects that previously had a value for it. If you re-add the attribute to the template, the old values will reappear. The data travels with the object, not the template.
{% endhint %}
## **How to create Sections for a Template**
You can now define sections for offer templates under the "Sections" tab. Here is an example:
You can then assign attributes to the different sections here:
This will then be displayed on the actual offer (that has an OfferBase template in this case) like this:
## **How to define Default Values for a Template**
For the **attribute default**, you are able to set the default value per attribute when you click on the **Edit Default Value** button for each attribute.
What this means is that for example if we create a new offer from scratch and we select the OfferBase template, it will automatically fill in all attributes based on the default values that we set up in the template.
**Does it only work for newly created objects?**
Yes, it will only on creation of new objects.
**Is the default applied when duplicating objects?**
No, duplicating an object will retain the value of the initial object.
**If a default value is updated, does it update existing objects?**
No, the default value is only applied upon creation of an object.
Any questions? Ping us an email at [support@limio.com](https://blog.limio.com/support/catalog-how-to-work-with-templates/support@limio.com) and we'll be happy to help.
# Localisation Settings
Localisation allows marketers to serve their clients in various countries through localised settings and rules.
## **Where can I find Localisation Settings?**
Localisation Settings can be found in the General Settings area within Limio.
*Screenshot: Localisation Settings*
## **Default Settings**
Defaults are used to help set up your shop in the right local formatting. This includes Address format, default shop language and the default date format. See below
*Screenshot: Default Settings*
#### **Default Language Settings**
Limio now supports better ways to communicate with your subscribers in their own language! Marketers can not only set their default locale as well as a default language. They can also now use the component section to override the default translations to their preferred translations.
*Limio App Screenshot: Default Language*
When building your page you will now also see the localisation tab in areas where language translations apply.
*Limio App Screenshot: Localisation Tab in Components*
## **Local Address Validation**
Marketers can now use Loqate for address autocomplete as well as define the list of country for which Limio will prefill the address from Loqate (country whitelist). Make sure that you have set up Loqate before using it within Limio.
*Limio App Screenshot: Using Loqate*
## **Tax Behaviour**
The Tax Behaviour section within Localisation Settings allows you to configure how tax is displayed across your shop. This includes controlling tax-exclusive pricing for self-service components and enabling tax preview during checkout in Cart Summary and Apple Pay.
For full configuration steps, see [How to configure tax behaviour for tax-exclusive countries](/product/settings/how-to-set-up-localisation/how-to-configure-tax-behaviour-for-tax-exclusive-countries).
## **Rules**
Rules help marketers to define how they would like to service clients in various countries. These rules apply to Billing & Delivery addresses as well as countries allowed and disallowed.
*Limio App Screenshot: Localisation Rules*
#### **Address Country Specific Rules**
Adding new rules to countries is very simple. Just add a new rule and select the designated country. The character set is the list of characters Limio will allow the customer to input in the address fields for that the specific country. The error set is the error message to display when the character set is not used.
*Limio App Screenshot: Allowed/Disallowed special characters*
#### **Delivery country allow list**
List all the countries where deliveries are allowed. If you do not want to deliver to a specific country, just simply do not add it. This feature does not override your ability to add allowed countries in the campaign attribute section.
For now this feature acts as a check for gift redemption checkout only.
#### **Disallowed country list**
This is a list of countries that you do now want to service at all. Countries on this list will not be able to get any offers you have available.
**Note: This is not a list for countries that cannot receive deliveries.**
# Limio Countries
Limio utilises the ISO 3166-1 alpha-2 country codes, accessible at or [https://knowledgecenter.zuora.com/Quick\_References/Country%2C\_State%2C\_and\_Province\_Codes/A\_Country\_Names\_and\_Their\_ISO\_Codes](https://knowledgecenter.zuora.com/Quick_References/Country%2C_State%2C_and_Province_Codes/A_Country_Names_and_Their_ISO_Codes.).
The management of country names is handled by Limio.
Limio explicitly excludes nine sanctioned countries, resulting in a list of 240 countries from the 249 ISO countries. The excluded countries are:
* Cuba
* Iran
* North Korea
* Syria
* Sudan
* South Sudan
* Iraq
* Yemen
* Somalia
The full list of countries (including their ISO alpha-2 code) used in Limio are:
| Standard Country Name | Country Name in Zuora | Country Label in Zuora | ISO alpha-2 code |
| -------------------------------------------- | --------------------------------------------------------------------------------------------------------------------------------------------------------------------------------------------------------------------------------- | --------------------------------------------------------------------------------------------------------------------------------------------------------------------------------------------------------------------------------- | ---------------- |
| Afghanistan | `Afghanistan` | `Afghanistan` | AF |
| Aland Islands | `Aland Islands` | `Aland Islands` | AX |
| Albania | `Albania` | `Albania` | AL |
| Algeria | `Algeria` | `Algeria` | DZ |
| American Samoa | `American Samoa` | `American Samoa` | AS |
| Andorra | `Andorra` | `Andorra` | AD |
| Angola | `Angola` | `Angola` | AO |
| Anguilla | `Anguilla` | `Anguilla` | AI |
| Antarctica | `Antarctica` | `Antarctica` | AQ |
| Antigua And Barbuda | `Antigua And Barbuda` | `Antigua And Barbuda` | AG |
| Argentina | `Argentina` | `Argentina` | AR |
| Armenia | `Armenia` | `Armenia` | AM |
| Aruba | `Aruba` | `Aruba` | AW |
| Australia | `Australia` | `Australia` | AU |
| Austria | `Austria` | `Austria` | AT |
| Azerbaijan | `Azerbaijan` | `Azerbaijan` | AZ |
| Bahamas | `Bahamas` | `Bahamas` | BS |
| Bahrain | `Bahrain` | `Bahrain` | BH |
| Bangladesh | `Bangladesh` | `Bangladesh` | BD |
| Barbados | `Barbados` | `Barbados` | BB |
| Belarus | `Belarus` | `Belarus` | BY |
| Belgium | `Belgium` | `Belgium` | BE |
| Belize | `Belize` | `Belize` | BZ |
| Benin | `Benin` | `Benin` | BJ |
| Bermuda | `Bermuda` | `Bermuda` | BM |
| Bhutan | `Bhutan` | `Bhutan` | BT |
| Bolivia, Plurinational Station of | `Bolivia` | `Bolivia` | BO |
| Bonaire, Saint Eustatius and Saba | `Bonaire, Saint Eustatius and Saba` | `Bonaire, Saint Eustatius and Saba` | BQ |
| Bosnia and Herzegovina | `Bosnia and Herzegovina` | `Bosnia and Herzegovina` | BA |
| Botswana | `Botswana` | `Botswana` | BW |
| Bouvet Island | `Bouvet Island` | `Bouvet Island` | BV |
| Brazil | `Brazil` | `Brazil` | BR |
| British Indian Ocean Territory | `British Indian Ocean Territory` | `British Indian Ocean Territory` | IO |
| Brunei Darussalam | `Brunei Darussalam` | `Brunei Darussalam` | BN |
| Bulgaria | `Bulgaria` | `Bulgaria` | BG |
| Burkina Faso | `Burkina Faso` | `Burkina Faso` | BF |
| Burundi | `Burundi` | `Burundi` | BI |
| Cambodia | `Cambodia` | `Cambodia` | KH |
| Cameroon | `Cameroon` | `Cameroon` | CM |
| Canada | `Canada` | `Canada` | CA |
| Cape Verde | `Cape Verde` | `Cape Verde` | CV |
| Cayman Islands | `Cayman Islands` | `Cayman Islands` | KY |
| Central African Republic | `Central African Republic` | `Central African Republic` | CF |
| Chad | `Chad` | `Chad` | TD |
| Chile | `Chile` | `Chile` | CL |
| China | `China` | `China` | CN |
| Christmas Island | `Christmas Island` | `Christmas Island` | CX |
| Cocos (Keeling) Islands | `Cocos (Keeling) Islands` | `Cocos (Keeling) Islands` | CC |
| Colombia | `Colombia` | `Colombia` | CO |
| Comoros | `Comoros` | `Comoros` | KM |
| Congo | `Congo` | `Congo` | CG |
| Congo, the Democratic Republic of the | `Congo the Democratic Republic of the` | `Congo, Democratic Republic of the` | CD |
| Cook Islands | `Cook Islands` | `Cook Islands` | CK |
| Costa Rica | `Costa Rica` | `Costa Rica` | CR |
| Cote d'Ivoire | `Cote d'Ivoire` | `Cote d'Ivoire` | CI |
| Croatia | `Croatia` | `Croatia` | HR |
| Curacao | `Curacao` | `Curacao` | CW |
| Cyprus | `Cyprus` | `Cyprus` | CY |
| Czech Republic | `Czech Republic` | `Czech Republic` | CZ |
| Denmark | `Denmark` | `Denmark` | DK |
| Djibouti | `Djibouti` | `Djibouti` | DJ |
| Dominica | `Dominica` | `Dominica` | DM |
| Dominican Republic | `Dominican Republic` | `Dominican Republic` | DO |
| Ecuador | `Ecuador` | `Ecuador` | EC |
| Egypt | `Egypt` | `Egypt` | EG |
| El Salvador | `El Salvador` | `El Salvador` | SV |
| Equatorial Guinea | `Equatorial Guinea` | `Equatorial Guinea` | GQ |
| Eritrea | `Eritrea` | `Eritrea` | ER |
| Estonia | `Estonia` | `Estonia` | EE |
| Ethiopia | `Ethiopia` | `Ethiopia` | ET |
| Falkland Islands (Malvinas) | `Falkland Islands (Malvinas)` | `Falkland Islands` | FK |
| Faroe Islands | `Faroe Islands` | `Faroe Islands` | FO |
| Fiji | `Fiji` | `Fiji` | FJ |
| Finland | `Finland` | `Finland` | FI |
| France | `France` | `France` | FR |
| French Guiana | `French Guiana` | `French Guiana` | GF |
| French Polynesia | `French Polynesia` | `French Polynesia` | PF |
| French Southern Territories | `French Southern Territories` | `French Southern Territories` | TF |
| Gabon | `Gabon` | `Gabon` | GA |
| Gambia | `Gambia` | `Gambia` | GM |
| Georgia | `Georgia` | `Georgia` | GE |
| Germany | `Germany` | `Germany` | DE |
| Ghana | `Ghana` | `Ghana` | GH |
| Gibraltar | `Gibraltar` | `Gibraltar` | GI |
| Greece | `Greece` | `Greece` | GR |
| Greenland | `Greenland` | `Greenland` | GL |
| Grenada | `Grenada` | `Grenada` | GD |
| Guadeloupe | `Guadeloupe` | `Guadeloupe` | GP |
| Guam | `Guam` | `Guam` | GU |
| Guatemala | `Guatemala` | `Guatemala` | GT |
| Guernsey | `Guernsey` | `Guernsey` | GG |
| Guinea | `Guinea` | `Guinea` | GN |
| Guinea-Bissau | `Guinea-Bissau` | `Guinea-Bissau` | GW |
| Guyana | `Guyana` | `Guyana` | GY |
| Haiti | `Haiti` | `Haiti` | HT |
| Heard Island and McDonald Islands | `Heard Island and McDonald Islands` | `Heard and Mc Donald Islands` | HM |
| Holy See (Vatican City State) | `Holy See (Vatican City State)` | `Vatican City State (Holy See)` | VA |
| Honduras | `Honduras` | `Honduras` | HN |
| Hong Kong | `Hong Kong` | `Hong Kong, China` | HK |
| Hungary | `Hungary` | `Hungary` | HU |
| Iceland | `Iceland` | `Iceland` | IS |
| India | `India` | `India` | IN |
| Indonesia | `Indonesia` | `Indonesia` | ID |
| Ireland | `Ireland` | `Ireland` | IE |
| Isle of Man | `Isle of Man` | `Isle of Man` | IM |
| Israel | `Israel` | `Israel` | IL |
| Italy | `Italy` | `Italy` | IT |
| Jamaica | `Jamaica` | `Jamaica` | JM |
| Japan | `Japan` | `Japan` | JP |
| Jersey | `Jersey` | `Jersey` | JE |
| Jordan | `Jordan` | `Jordan` | JO |
| Kazakhstan | `Kazakhstan` | `Kazakhstan` | KZ |
| Kenya | `Kenya` | `Kenya` | KE |
| Kiribati | `Kiribati` | `Kiribati` | KI |
| Korea, Republic of | `Korea, Republic of` | `Korea, Republic of` | KR |
| Kuwait | `Kuwait` | `Kuwait` | KW |
| Kyrgyzstan | `Kyrgyzstan` | `Kyrgyzstan` | KG |
| Lao People's Democratic Republic | `Lao People's Democratic Republic` | `Lao People's Democratic Republic` | LA |
| Latvia | `Latvia` | `Latvia` | LV |
| Lebanon | `Lebanon` | `Lebanon` | LB |
| Lesotho | `Lesotho` | `Lesotho` | LS |
| Liberia | `Liberia` | `Liberia` | LR |
| Libyan Arab Jamahiriya | `Libyan Arab Jamahiriya` | `Libya` | LY |
| Liechtenstein | `Liechtenstein` | `Liechtenstein` | LI |
| Lithuania | `Lithuania` | `Lithuania` | LT |
| Luxembourg | `Luxembourg` | `Luxembourg` | LU |
| Macao | `Macao` | `Macau` | MO |
| Republic of North Macedonia | `Macedonia, the former Yugoslav Republic of` | `Macedonia` | MK |
| Madagascar | `Madagascar` | `Madagascar` | MG |
| Malawi | `Malawi` | `Malawi` | MW |
| Malaysia | `Malaysia` | `Malaysia` | MY |
| Maldives | `Maldives` | `Maldives` | MV |
| Mali | `Mali` | `Mali` | ML |
| Malta | `Malta` | `Malta` | MT |
| Marshall Islands | `Marshall Islands` | `Marshall Islands` | MH |
| Martinique | `Martinique` | `Martinique` | MQ |
| Mauritania | `Mauritania` | `Mauritania` | MR |
| Mauritius | `Mauritius` | `Mauritius` | MU |
| Mayotte | `Mayotte` | `Mayotte` | YT |
| Mexico | `Mexico` | `Mexico` | MX |
| Micronesia, Federated States of | `Micronesia, Federated States of` | `Micronesia, Federated States of` | FM |
| Moldova, Republic of | `Moldova, Republic of` | `Moldova, Republic of` | MD |
| Monaco | `Monaco` | `Monaco` | MC |
| Mongolia | `Mongolia` | `Mongolia` | MN |
| Montenegro | `Montenegro` | `Montenegro` | ME |
| Montserrat | `Montserrat` | `Montserrat` | MS |
| Morocco | `Morocco` | `Morocco` | MA |
| Mozambique | `Mozambique` | `Mozambique` | MZ |
| Myanmar | `Myanmar` | `Myanmar` | MM |
| Namibia | `Namibia` | `Namibia` | NA |
| Nauru | `Nauru` | `Nauru` | NR |
| Nepal | `Nepal` | `Nepal` | NP |
| Netherlands | `Netherlands` | `Netherlands` | NL |
| New Caledonia | `New Caledonia` | `New Caledonia` | NC |
| New Zealand | `New Zealand` | `New Zealand` | NZ |
| Nicaragua | `Nicaragua` | `Nicaragua` | NI |
| Niger | `Niger` | `Niger` | NE |
| Nigeria | `Nigeria` | `Nigeria` | NG |
| Niue | `Niue` | `Niue` | NU |
| Norfolk Island | `Norfolk Island` | `Norfolk Island` | NF |
| Northern Mariana Islands | `Northern Mariana Islands` | `Northern Mariana Islands` | MP |
| Norway | `Norway` | `Norway` | NO |
| Oman | `Oman` | `Oman` | OM |
| Pakistan | `Pakistan` | `Pakistan` | PK |
| Palau | `Palau` | `Palau` | PW |
| Palestinian, State of | `Palestinian Territory, Occupied` | `Palestinian Territory, Occupied` | PS |
| Panama | `Panama` | `Panama` | PA |
| Papua New Guinea | `Papua New Guinea` | `Papua New Guinea` | PG |
| Paraguay | `Paraguay` | `Paraguay` | PY |
| Peru | `Peru` | `Peru` | PE |
| Philippines | `Philippines` | `Philippines` | PH |
| Pitcairn | `Pitcairn` | `Pitcairn` | PN |
| Poland | `Poland` | `Poland` | PL |
| Portugal | `Portugal` | `Portugal` | PT |
| Puerto Rico | `Puerto Rico` | `Puerto Rico` | PR |
| Qatar | `Qatar` | `Qatar` | QA |
| Reunion | `Reunion` | `Reunion` | RE |
| Romania | `Romania` | `Romania` | RO |
| Russian Federation | `Russian Federation` | `Russian Federation` | RU |
| Rwanda | `Rwanda` | `Rwanda` | RW |
| Saint Barthelemy | `Saint Barthelemy` | `Saint Barthelemy` | BL |
| Saint Helena, Ascension and Tristan da Cunha | `Saint Helena` | `St. Helena` | SH |
| Saint Kitts and Nevis | `Saint Kitts and Nevis` | `Saint Kitts and Nevis` | KN |
| Saint Lucia | `Saint Lucia` | `Saint Lucia` | LC |
| Saint Martin (French part) | `Saint Martin (French part)` | `Saint Martin (French part)` | MF |
| Saint Pierre and Miquelon | `Saint Pierre and Miquelon` | `St. Pierre and Miquelon` | PM |
| Saint Vincent and the Grenadines | `Saint Vincent and the Grenadines` | `Saint Vincent and the Grenadines` | VC |
| Samoa | `Samoa (Independent)` | `Samoa (Independent)` | WS |
| San Marino | `San Marino` | `San Marino` | SM |
| Sao Tome and Principe | `Sao Tome and Principe` | `Sao Tome and Principe` | ST |
| Saudi Arabia | `Saudi Arabia` | `Saudi Arabia` | SA |
| Senegal | `Senegal` | `Senegal` | SN |
| Serbia | `Serbia` | `Serbia` | RS |
| Seychelles | `Seychelles` | `Seychelles` | SC |
| Sierra Leone | `Sierra Leone` | `Sierra Leone` | SL |
| Singapore | `Singapore` | `Singapore` | SG |
| Sint Maarten (Dutch part) | `Sint Maarten` | `Sint Maarten` | SX |
| Slovakia | `Slovakia` | `Slovakia` | SK |
| Slovenia | `Slovenia` | `Slovenia` | SI |
| Solomon Islands | `Solomon Islands` | `Solomon Islands` | SB |
| South Africa | `South Africa` | `South Africa` | ZA |
| South Georgia and the South Sandwich Islands | `South Georgia and the South Sandwich Islands` | `South Georgia and the South Sandwich Islands` | GS |
| Spain | `Spain` | `Spain` | ES |
| Sri Lanka | `Sri Lanka` | `Sri Lanka` | LK |
| Suriname | `Suriname` | `Suriname` | SR |
| Svalbard and Jan Mayen | `Svalbard and Jan Mayen` | `Svalbard and Jan Mayen Islands` | SJ |
| Swaziland | `Swaziland` | `Swaziland` | SZ |
| Sweden | `Sweden` | `Sweden` | SE |
| Switzerland | `Switzerland` | `Switzerland` | CH |
| Taiwan, Province of China | `Taiwan` | `Taiwan` | TW |
| Tajikistan | `Tajikistan` | `Tajikistan` | TJ |
| Tanzania, United Republic of | `Tanzania, United Republic of` | `Tanzania` | TZ |
| Thailand | `Thailand` | `Thailand` | TH |
| Timor-Leste | `Timor-Leste` | `East Timor` | TL |
| Togo | `Togo` | `Togo` | TG |
| Tokelau | `Tokelau` | `Tokelau` | TK |
| Tonga | `Tonga` | `Tonga` | TO |
| Trinidad and Tobago | `Trinidad and Tobago` | `Trinidad and Tobago` | TT |
| Tunisia | `Tunisia` | `Tunisia` | TN |
| Turkey | `Turkey` | `Turkey` | TR |
| Turkmenistan | `Turkmenistan` | `Turkmenistan` | TM |
| Turks and Caicos Islands | `Turks and Caicos Islands` | `Turks and Caicos Islands` | TC |
| Tuvalu | `Tuvalu` | `Tuvalu` | TV |
| Uganda | `Uganda` | `Uganda` | UG |
| Ukraine | `Ukraine` | `Ukraine` | UA |
| United Arab Emirates | `United Arab Emirates` | `United Arab Emirates` | AE |
| United Kingdom | `United Kingdom` | `United Kingdom` | GB |
| United States | `United States` | `United States` | US |
| United States Minor Outlying Islands | `United States Minor Outlying Islands` | `United States Minor Outlying Islands` | UM |
| Uruguay | `Uruguay` | `Uruguay` | UY |
| Uzbekistan | `Uzbekistan` | `Uzbekistan` | UZ |
| Vanuatu | `Vanuatu` | `Vanuatu` | VU |
| Venezuela, Bolivarian Republic of | `Venezuela` | `Venezuela` | VE |
| Viet Nam | `Viet Nam` | `Viet Nam` | VN |
| Virgin Islands, British | `Virgin Islands, British` | `Virgin Islands (British)` | VG |
| Virgin Islands, U.S. | `Virgin Islands, U.S.` | `Virgin Islands (U.S.)` | VI |
| Wallis and Futuna | `Wallis and Futuna` | `Wallis and Futuna Islands` | WF |
| Western Sahara | `Western Sahara` | `Western Sahara` | EH |
| Zambia | `Zambia` | `Zambia` | ZM |
| Zimbabwe | `Zimbabwe` | `Zimbabwe` | ZW |
| N/A |
Kosovo
Note: Kosovo is not listed as an ISO standard country. The unofficial 2 and 3-digit codes are used by the European Commission and others until Kosovo is assigned an ISO code.
|
Kosovo
Note: Kosovo is not listed as an ISO standard country. The unofficial 2 and 3-digit codes are used by the European Commission and others until Kosovo is assigned an ISO code.
| XK |
# Configure Date Format
It is possible to define the date format you wish to use in Limio components across the Limio shop flow. To configure this follow the steps below.
1\. Navigate to the settings tab in the Limio Console
2\. Navigate to Localisation
3\. Select the format you want to use and click save
#### **Formats explained:**
{% hint style="info" %}
If no format is selected, the components will default to use the locale date, in the short format. E.g US and CA will display as MM/DD/YYY i.e. 07/24/2023. However, improper config of the date can result in inconsistency across dates in Limio, Limio for Salesforce, and Zuora. To ensure dates are consistent, we recommend you choose one of the date formats defined in the table.
{% endhint %}
| Short Date | DD/MM/YYYY e.g. 23/02/1994 |
| ------------------------ | -------------------------------------------- |
| Abbreviated date | Abbreviated month DD, YYYY e.g. Feb 23, 1994 |
| Full date | Month DD, YYYY e.g. February 23, 1994 |
| English abbreviated date | DD Abbreviated month YYYY e.g. 23 Feb 1994 |
| Short date (US) | MM/DD/YYYY e.g. 02/23/1994 |
# Configure Tax Behaviour
**Purpose:** Use these settings to determine if prices are displayed with or without tax added for certain territories.
{% hint style="info" %}
**Scope of Limio tax configuration:** Limio's tax settings are **country-level only**. You can control whether prices are shown tax-inclusive or tax-exclusive per country, and whether tax is previewed during checkout.
Limio does **not** support:
* Different tax rates per product
* Product-level tax exemptions
* Person vs. company tax distinctions
If your business requires product-level tax rules or person/company distinctions, configure these in your billing systems (e.g. **Zuora** or **Stripe Billing**), which handle the actual tax calculation and apply them at the point of billing.
{% endhint %}
**Steps:**
1: Click on the profile icon in the top-right corner of the app.
2: Click on the **Developer** option in the dropdown.
3: Click **General Settings**, then **Localisation** and find the section named **Tax Behaviour**.
4: Don't forget to save the changes by clicking the **Save** button in the top-right of the page.
5: If you have just configured this feature and would like to see it on published pages, the relevant pages must be rebuilt and republished to utilise the changes.
### Configure tax in acquisition components
The [Cart Summary](https://docs.limio.com/components/component-library/cart-components/component-cart-summary) component uses the **"Preview tax on the order during checkout"** setting to display and calculate tax during checkout. Add any country where you want customers to see a tax preview in the Cart Summary — for example, the US (tax-exclusive) or Germany (tax-inclusive with VAT).
The Cart Summary component documentation explains how tax display behaves across different checkout states, including:
* Before an address is collected (based on the customer's `limio-country` cookie)
* After billing or delivery address is populated (calculated from postal code)
* Dynamic recalculation when the customer changes address fields
See the full breakdown in the [Cart Summary component documentation](https://docs.limio.com/components/component-library/cart-components/component-cart-summary).
### Configure tax in self-service components
For the following components:
* [Payments Table](https://docs.limio.com/components/component-library/standard-components/component-payments-table)
* [Switch Subscription](https://docs.limio.com/components/component-library/standard-components/component-switch-subscription)
* [Cancel Save Offer](https://docs.limio.com/components/component-library/standard-components/component-cancel-save-offer)
* [Order Change Success](https://docs.limio.com/components/component-library/standard-components/component-order-change-success)
* [Orders Table](https://docs.limio.com/components/component-library/standard-components/component-orders-table)
* [Subscription Description](https://docs.limio.com/components/component-library/standard-components/component-subscription-description)
* [Subscription Info](https://docs.limio.com/components/component-library/standard-components/component-subscription-info)
* [Change Order Table](https://docs.limio.com/components/component-library/standard-components/component-order-change-table)
If the customer's billing address matches with a country listed in the section "**Display the tax-exclusive price as the final price on self-service components if your customers are in one of these countries**", then the prices in the components listed originally will be displayed without tax added.
The default options here are the United States of America and Canada, but you may want to remove all countries entirely depending on your tax requirements.
### Configure tax in Apple Pay modal
This impacts how prices are displayed in any Cart or Checkout components.
**Steps**:
1: Click on the profile icon in the top-right corner of the app.
2: Click on the **Developer** option in the dropdown.
3: Click **General Settings**, then **Localisation** and find the section named **Tax Behaviour**.
If the customer's Apple Pay address matches one of the countries in "Preview tax on the order during checkout if your customer is in one of the countries below", then tax will be included in the Apple Pay modal.
4: Don't forget to save the changes by clicking the **Save** button in the top-right of the page.
5: If you have just configured this feature and would like to see it on published pages, the relevant pages must be rebuilt and republished to utilise the changes.
# Configure Address Validation
Using the Localisation section of General Settings in the Limio Commerce app, it's possible to define country-specific validation rules for billing and delivery addresses:
1. Go to Settings > General Settings > Localisation
2. Scroll down to 'Address Country Specific Rules'
3. Select the countries that you want your validation to apply for
4. Enter all the whitelisted characters (accepts regular expressions)
5. Enter the message that's displayed when validation fails.
# Configure Phone Number Validation
This functionality will be included with Release 72.0 and beyond.
It is possible to set validation rules for phone number inputs in both the legacy Single Page Checkout and [Customer Table](https://docs.limio.com/components/component-library/standard-components/component-customer-table) components.
To set validation on the newer Modular Checkout, go to [https://docs.limio.com/components/component-library/modular-checkout-components/modular-checkout-subcomponents-in-form/form-subcomponent-field](https://docs.limio.com/components/component-library/modular-checkout-components/modular-checkout-subcomponents-in-form/form-subcomponent-field "mention").
**Steps to set the phone number validation:**
1: Click on the profile icon in the top-right corner of the app.
2: Click on the **Developer** option in the dropdown.
3: Click **General Settings**, then **Localisation** and type the regex code you wish to use in the **Regex for phone number validation** input.
Note: regular expressions (regex) are patterns used to match character combinations in strings. They must be entered here **without** being enclosed between slashes.
4: Don't forget to save the changes by clicking the **Save** button in the top-right of the page.
The phone number input on the Single Page Checkout and Customer Table must match the regular expression (regex) specified here in order to pass the validation that allows the forms to submit.
# Restrict Billing/Delivery Country
## How to restrict the billing and/or delivery country for Limio Offers
Limio allows global businesses to restrict who can order a specific Limio Offer based on their country. This functionality enables phased roll out of global campaigns, helps prevent geo-spoofing for purchasing a preferable price and allows to control where physical Products are delivered.
This feature works both for the legacy Single Page Checkout and the new Modular Checkout.
### Limio Allowed Countries attribute
The 'Allowed Country' attribute on Limio Offers is used to restrict where that Offer can be purchased. If this attribute is empty or not filled out the Limio Checkout will assume the Offer is available globally.
| NOTE: Before the release of [2021 Winter Release](https://docs.limio.com/release-notes/limio-commerce-release-notes/legacy-releases/releases-notes-winter-2021) "Allowed Country" attribute was supported at both Page and Offer level. This is now **deprecated**. |
| ------------------------------------------------------------------------------------------------------------------------------------------------------------------------------------------------------------------------------------------------------------------- |
If the attribute is filled out, countries included in the list will be the only countries offered in the Limio Checkout.
#### Understanding Allowed Countries attribute for different Order Types
Due to billing requirements for different kind of Order Types, Limio will intelligently restrict the country on the most appropriate input:
| **Order Type** | **Restricted address control** | **Explanation** |
| ------------------------------------- | ------------------------------ | ------------------------------------------------------------------------------------------------------------------------------------------------------------------------------------------------------------------------------------ |
| Standard acquisition with no delivery | Billing Address | Digital Subscriptions should be purchased with a payment method belonging the country the Offer is allowed to be sold in. |
| Standard acquisition with delivery | Delivery Address | Physical Subscriptions can only be delivered to the country the Offer is allowed to be sold in. However, can be bought with any payment method as delivery is limited. |
| Gift acquisition with no delivery | Billing Address | Digital Gift Subscriptions should be purchased with a payment method belonging the country the Offer is allowed to be sold in. |
| Gift acquisition with delivery | Billing Address |
Physical Gift Subscriptions should allow for gifts to be purchased abroad.
Therefore, should be purchased with a payment method belonging the country the Offer is allowed to be sold in, but allow delivery anywhere.
|
#### Limio Setup
Once you are ready to setup restrictions, navigate to the relevant Limio Offer and fill out the Allowed Countries attribute with the allow list of countries:
This is how it will look in the Limio Shop's checkout:
 
## Restricting Countries in Limio for Salesforce
Allowed Countries are also used in the Limio Checkout for Salesforce Product Selector ([How to configure offer details to display in Product Selector](https://docs.limio.com/salesforce/support/legacy-features/offer-details-deprecated)). You can type in Country, select the country you need, and the search will automatically pull all matching pages for that country.
Note that it is also possible to mandate agents to always select a country before placing an order.
## Allowed Countries vs. Limio Journeys
Please note that this is different from the Limio Journey capabilities around geo-routing. Limio Journey routes customers to the page based on their IP address, but does not enforce the available countries for purchase. Often those will be the same, but not in every case: for example you may advertise a specific page for a digital subscription in France, but must legally allow the purchase of that digital subscription throughout the EU. Learn more about Limio Journey here: [What are Limio Journeys](/product/journey/what-are-limio-journeys).
# Security Settings
# Login options (SSO)
## Federating identity for Limio app users with Okta (OIDC)
Limio supports identity federation for app users, allowing you to authenticate internal users (e.g. marketers, administrators, customer support agents) into the **Limio Commerce Platform** using your existing identity provider (IdP), such as Okta.
{% hint style="warning" %}
You are reading the SSO docs to login into the Limio application. If you are looking at how to SSO your customers or end-users into the Limio Shop and Self-Service, go to [Set up Authentication for Customers](/product/authentication/sso-your-authentication).
{% endhint %}
Identity federation is a mechanism that links Limio’s internal authentication system to your enterprise Identity Provider. This allows your internal users to securely log in without needing to create separate Limio credentials. Authentication is managed through your IdP, providing a secure, seamless experience that aligns with your existing IT policies and SSO strategy.
Limio supports all major Identity Providers that use OAuth 2.0 and OpenID Connect (OIDC), including Okta, Auth0, Microsoft Entra ID (formerly Azure AD), AWS Cognito, and more.llows Limio to verify user identity and retrieve basic user information (such as name and email).
In this guide, we’ll walk you through how to configure Okta as your IdP for internal Limio user authentication using OAuth and OIDC protocols.
### Step 1: Create a new app integration in Okta
1. Sign in to the **Okta Developer Console**.
2. Go to **Applications > Applications**.
3. Click **Create App Integration**.
4. Choose the following:
* **Sign-in method:** OIDC - OpenID Connect
* **Application type:** Web Application
5. Click **Next**.
### Step 2: Configure your Okta app
On the **New Web App Integration** screen:
| Setting | Value |
| --------------------- | ----------------------------------------------------------------------------------------------------------------------------------------------------------------------------------------------------------- |
| App name | Limio App (or any name you recognise) |
| Grant type | Ensure **Authorization Code** is selected |
| Sign-in redirect URIs |
Example:
|
| Login redirect URIs | Same as above |
| Controlled access | Choose how you want to assign access (e.g. groups or individuals) |
Click **Save** to complete setup.
### Step 3: Share credentials with Limio
After the app is created, go to the **General** or **Sign On** tab and collect the following:
* **Client ID** – Generated by Okta
* **Client Secret** – Generated by Okta
* **Issuer URL** – Found under OpenID Connect ID Token (e.g. `https://yourdomain.okta.com/oauth2/default`)
Please share these three values securely with Limio by raising a case within this help desk.
### Step 4: Testing the authentication
Limio will confirm once configuration is complete and share with your a login URL. The login URL will typically look like:
`https://your-cognito-domain.auth.region.amazoncognito.com/login?client_id=XXXX&response_type=code&scope=email+openid+phone&redirect_uri=https%3A%2F%2Fyour-cloudfront-url`
Upon visiting this URL, users will be redirected to Okta to authenticate, then returned to Limio.
### Example values
| Field | Example |
| ------------ | ------------------------------------------------------------------------------- |
| Redirect URI | `https://your-app-limio.auth.eu-central-1.amazoncognito.com/oauth2/idpresponse` |
| Login URL | `https://your-app-limio.auth.eu-central-1.amazoncognito.com/login?...` |
| Issuer URL | `https://yourcompany.okta.com/oauth2/default` |
### Notes
* Ensure your redirect URIs exactly match those configured in Okta.
* Scopes should include at minimum: `openid email profile`.
* Assign users or groups to the Okta app integration to enable access.
# CORS Configuration
**Introduction to CORS (Cross-Origin Resource Sharing)**
CORS, or Cross-Origin Resource Sharing, is a fundamental web security mechanism, it defines the rules for when and how a web page hosted on one domain can make requests to access resources, such as data or services, on another domain. CORS is a crucial aspect of web security, as it helps prevent malicious websites from making unauthorized requests to sensitive data.
**Understanding Allowed CORS hosts**
In Limio the Allowed CORS hosts list serves as a whitelist, permitting specific domains to make cross-origin requests to the Limio API and access its resources.
The list allows "headless" access to APIs. This means that services or scripts running on servers or in environments without a traditional web browser (i.e., headless) can still make secure requests to the Limio API.
Go to General Settings > Site Security:
# Content Security Policy (CSP)
To allow use of external APIs inside custom components in Limio, in General Settings, or in Inject Code, you need to add trusted host to your shop's Content Security Policy (CSP).
To do so, go to **Settings** > **Allowed Hosts** and **add the New Host**. Use a wildcard to set the domain more broadly (e.g. ).
You should only add hosts that you trust and review this list periodically to remove any unused services.
# Frame Ancestors CSP
By default, Limio paages have the **X-Frame-Options** header set to `'sameorigin'` as a security measure. This prevents unauthorised embedding of pages on external sites. However, you can define specific domains where you want to allow Limio pages to be hosted, enabling you to embed Limio pages within an iframe on other sites.
To embed a Limio shop page on an external site, follow these steps:
1. Navigate to **Settings** > **Allowed Hosts**.
2. Locate the **Allowed Ancestors** section.
3. Specify the domain(s) where you want to allow the page to be embedded.
Ensure that the URL starts with `"https://"` and does not include any trailing slashes (`"/"`).
If you are using multiple domains, make sure to add the URLs for all the domains where you plan to host the Limio component via an iframe.
# Rate Limiting
**Introduction to rate limiting**\
Rate limiting plays a crucial role in enhancing the security and efficiency of your API. By limiting the number of requests that can be made to your API within a specific timeframe, you achieve several key benefits
1. Manage and control the volume of network
2. Acts as a defense mechanism against abusive or malicious activities.
3. By preventing excessive requests, rate limiting ensures server resources are used efficiently.
**Implementation in Limio**
Limio provides the flexibility to set specific rate limits and periods for various types of requests to the Limio API, including:
1. **Payment -** Set limits when generating payment tokens and token endpoints for subscription management platforms like Zuora
2. **Payment Basket -** Set limits when generating payment tokens for subscription management platforms like Zuora
3. **Order Requests -** Set limits on functions calling APIs during order processing
To configure these limits go to General Settings > Site Security
---
[Next Page](/llms-full.txt/1)